
2. Remove the ATF oil pick-up (see Section 4).
3. Disconnect the connector (2 in the illustration), by releasing the latch and turning the holder cover counterclockwise.
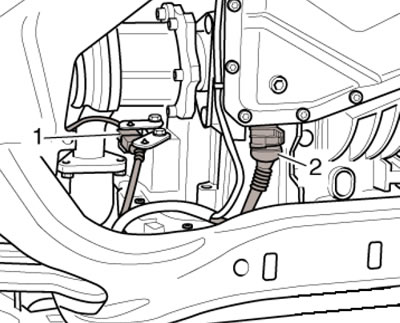
5.3. AT wiring connector
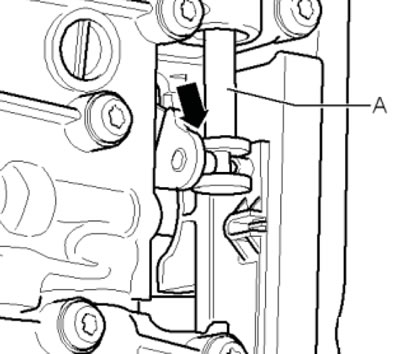
4. Touch the car body with your bare hand to remove static electricity. Pull the locking pin (arrow on the illustration) connector inside the AT crankcase.
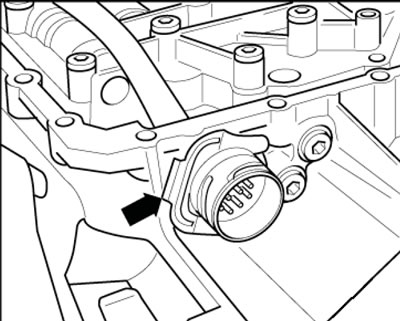
5.4. AT connector retainer
5. Unscrew the mechatronics mounting bolts in the following sequence: (1-11 in the illustration) and remove it with the wiring harness.
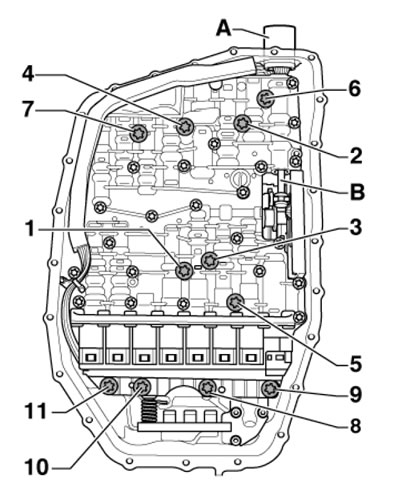
5.5. Mechatronics fasteners
Note: Do not remove other bolts as this may cause damage or affect the operation of the mechatronics.
6. If necessary, separate the wiring harness (And in the illustration) from the mechatronics (B), avoiding damage to the tab on the back of the harness (arrow) and disconnect the connector (C and D).
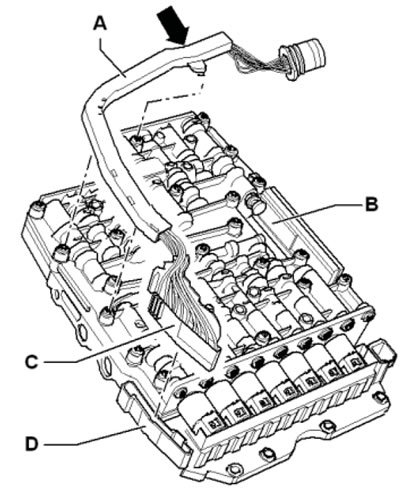
5.6. AT Wiring Harness
7. If the wiring harness was removed, connect its connector and secure the harness to the mechatronics.
8. When installing the mechatronics, insert the pin without force (arrow on the illustration) selector lever into the groove on the slider (A). If necessary, move the slider forward or backward to do this.
5.8. Stud on the selector slider
9. Tighten the bolts (1 and 2 in Illustration 5.5) with a torque of 2 Nm, and then tighten all bolts in sequence (1-11) with a torque of 8 Nm.
10. Further installation is carried out in the reverse order of dismantling the components. Upon completion of the work, adjust the ATF level.
[This article was copied from the website: AudiManual.ru]