
2. Turn the brake light D/W (1 in illustration 6.3) counterclockwise and remove it.
3. Using the T40024 device (see illustration 10.6 Chapter 6) separate the brake pedal from the brake booster.
4. Remove the gutter cover and place enough rags in it to absorb any leaking brake fluid.
5. Pump the brake fluid out of the reservoir.
6. Disconnect the connector (1 in the illustration) low brake fluid level sensor and pull out the vacuum hose (2).
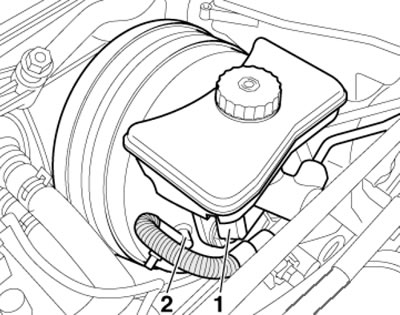
7.6. Vacuum hose and connector D/V low brake fluid level
7. Unscrew the bolt (1 in illustration 10.4 Chapter 6) of the reservoir mount, press down the locking tab and simultaneously pull the reservoir out of the cuffs. Set the reservoir aside.
8. Remove the nuts and separate the brake pipes (1 and 2 in the illustration) from the brake master cylinder. Seal the opened holes with suitable plugs and place a rag in the hydraulic modulator area to collect the leaking brake fluid.
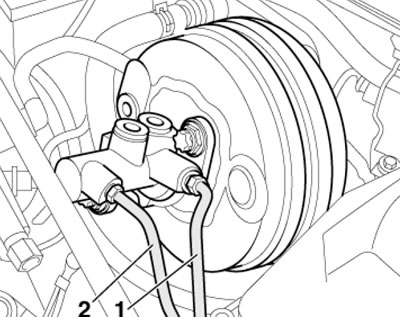
7.8. Brake pipes on the brake master cylinder
9. Separate the brake pipes (1 in the illustration) from the hydraulic modulator and remove them together with the rubber seal.
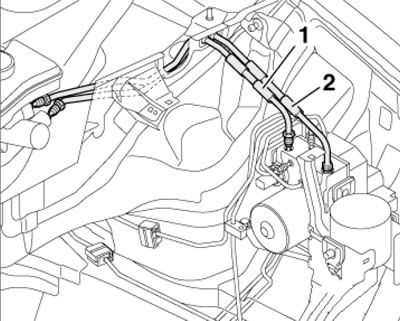
7.9. Brake pipes on the hydraulic modulator
10. Remove the bolts (1 in the illustration) and remove the vacuum booster together with the master cylinder. If there is an upper front suspension strut, the strut must be removed (see Chapter 10).
7.10. Bolts (1) for fastening the brake booster
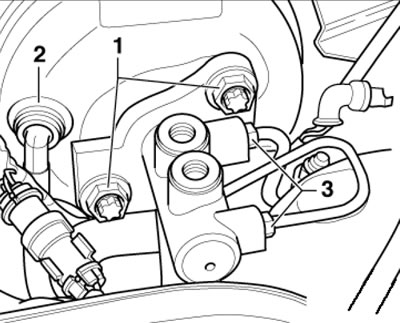
11. If necessary, give away the nuts (1 in the illustration) mount the master cylinder and remove it from the vacuum booster.
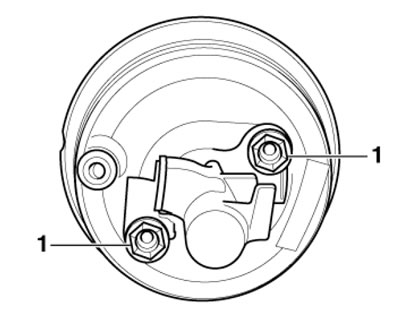
7.11. Nuts (1) for fastening the brake master cylinder
12. Installation is carried out in the reverse order of dismantling the components. When installing the brake master cylinder on the vacuum booster, make sure that its rod is correctly positioned in the brake master cylinder. The hinge should be at a distance (and in the illustration) - 159±0.5 mm from the surface (1, without gasket).
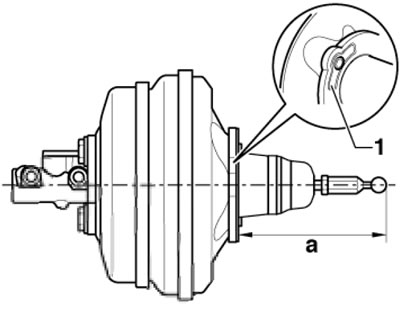
7.12. Distance for joint adjustment
13. After installation, adjust the brake light sensor (see Section 10) and bleed the brake hydraulic system (see Chapter 1).
[The original article is posted on the resource AUDIMANUAL.RU]