
2. Unscrew the bolts with washers (2 and 4 in the illustration), lift the stretcher (1) out of the trough (5).
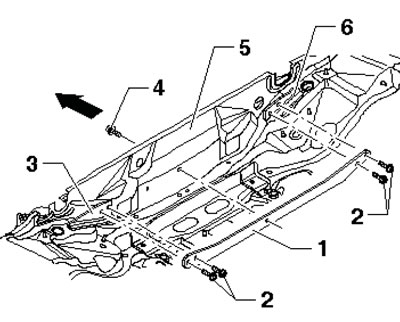
9.2. Fastening the upper stretcher
Note: The arrow in the illustration points in the direction of forward vehicle movement, and positions 3 and 6 are brackets welded to the body on the left and right sides.
3. Installation is performed in the reverse order of component dismantling. Tighten the fasteners with a force of 25 Nm.
(The article is a reprint of material from: audimanual.ru)