



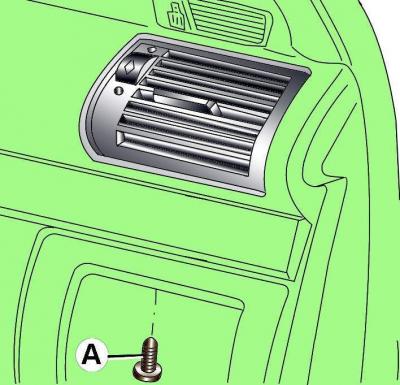
Fig. 17–15. Location of the mounting screw (A)
Through the opening that opens after removing the side ventilation grille from below, unscrew the screw securing the upper side ventilation grille (Fig. 17–15).

Fig. 17–13. Elements of the heating and air conditioning system located in the vehicle interior: 1 – heater control unit; 2 – diagnostic connector; 3 – ventilation grille; 4 – Upper side ventilation grille; 5 – defrosting nozzles; 6 – central ventilation grille; 7 – central defrosting nozzles; 8 – control display; 9 – Air conditioning hose with valve on the passenger side; 10 – right temperature sensor; 11 – Temperature control flap stop; 12 – right heater heat exchanger; 13 – Cable for the footwell ventilation flaps; 14 – Defrost nozzle flap cable; 15 – cable for central ventilation openings; 16 – left temperature sensor; 17 – left heater heat exchanger; 18 – Air conditioning hose with valve on the driver's side
Attach the wire device through the ventilation grille into the openings in the ventilation grille housing (see Fig. 17–13). Carefully remove the ventilation grille from the instrument panel.