



2. Press the handle lock (1 in the illustration) screwdriver (3) and remove the handle.
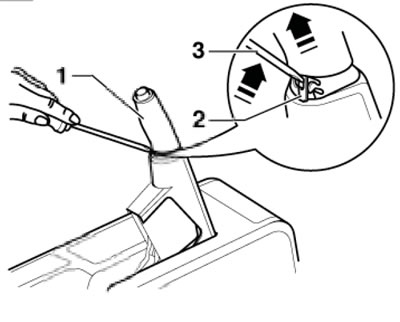
4.2. Removing the parking brake handle
3. Remove the cover (4 in the illustration) and casing (1).
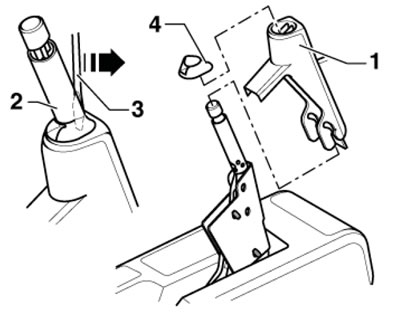
4.3. Removing the cover (4) and casing (1)
4. Remove the bolts (2 in the illustration) and remove the holder (1). Remove the floor pads.
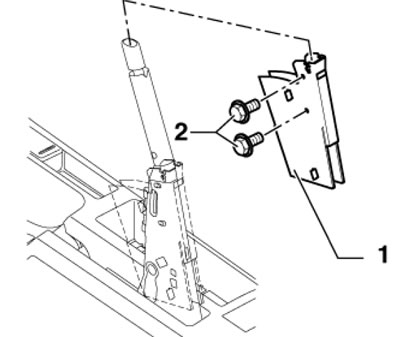
4.4 Removing the holder
5. Remove the bottom panel on the left side by unscrewing 8 bolts.
6. Remove the inner bottom panel on the exhaust pipe, separate the rear part of the exhaust pipe.
7. Remove the heat shield on the back of the fuel tank.
8. Remove the rear tunnel heat shield and disconnect the parking brake lever D/B connector.
9. Remove the bolts (1 in the illustration) and remove the lever in a downward direction.
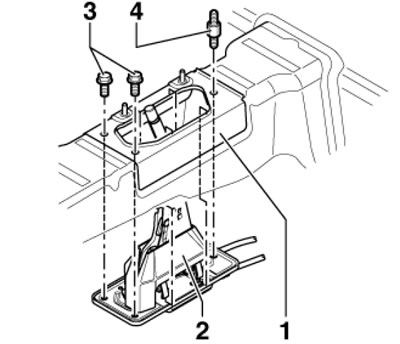
4.9. Bolts (1) for fastening the lever
10. Remove the flange nuts (1 in the illustration) and separate the lever (2) from the mounting plate.
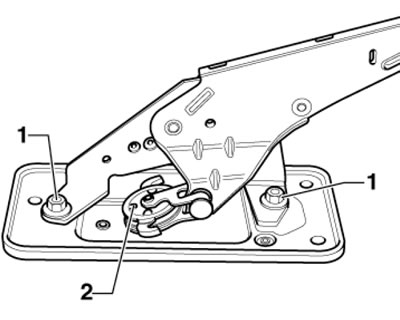
4.10. Fastening the lever to the mounting plate
11. Bring the lever to its original position. To do this, clamp one of the spring-loaded hooks in a vice and release the mechanism with a screwdriver (2 in the illustration), while simultaneously pressing the second hook with the second screwdriver.
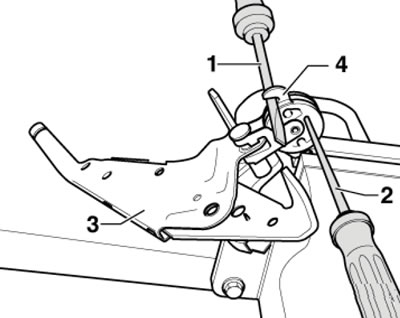
4.11. Bringing the lever to its original position
12. Installation is carried out in the reverse order of dismantling the components.
13. On FWD models, insert the cables into the lever assembly until they are fully engaged (see illustration 3.10), and on AWD models, insert the cables into the compensator. Where the cables cross, cable (1) should pass under cable (2).
14. Bolt (3 in illustration 4.9) and tighten the adapter with the washer (4) with a force of 25 Nm.
15. Further installation is carried out in the reverse order of dismantling the components. After installation, adjust the parking brake drive (see Section 5).
A link to the original source is available on the website Audimanual.ru