
Table of contents: Removal the cable ↓ Installation ↓
Parking brake lever with fastening elements
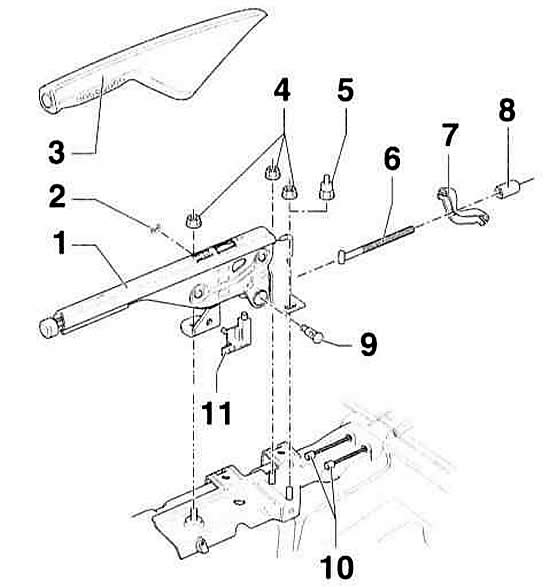
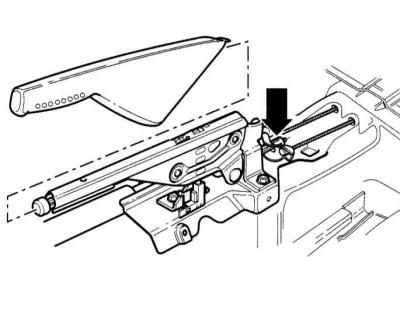
- 1 - Parking brake lever. Remove the center console before removing.
- 2 - lock washer
- 3 - parking brake lever trim. Removed forward
- 4 - nut, 25 Nm
- 5 - adapter. For cars with a central armrest
- 6 - traction
- 7 - equalizer
- 8 - adjusting nut
- 9 - support finger
- 10 - Parking brake cable
- 11 - Parking brake control switch
Removal the cable
Front wheel drive cars
1. Remove the rear center console, referring to the subsection Removal and installation the pocket on the driver's side.
2. Release the parking brake.
3. Loosen the adjusting nut so that the cable can be removed from the equalizer. Disconnect the parking brake cable.
4. Disconnect the parking brake cable at the caliper, referring to the subsection Removal and installation of rear disc brakes.
5. Mark the position of the rear wheels relative to the hubs with paint. This will allow you to install the balanced wheel in its original position during assembly. Loosen the wheel mounting bolts with the car on the ground. Raise the rear of the car, place it on stands and remove the rear wheels.

6. Disconnect the cable from the holder (A) at the rear suspension beam and remove it from the holders.
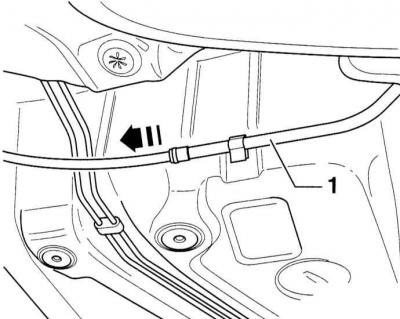
7. Disconnect the cable from the holder (A) at the rear suspension beam and remove it from the holders
8. Remove the cable.
Installation
1. Insert the cable into the guide tube.
2. Connect the cable to the caliper, referring to the subsection Removal and installation of rear disc brakes.
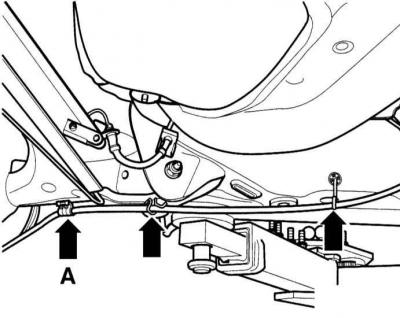
3. Secure the cable to the holder (A) on the rear suspension beam. The clamping ring on the cable should be in the center of the clamp.
4. Secure the cable to the holders on the rear suspension beam.
5. Attach the cable to the parking brake lever and tighten the adjusting nut slightly.
6. Adjust the parking brake, referring to the subsection Adjusting the parking brake.
7. Install the rear part of the center console, referring to the subsection Removal and installation the center console.
[The original version of the article is posted on the website: AUDIMANUAL]