
Table of contents: Engines 90, 113 hp. ↓ Engines 115, 136 hp. ↓
Check conditions: The exhaust system between the catalytic converter and the cylinder head must be tight. The electrohydraulic regulator and idle speed adjustment must be in order.
Warm up the engine. The oil temperature should be about 80°C.
Disconnect the lambda probe heating plug and connect a voltmeter. The voltage with the ignition on should be min. 11.5 V. Then reconnect the plug.
Check the temperature sensor.
Caution: Connect test devices only when the ignition is off.
Engines 90, 113, 115 hp:
Connect the ammeter to the electrohydraulic regulator using the VAG 1315 A/1 measuring cable. Set the measurement limit to 200 mA.
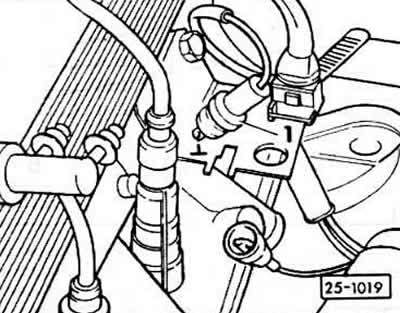
Connect the CO measuring device to the measuring pipe in the engine compartment. The measuring pipe is welded to the exhaust pipe and is usually plugged with a blue plug.
Caution: Place the instrument hose tightly onto the measuring port. Make sure that there is no leakage.
Start the engine and let it idle for at least 2 minutes.
Engines 90, 113 hp.
Clamp the crankcase ventilation hose with a suitable clamp or pliers. The CO content will increase for a while, but then drop again. If so, the lambda control is working.
If the CO content does not drop or the control current does not increase, the lambda probe should be checked as follows.
Disconnect the plug connection of the lambda probe cable and short it to ground for 20 seconds (green wire) to the control device.
If the CO content and control current now change, replace the lambda probe.
Otherwise check the electrical wires to the control unit, I also check the control unit (is done in the workshop), otherwise replace.
Engines 115, 136 hp.
Take control current readings and record them.
Remove the oil level dipstick.
The control current should increase, which means lambda regulation is working.
Disconnect the plug connection of the lambda probe cable and short it to ground for 20 seconds. (green wire) to the control device.
If the control current now changes, replace the lambda probe.
Otherwise, check the electrical wires to the control device and the control device itself (is done in the workshop), replace if necessary.
(The article is a reprint of material from: «audimanual.ru»)