
Do-it-yourself oil change
Changing your oil yourself is only worth it if you are using inexpensive oil purchased at an auto parts store, department store, or gas station. A regular oil change, which involves draining the oil and replacing the filter, takes time because the car needs to be jacked up. Changing your oil yourself at a gas station using a suction device is quicker and cleaner. However, this method has its drawbacks: dirt remains in the oil pan, and changing the oil without changing the filter is only half the battle. Changing the oil at a workshop will cost you the most, because workshops usually only use expensive grades of oil. If you change the oil at a gas station, although you will have to buy the oil at the gas station, you will choose the grade of oil yourself.
Amount of oil needed for oil change
| Engine | Filling volume |
| 1.6 l | 3.5L |
| 1.8 L turbocharged | 4.0 l |
| 2.0L | 4.0 l |
| 3.0L | 6.0 l |
The oil filter is selected according to the engine type. When purchasing a filter, ask which filter is suitable for your car's engine.
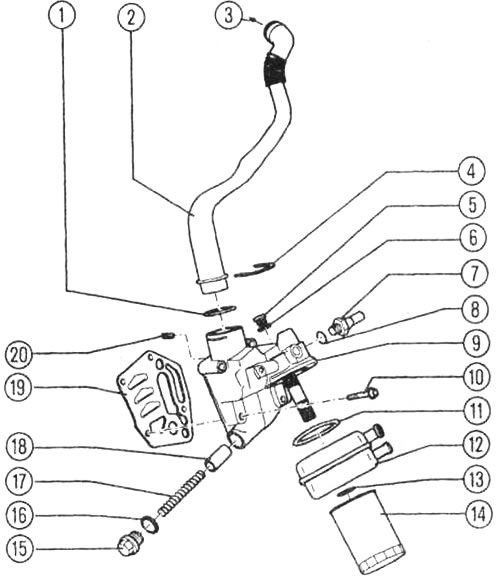
Oil filter assembly parts: 1 - sealing ring, 2 - connecting pipe, 3 - ventilation pipe, 4 - clamp, 5 - threaded plug 15 Nm, 6 and 8 - sealing rings (if there is a leak, take a bite and replace), 7 - pressure oil switch (F1) 25 Nm, 9 - oil filter holder, 10 - screw 19 Nm + 90' (replace), 11 - seal (replace and attach to the tabs on the oil cooler), 12 - oil radiator (pay attention to the free movement relative to adjacent parts), 13 - nut 25 Nm, 14 - oil filter, 15 - threaded plug 40 Nm, 16 - sealing ring (non-falling, on a screw cap), 17 - spring for safety valve, 18 - plunger of safety valve, 19 - seal (replace), 20 - bypass valve 8 Nm.
1. Warm up the engine. Only in this case will dirt particles be washed out when draining the oil.
2. Place the vehicle in a horizontal position or securely place it on jack stands,
3. Remove the soundproof cover.
4. Place a flat bath, bowl or cut plastic oil canister under the oil pan; this container should be of the appropriate volume.
5. Open the oil drain plug with a socket wrench and drain the oil into a container. Be careful, the oil is hot.
The oil drain plug 3 is best unscrewed with a ring spanner. In order to gain access to this plug, you need to remove the soundproofing cover.
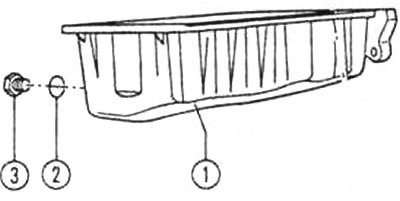
1 - oil pan, 2 - sealing ring, 3 - plug
6. If only the front end is supported on jacks: Lower the vehicle until all the oil has drained out. Make sure that the oil collection container does not tip over.
7. Using a tension band wrench (for example, Hazet 2171-1) loosen the oil filter. If the filter does not loosen, tap a screwdriver into the tin housing (be careful, hot oil will leak out) and turn it with a screwdriver. Collect the oil from the filter in a container and dispose of it as special waste.
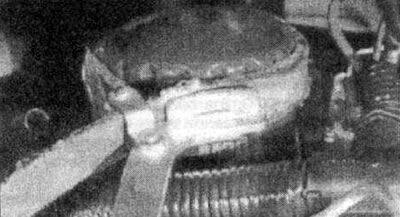
Loosening the oil filter using a tension band wrench (inexpensive oil filter wrench option). If you have problems with loosening, punch the filter with a screwdriver and unscrew it.
8. Lubricate the sealing ring of the new filter with consistent grease and screw the filter on by hand.
9. Clean the oil drain plug and screw it in with a new sealing ring. Screw the plug in carefully (30 Nm), otherwise you may damage the sealing thread in the oil bath.
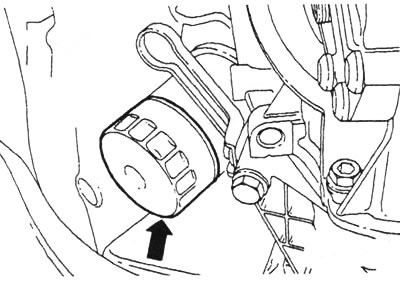
Oil filter (arrow) for four-cylinder engines
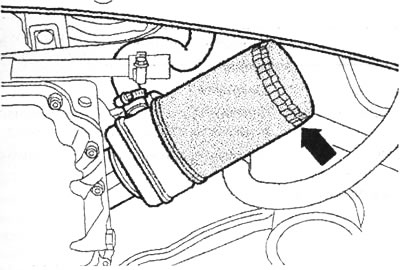
Oil filter (arrow) for six-cylinder engines
10. Fill with oil. Then run the engine for a while. Until the oil pump fills the filter, the low oil level indicator will light, since the required pressure is not created immediately.
Attention (turbocharged engine)! While the indicator is on, the engine must only idle. Do not press the accelerator pedal! Pressing the accelerator pedal may damage the supercharger or cause it to fail completely. The pedal may only be pressed after the indicator light goes out and full oil pressure is created.
11. Check the tightness of the oil filter and drain plug.
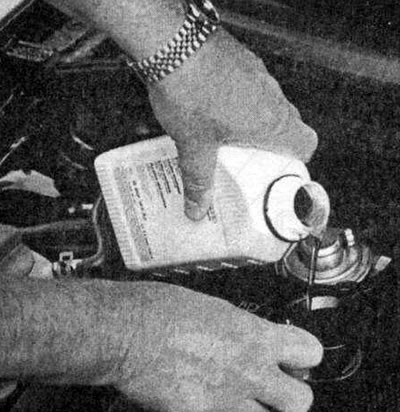
To ensure cleanliness when adding oil, use a funnel