
Table of contents: General information ↓ Removal ↓ Installation ↓ Setting the front panel/lock bracket… ↓
General information
1. The front panel/lock bracket is the name given to the body part mounted in front of the engine compartment. The hood lock mechanism, front bumper, radiator, automatic transmission cooler and headlights are mounted to this body part. The design of the Audi A4 body is such that this body part can be removed without significant disassembly. In addition, the front panel/lock bracket can be moved away from the body a few centimeters, moving it to the "service" position, without disconnecting the various hoses, tubes and wiring that are attached to it. In this position, access to the various components of the engine and engine compartment can be greatly improved.
Removal
2. Disconnect the ground wire from the battery.
Note: If the radio installed in your car has a secret code, make sure you know it before disconnecting the battery. Contact your dealer if in doubt.
3. Remove the front bumper as described in paragraph 3.
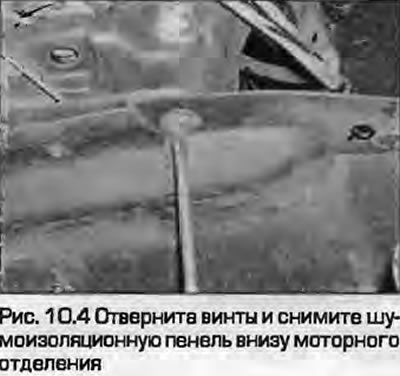
4. Loosen the screws and remove the soundproofing panel at the bottom of the engine compartment (Fig. 10.4).
5. Disconnect the cable from the hood lock as described in paragraph 8.
6. Loosen the mounting screws and disconnect the air intake duct with the grille from the lock bracket (Fig. 10.6).

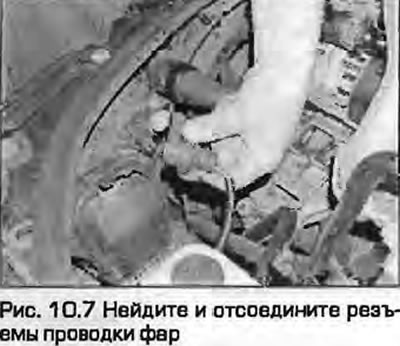
7. Locate and disconnect the wiring connectors for the headlights, headlight corrector motors, and turn signals in the left corner of the engine compartment (Fig. 10.7). Disconnect the wiring from the outside temperature sensor, which is installed at the lower rear edge of the radiator, closer to the lower hose connection.
8. Drain the coolant as described in the relevant section chapters 1, disconnect the cooling hoses from the radiator as described in paragraph 3 of chapter 3.
9. On models with air conditioning, remove the condenser from the lock bracket and tie it in a suitable place in front of the engine with wire or rope.
Warning: Do not leave the condenser hanging on the tubes to avoid putting stress on them and damaging them.
Caution! Do not disconnect the refrigerant pipes from the condenser (read the warnings in chapter 3, about the dangers of the refrigerant).
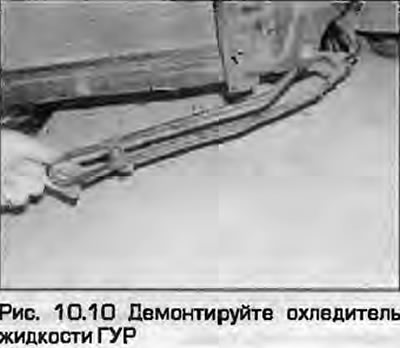
10. Remove the power steering fluid cooler and tie it to a suitable location at the bottom of the engine compartment with wire (fig. 10.10). On models with automatic transmission, perform the same operation with the automatic transmission fluid cooler.
11. On turbocharged models, remove the mounting screws and remove the intercooler duct from the front panel.
12. Release the front panel seal from both front wings. There is no need to remove the seal from the panel itself.
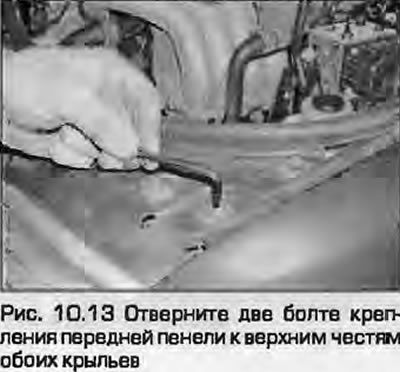
13. Remove the two bolts securing the front panel to the upper parts of both wings (fig. 10.13).
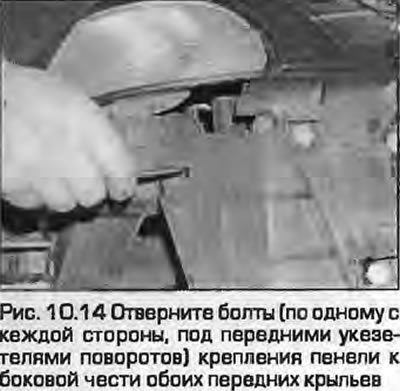
14. Unscrew the bolts (one on each side, located under the front turn signals) panel fastenings to the side of both front fenders (fig. 10.14).
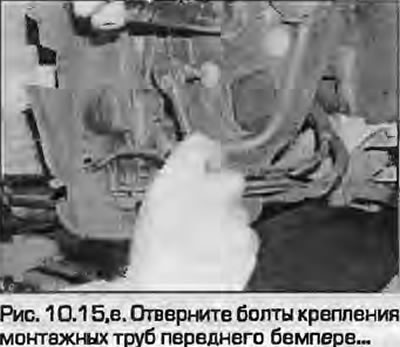
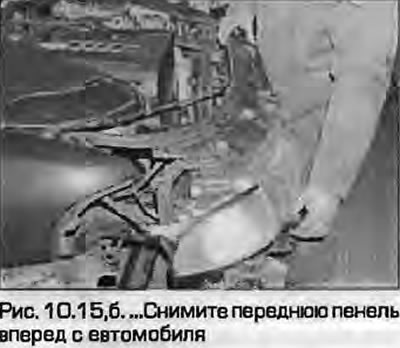
15. For the final stage, you will need an assistant. Unscrew the bolts securing the front bumper mounting pipes (four on the right and three on the left). Remove the front panel forward from the vehicle (fig. 10.15, a, b).
 |
 |
Installation
16. Installation is the reverse procedure. Check the operation of the front direction indicators, the bonnet lock and the bonnet safety hook. Fill and bleed the cooling system as described in Chapter 1A or 1B. Check the headlight adjustment.
Setting the front panel/lock bracket to the "service" position
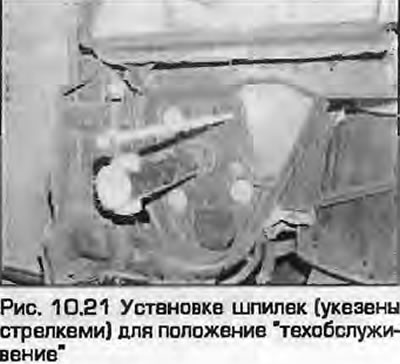
Note: To perform this procedure, make two auxiliary studs from a 300 mm long rod and a set of nuts.
17. Disconnect the ground wire from the battery.
Note: If the radio installed in your car has a secret code, make sure you know it before disconnecting the battery. Contact your dealer if in doubt.
18. Remove the front bumper as described in paragraph 9.
19. Unscrew the fasteners and remove the front edge of the noise-insulating panel from the bottom of the front panel. There is no need to remove the panel completely.
20. Loosen the fastening screws and disconnect the air ducts with the grille from the panel.
21. Unscrew the right upper bolt from the right bumper mounting pipe. Screw one of the auxiliary studs into the opened hole and screw a nut onto the end of the stud. Screw the second stud into the hole that is to the left of the left bumper mounting pipe (fig. 10.21).
22. Unscrew the remaining bolts securing the front panel as described in paragraphs 13...15 of the previous section.
23. Carefully pry the front panel away from the engine until the rear two bolts on each side of the top surface of the front panel line up with the first of the two corresponding holes in each fender. Re-tighten the mounting bolts to secure the front panel. Adjust the nuts on the homemade studs so that the panel is secure and does not hang on the top mounting bolts.
24. Installing the panel - reverse procedure. Tighten all threaded fasteners to the specified torques. Check the headlight adjustment.