
Table of contents: Removal the radiator ↓ Radiator cleaning ↓ Removal coolant supply hoses ↓ Draining the coolant ↓ Filling the cooling system with new… ↓
The radiator is a reservoir made of synthetic material, which is equipped with fins on the right and left sides. From this collector, the coolant flows through radiator tubes made of light metal, which, in order to increase their surface area, (and, therefore, the cooling surface) are equipped with cooling fins. Through the cooling fins, the coolant can release heat to the environment.
If you suspect a radiator leak, you should conduct the pressure test described in the workshop. If the defect is obvious, you can also immediately dismantle the radiator yourself and send it for repair. There are special workshops for repairing radiators (industry telephone directory), who carry out such repairs or offer replacement radiators.
Removal the radiator
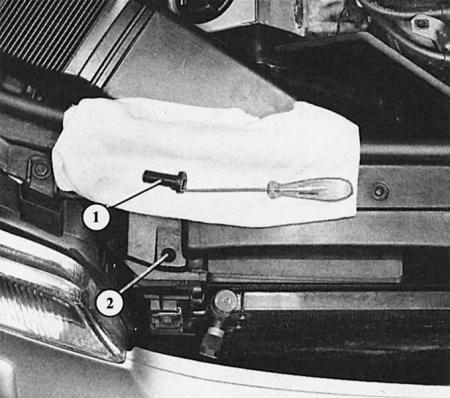
To remove the radiator, use a screwdriver to release both mounting screws (1) on the front of the vehicle and remove them from the fixing holes (2).
We do not recommend that you dismantle the radiator in a car with an automatic transmission. In this case, you need to disconnect the pipes of the oil cooler with ATF integrated in the radiator, which then entails problematic filling of the gearbox with ATF. In addition, dirt should not get into the ATF circulation system. Below you will find a description of how to dismantle the radiator for cars with a manual transmission.
1. Remove the front bumper (chapter Body parts).
2. Drain the coolant into a container.
3. Disconnect the hoses from the radiator; the thick hose at the bottom on the driver's side can be removed by pressing the metal clip at the hose connector.
4. Where necessary, remove the air duct on the right or left side of the radiator.
5. Disconnect if any (enhanced cooling, air conditioning), the wire connectors on the radiator fan thermostat switch, as well as the connectors on the radiator fan.
6. Using a small screwdriver, loosen the radiator mounting bolt at the top of the front of the vehicle and remove it.
7. Pull the intermediate rubber support forward.
8. Pull the radiator forward by the top edge and remove it upward from the lower mounting pins.
Radiator cleaning
Before and after the summer period, the radiator fins must be cleaned of insect corpses stuck to them, otherwise the cooling effect will deteriorate.
1. Spray dried insect residue with a protein dissolving agent.
2. After a while, rinse the product from the back of the radiator. Run a not too strong stream through the radiator fins. A hard brush or a sharp tool can damage the radiator fins.
3. Insert a water hose into the hole around the radiator fan. Where available, additionally lift the air damper on the back of the radiator and pour water through the holes located behind it.
Removal coolant supply hoses
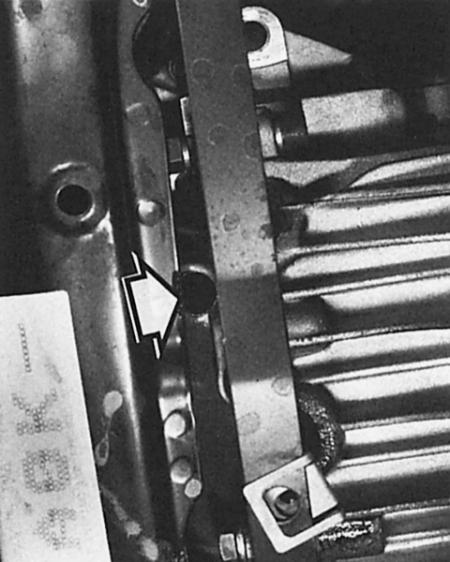
In a car with a six-cylinder engine, there is an additional threaded plug (arrow) for draining the coolant, which is located at the bottom of the engine next to the separation seam with the crankcase.
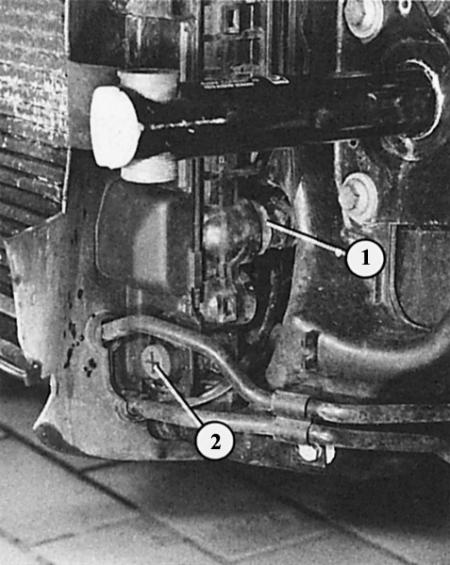
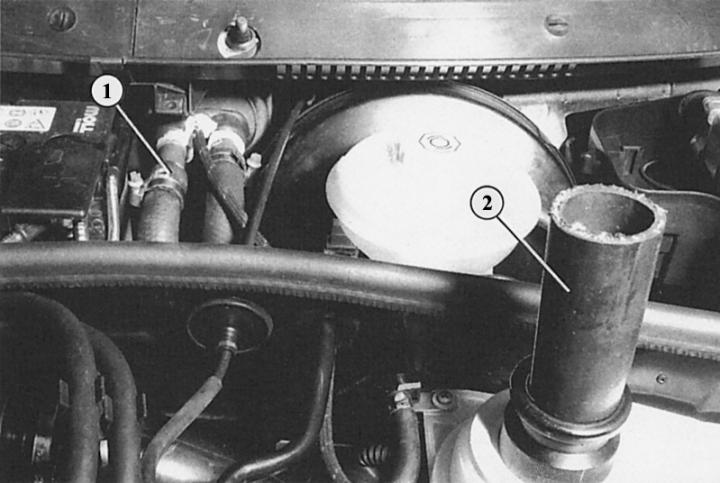
The drain plug (2) at the front right of the radiator is unfortunately only accessible with the bumper removed. Sometimes in cars with an electric radiator fan (enhanced cooling) a thermal switch (1) for the coolant is built in.
To remove air from the cooling system, after loosening the clamp, move the heating hose (3) on the connecting pipe (1) so that the ventilation hole (2) is exposed. This is possible when the hole in the pipe coincides with the hole in the hose.
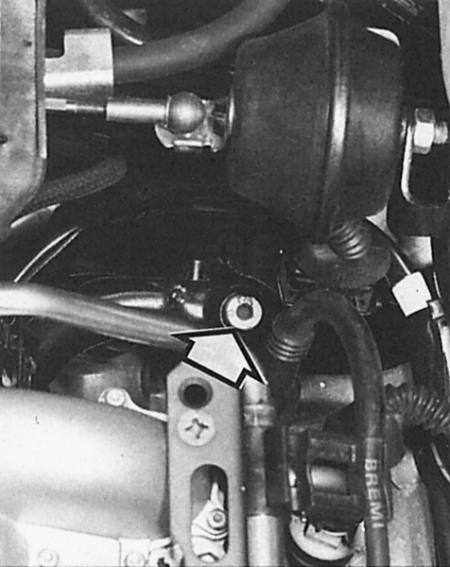
For a six-cylinder engine, to remove air from the cooling system, you must additionally open the Allen bolt (arrow) on the bottom left of the coolant pipe.
1. Purchase original hoses of the required curved shape and new clamps as spare parts.
2. Drain and collect the coolant.
3. Loosen the screw clamps with a screwdriver.
4. Use pliers to squeeze the spring clamps of the hoses by the "ears" until they stop.
5. On some models, the thick hose on the lower left side of the radiator is secured with a metal clip in the hose connection.
6. Press down the metal bracket.
7. Remove the hoses.
8. Loosen tightly seated ends of hoses with a screwdriver by inserting it between the hose and the branch pipe and then carefully pressing it out.
9. Slide the new hoses onto the fittings far enough so that they cannot slip off again.
10. Do not tighten the screw clamps too much, otherwise the threads will be stripped.
11. Hose secured with metal clamp: Check the sealing ring, push the hose connector until it fits into the groove of the metal clamp.
Tip: A torn or rodent-bitten water hose can rarely be replaced immediately, as the right water hose is often not in the pantry. Adhesive tape for repairing the cooling system can help temporarily. It sticks well to clean and dry rubber hoses. In case of a large leak, it can help if you open the radiator cap one turn so that the pressure in the cooling system drops, which the bandage will not be able to withstand. Only now drive carefully to the workshop. Do not lose sight of the temperature gauge and the coolant level!
Draining the coolant
1. Let the engine cool down; if the engine is hot, there is a risk of burns!
2. Open the expansion tank cap.
3. Remove the lower trim of the engine compartment (chapter Body parts).
4. Place a wide tray under the engine to collect the coolant.
5. Remove the lower water hose on the radiator. Additionally:
- Four-cylinder engine: In the direction of travel, on the left side of the engine, remove the thick hose to the radiator and the thinner hose to the heating heat exchanger, as well as on the thermostat housing and drain the fluid.
- Six-cylinder engine: Drain the coolant by unscrewing the drain plug at the bottom of the engine block.
Tip: Antifreeze is toxic, so you can't just pour it down the drain. Instead, pour it into a separate container and send it to special waste (find out where the collection point is at your local government office).
Filling the cooling system with new coolant
Filling with new coolant: Pull back the heating hose on the connected pipe until the vent hole (1) is visible. Then place a 10 cm long piece of hose (2) on the filler neck of the expansion tank to increase its filling height.
Since a certain amount of coolant remains in the engine, the entire amount of coolant listed in the table at the beginning of the chapter may not be needed.
1. Before filling, open the clamp on the water hose to the heating and slide it back to expose the vent.
2. Six-cylinder engine: Open the air screw in the coolant pipe under the expansion tank.
3. Place a 10 cm long piece of hose onto the filler neck (diameter about 42 mm) in order to increase the height of the bay.
4. First add antifreeze, then, if possible, distilled water so that the liquid level reaches the top edge of the expansion tank.
5. For six-cylinder engine only: Fill with fluid until it comes out of the air screw. Close the screw (15 Nm).
6. Continue pouring fluid until it comes out of the vent hole.
7. Move the heat exchanger hose back to its original position (close the vent) and tighten the clamp.
8. Then pour in the liquid completely.
9. Screw the cap onto the expansion tank.
10. Start the engine and let it run until the radiator becomes hot in the lower connection area.
11. If necessary, adjust the fluid level. It should be between the "MIN" and "MAX" marks on the expansion tank; when the engine is hot, then, naturally, it is higher.
12. Be careful when opening the cap when the coolant is hot.
(The original article is available on the website «audimanual.ru»)