
Table of contents: General information ↓ Front wheel drive shaft ↓ Removal ↓ Installation ↓ Rear wheel drive shaft ↓ Removal ↓ Installation ↓
General information
To turn the wheels, ball joints are located on the drive shafts (half-axles). Thus, the drive of each wheel consists of two constant velocity joints and a shaft. AUDI 80 cars are equipped with two different types of joints. All models with a manual transmission with four- and five-cylinder engines, as well as all quattro models (front and rear wheel drive) have a cardan joint of constant angular velocities, the main element of which are six balls. These same joints on cars with an automatic transmission and cars with a six-cylinder engine are installed as external ones, on the hub side.
The so-called "Tripod" joints are installed on cars with automatic transmission and front-wheel drive cars with a six-cylinder engine as internal, i.e. on the gearbox side. Tripod joints have three rollers on needle bearings instead of six balls.
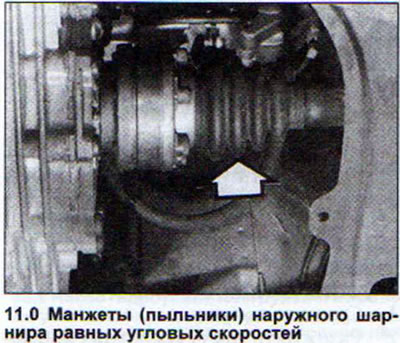
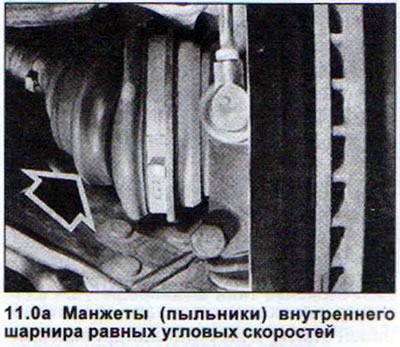
Constant velocity joints are protected from moisture and dust by rubber seals (anthers), whose condition must be checked regularly. Damaged or cracked cuffs should be replaced immediately, because moisture and dust will destroy the CV joint (see illustration 11.0 and 11.0a).
Drive shafts, as a rule, do not create problems. Their service life depends on the driving style. Frequent jerks from a standstill with the wheels turned instead of normal starting, etc. are the cause of premature shaft defects.
The CV joint malfunction manifests itself immediately, although after some time the defect may disappear for several days. The characteristic signs of faulty CV joints are rhythmic knocks and clicks when pressing the accelerator pedal, as well as when driving in forced idle mode. If, in addition to this, the tonality of these sounds changes depending on the position of the steering wheel, then it can be confidently stated that the outer CV joint is damaged. Vibration and shaking of the steering wheel when turning the wheels are also evidence of a defective outer CV joint.
Front wheel drive shaft
Necessary consumables: a hexagonal head drive shaft mounting bolt in the hub, a self-locking nut for the anti-roll bar strut, and a gasket for the inner CV joint. This gasket is not needed for cars with a six-cylinder engine and a manual transmission, or for cars with an automatic transmission.
Removal
1. Remove the protective cap from the wheel hub nut.
2. Loosen the wheel mounting bolts.
3. Loosen the drive shaft mounting bolt in the hub. The car must stand on its wheels.
4. Place the front of the vehicle on jack stands.
5. Remove the wheel.
6. Loosen the nuts securing the anti-roll bar struts on the left and right sides of the suspension.
7. Press out the stabilizer.
8. Remove the axle shaft protective cover if necessary.
9. Remove the socket head bolts that secure the axle shaft to the gearbox.
10. Press the axle shaft end away from the drive shaft mounting flange on the gearbox.
For vehicles with ABS, remove the ABS sensor when disconnecting the axle shaft from the hub.
11. Turn the steering wheel in the desired direction to disconnect the axle shaft from the hub.
12. Remove the axle shaft.
Installation
First install the axle shaft into the hub, and only then tighten the bolts securing the shaft to the flange on the gearbox in a cross pattern. Tightening torques: M8 bolts - 45 Nm; M10 - 80 Nm. Do not forget to install spacer washers.
13. Lower the vehicle and apply the parking brake.
14. Tighten the drive shaft mounting bolt to the hub to the following torque:
- Bolt M14 x 1.5. First tighten it to 120 Nm, then tighten it an additional ¼ turn (90°).
- Bolt M16 x 1.5. First tighten it to 200 Nm, then tighten it an additional ¼ turn (90°).
15. Tighten the anti-roll bar nut to 20 Nm.
16. Slide the ABS sensor back into place.
Rear wheel drive shaft
Necessary consumables: a hexagonal head drive shaft mounting bolt in the hub, as well as a gasket for the inner CV joint. This gasket is only needed for cars with a five- and six-cylinder engine.
Removal
17. Remove the protective cap from the wheel hub nut (see illustration 10.2).
18. Loosen the wheel mounting bolts.
19. Loosen the hexagonal bolt securing the drive shaft to the hub. The car must stand on its wheels.
20. Place the rear of the vehicle on jack stands.
21. Remove the wheel.
22. Remove the socket head bolts that secure the axle shaft to the rear axle gearbox.
23. Press the axle shaft tail off the drive shaft mounting flange on the gearbox.
For vehicles with ABS, remove the ABS sensor when disconnecting the axle shaft from the hub.
24. Remove the axle shaft.
Installation
25. Place a new gasket on the inner CV joint, having first removed the protective foil from it.
First install the axle shaft into the hub, and only then tighten the bolts securing the shaft to the flange on the gearbox in a cross pattern. Tightening torques: M8 bolts - 45 Nm; M10 - 80 Nm. Do not forget to install spacer washers.
26. Lower the vehicle and apply the parking brake.
27. Tighten the drive shaft mounting bolt to the hub to the following torque:
- Bolt M14 x 1.5. First tighten it to 120 Nm, then tighten it an additional ¼ turn (90°).
- Bolt M16 x 1.5. First tighten it to 200 Nm, then tighten it an additional ¼ turn (90°).
28. Tighten the anti-roll bar nut to 20 Nm.
29. Slide the ABS sensor back into place.
Warning! Do not move the vehicle with the drive shaft removed. Otherwise, the hub bearing may be damaged. In case of emergency, install the half-shaft to move the vehicle, securing the outer CV joint tailpiece in the hub.
Attention! Depending on the engine and gearbox type, AUDI vehicles are equipped with different drive shafts. When purchasing them, please indicate the engine letter designation and vehicle identification number.