



Table of contents: 4-cylinder petrol engine ↓ Engine 115 hp, letter designation AAD ↓ 5-cylinder engine (2-valve) ↓
Note: This describes operation for a petrol engine only.
4-cylinder petrol engine
Removal
Remove the V-belt.
Set the crankshaft to the TDC position of the piston of the 1st cylinder.
Unscrew both belt pulleys and the vibration damper on the crankshaft.
Remove the upper and lower timing belt covers
Mark the direction of travel on the toothed belt.
Loosen and remove the timing belt.
Caution: The toothed belt must not be bent. Once bent, the belt must be replaced, as it may break during subsequent use, which will lead to serious engine problems.
Installation
Place the toothed belt on the crankshaft and auxiliary shaft gears.
Caution: If you install an old belt, be sure to maintain the direction of rotation. Installing the toothed belt in the opposite direction of rotation may cause it to break and therefore damage the engine.
Secure the crankshaft pulley with one bolt; for an injection engine, screw on the vibration damper with all 4 bolts.
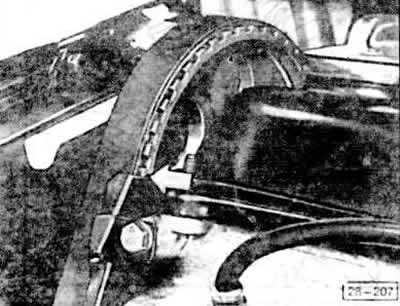
Check that the camshaft is in the TDC position of the piston of the 1st cylinder. Otherwise, check the camshaft until the marks match (Fig. A) with the cylinder head cover installed or Fig. B with the cover removed.
Caution: If the camshaft needs to be turned to a greater angle, make sure that none of the pistons are in the TDC position, otherwise the valves or pistons may be damaged. Otherwise, set the crankshaft 90° (¼ turn) before or after TDC. However, do not turn the belt pulley more than 90°.
Engine 115 hp, letter designation AAD
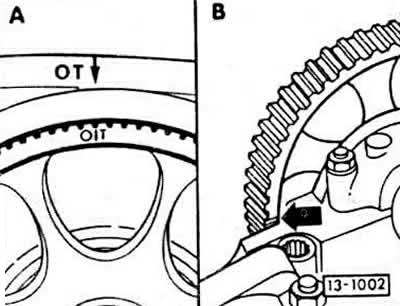
Check that the camshaft is in the TDC position of the piston of the 1st cylinder. Otherwise, check the camshaft until the marks match (Fig. A) with the cylinder head cover installed or Fig. B with the cover removed.
Caution: If the camshaft needs to be turned to a greater angle, make sure that none of the pistons are in the TDC position, otherwise the valves or pistons may be damaged. Otherwise, set the crankshaft 90° (¼ turn) before or after TDC. However, do not turn the belt pulley more than 90°.
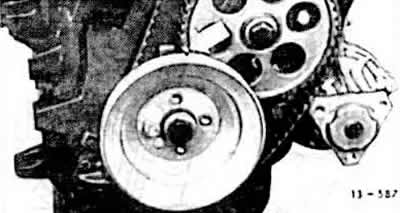
Check that the markings on the crankshaft gear and the intermediate shaft match. The engine is in the TDC position of the 1st cylinder.
Place the timing belt on the camshaft sprocket.
Caution: When installing the belt, do not change the position of the crankshaft, camshaft, or intermediate shaft. Otherwise, this may cause serious damage to the engine or reduce its power.
Note: After tensioning the timing belt, check the installation of the camshaft and intermediate shaft again. This means the following: If the marking on the camshaft gear coincides with the base marking, then at the same time the marking on the crankshaft gear must coincide with the marking on the intermediate shaft gear. Otherwise, change the installation of the camshaft and crankshaft gears.
Tighten the toothed belt
Check the crankshaft two turns in the direction of rotation and check the installation again.
Remove the crankshaft belt pulley.
Install the lower timing belt cover.
Install the upper timing belt cover.
Install the crankshaft belt pulley and tighten to 20 Nm.
Install the V-belt and tighten it.
Check the ignition timing. Adjust it if necessary.
Caution: When performing repairs that require removal of the timing belt from the camshaft sprocket only, install the timing belt as follows:
Install the crankshaft so that piston 1 of cylinder is at TDC.
The mark on the camshaft gear must match the cylinder head cover.
Loosen the timing belt and remove it from the camshaft wheel.
Note: Do not change the position of the crankshaft and intermediate shaft again.
Put on the belt and tighten it.
Check that the distributor rotor points to the 1st cylinder terminal on the distributor cap. If not, the distributor should be loosened and turned so that the marks match. Otherwise, reinstall the distributor.
Turn the crankshaft twice, now the marks on the camshaft and crankshaft should match the pointers, otherwise the installation should be repeated.
Check the ignition timing and adjust if necessary.
Start the engine. A whistling toothed belt usually indicates that it is over-tensioned.
5-cylinder engine (2-valve)
Removal
The order of work basically corresponds to a 4-cylinder engine. Only differences are noted below.
Remove the power steering pump.
Remove the vibration damper.
Installation
Check that the mark on the camshaft gear is aligned with the top edge of the cylinder head cover seal.
Place the toothed belt on the gear and put it on the crankshaft together with the vibration damper.
Caution: The timing belt must not get stuck between the gear and the oil pump.
Caution: If an old toothed belt is used, it is essential to take into account the previous direction of movement. Installing the belt in the opposite direction or bending it may cause rupture and damage to the engine.
Attach the vibration damper.
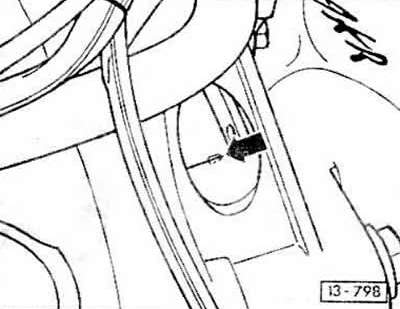
Check that the crankshaft is in the TDC position of the piston of the 1st cylinder. In the clutch housing window, the TDC mark "O" should be located exactly under the pointer.
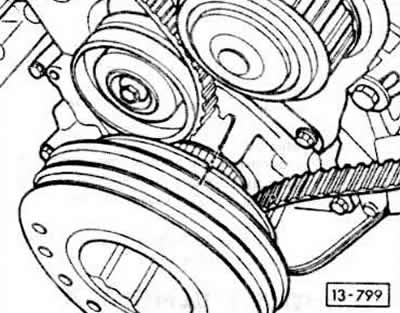
If the toothed belt is installed on a removed engine, the notch on the belt pulley must match the installation mark on the pump housing. The crankshaft must be in the TDC position of the piston of the 1st cylinder.
Put on and tighten the timing belt.
Install the power steering pump.
[Content source: the specified website: AudiManual]