
Selector lever cable
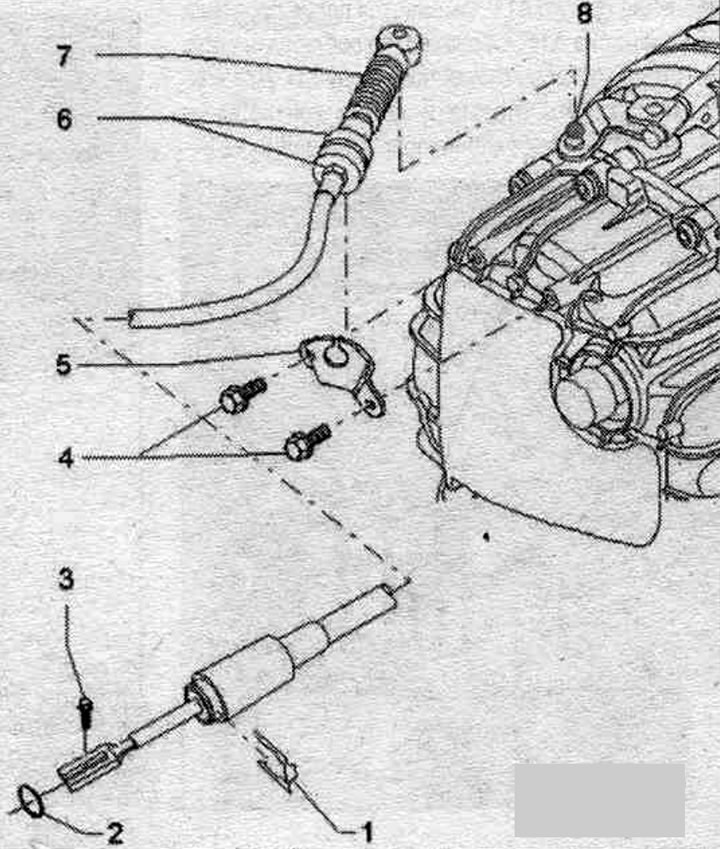
1. Selector cable retaining clip on the shift drive functional block.
2. Sealing ring: replace.
3. Bolt: 13 Nm; to adjust the selector cable; mounting on the functional block of the gear shift mechanism.
4. Bolt: 8 Nm, 2 pcs.
5. Selector cable stop.
6. Nut: 2 pcs., 13 Nm; rigidly mounted on the automatic transmission selector cable; the automatic transmission selector cable is fixed to the cable stop using a locking device.
7. Gear selector cable: do not bend or kink; if the rubber bushing is damaged, replace the selector cable; before installation, lightly lubricate the ball joint with polyurea grease -G 052 142 A2-; install the rubber cuff on the gearbox side without distortions.
8. Gear shift lever.
Removal
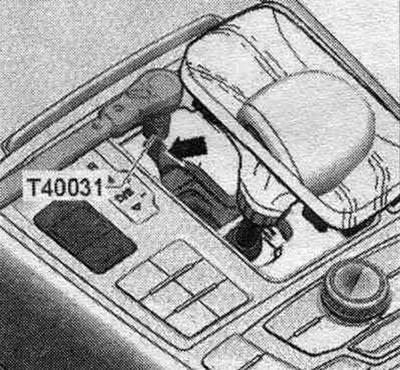
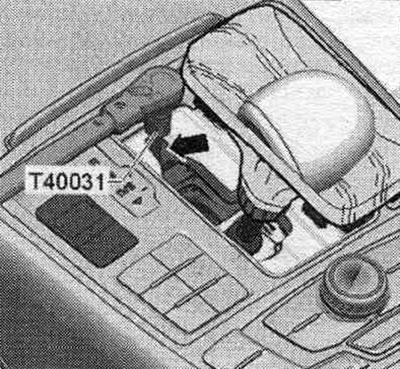
Pull the parking brake lever to engage the electric. mechanical parking brake. Shift the automatic transmission selector to position "D." Carefully detach the automatic transmission selector sleeve retaining frame "1" from the center console "arrow" using wedge "3409" and bend it upward.
Using the T40031 socket wrench, loosen the automatic transmission selector cable bolt by 1 turn through the "arrow" hole in the gearshift mechanism. Loosen the clamp bolt only; do not remove it. Access to the clamp bolt is only possible in the "D" position. With the clamp bolt loosened, the automatic transmission selector must remain in the "D" position.
Cars with 3.2 l FSI: removing the front muffler on the left. Using a 80-200mm release lever, detach the ball joint "1" of the selector cable from the gearbox lever. Remove the bolts "2" of the traction cable support. Release the gear selector cable. Ignore the arrow.

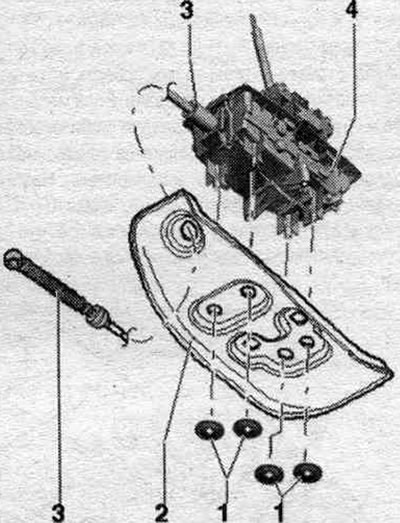
Remove 4 lock washers "1". Replace lock washers. Remove the noise insulation screen "2" and move it forward.
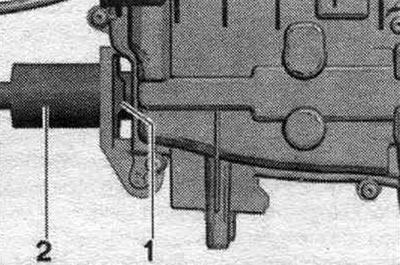
Remove the retaining clip "1" from the side of the automatic transmission selector cable. Remove the automatic transmission selector cable "2" from the gearshift mechanism.
Installation
Installation in reverse order. Before installation, lightly lubricate the loop and ball joint of the automatic transmission selector cable with polyurea grease -G 052 142 A2-. Install the noise insulation screen "2" through the hole on the selector cable "3". Insert the seal. ring "1" of the automatic transmission selector cable. Insert the automatic transmission selector cable "2" into the functional unit of the gear shift mechanism "arrow". Secure the gear selector cable "2" with the locking bracket "3".
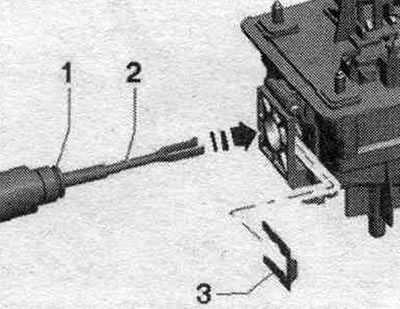
Mounting position: The curved edge of the locking bracket "1" faces the gear shift lever. Secure the noise insulation screen "2" with 4 new locking bolts "1". Shift the gearshift shaft lever "1" on the gearbox all the way back "arrow" to lock the gear engagement lock mechanism. If the gear lock mechanism is locked, then both front. the wheels must not be turned in the same direction at the same time. Press the gearshift lever 3 forward with the locking pins so that the gearshift lever is in position "D." Make sure that the automatic transmission selector in the car is also in position "D.".
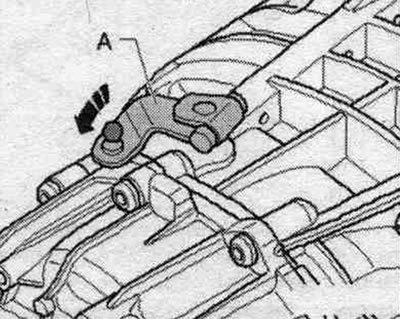
In this position, carefully insert the ball joint of the selector cable "1" onto the gearshift lever. When pressing, be careful not to deform the lever by shifting gears, as this will make precise adjustment of the shifter impossible. Attach the traction cable support from gearbox "2". Ignore the "arrow". Screw the selector cable to the support, tightening the lock nuts. Check and adjust the selector cable. Check the gear shift mechanism drive. Cars with 3.2 l FSI: installation of front muffler on the left.
Adjusting the gear selector cable
Carefully detach the mounting frame of the automatic transmission selector cuff "1" using the wedge "3409" from the central console "arrow" and bend it upwards.

Shift the automatic transmission selector lever to position "D." Loosen the automatic transmission selector cable screw by 1 turn using the "T40031" socket wrench through the "arrow" hole in the gearshift mechanism. Loosen the clamp bolt by approximately 1 turn; do not remove it. The clamp bolt is only accessible in the "D" position. With the clamp bolt loosened, the automatic transmission selector lever should remain in the "D" position. Carefully move the automatic transmission selector lever forward and backward, without shifting to another position. This will relieve the strain on the automatic transmission selector cable. Move the automatic transmission selector lever to the "Tiptronic" slot. Do not touch the automatic transmission selector lever during adjustment. In this position, tighten the clamp bolt using the "T40031" socket wrench, without touching the automatic transmission selector lever.
(The original version is on the portal: audimanual)