



Table of contents: Removal ↓ Installation ↓
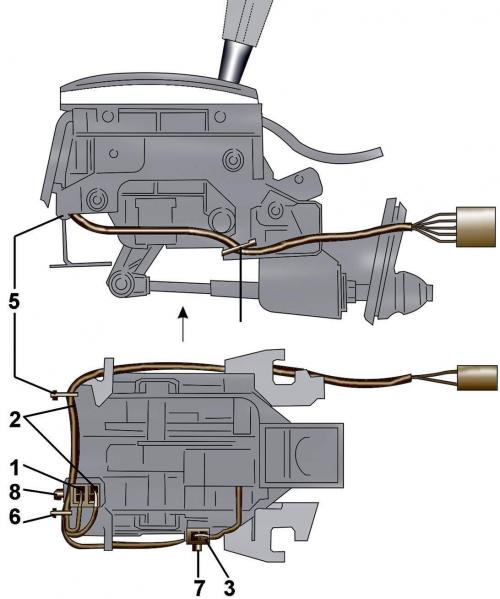
Fig. 9–10. Location of electrical connectors and wires on the automatic transmission selector: 1 - Brown connector for backlight; 2 – yellow connector for indicating the position of the selector lever; 3 – black connector for solenoid N110 selector lever
Removal
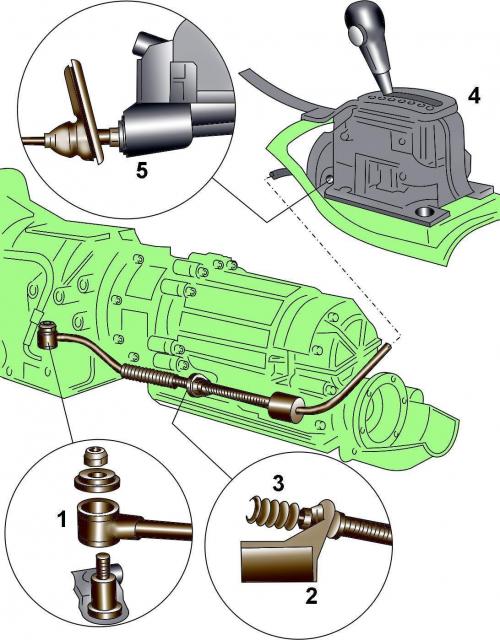
Fig. 9–11. Selector cable location and fastening: 1 – elements of fastening the selector cable to the automatic transmission control lever; 2 – selector cable bracket; 3 – selector cable; 4 – selector mechanism; 5 – fastening the selector cable to the selector mechanism
Unscrew the nut, remove the washer and, by pulling, remove the selector cable from the automatic transmission control lever (see Fig. 9–11).
Unscrew the bolt and remove bracket 2 with the cable from the automatic transmission.
Remove the center console.
Remove the front masking panel guide.
Unscrew the four bolts and remove the mounting plates.
With the help of an assistant, remove the selector with the cable from the vehicle.
Disconnect cable 3 from selector mechanism 4 (pos. 5, Fig. 9–11).
Installation
Installation is carried out in the reverse order of removal, taking into account the following.
Check that the sealing ring is installed correctly.
[This article was previously published on the resource: AUDIMANUAL.RU]