
Brake repair. fN3 calipers
Note: Use the entire repair kit when performing repairs. New brake calipers are filled with brake fluid. liquid and the air has been removed from them. Apply a thin layer of paste -G 052 150 A2- to the brake cylinders, pistons and seals.
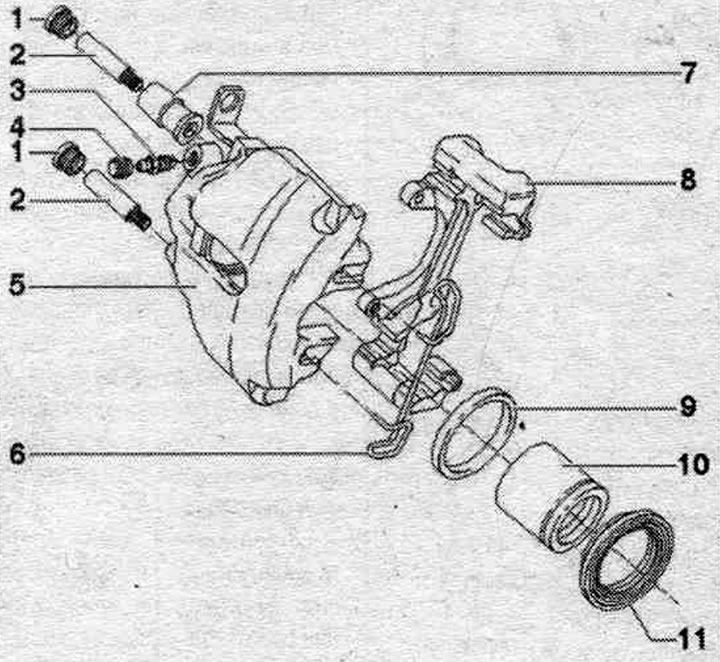
1. Plugs: To remove, remove the guide pins; after installation, insert the guide pins.
2. Guide pin: 30 Nm.
3. Bleed nipple (air bleed valve): Before tightening, lubricate the threads with a small amount of paste -G 052 150 A2-: 10 Nm.
4. Protective cap: placed on the bleed nipple.
5. Brake caliper.
6. Spring: inserted with both ends into the brake holes. caliper. After installation, press the support spring into both holes under the brake caliper bracket. brake pads. If installed incorrectly, wear on the outer pad cannot be properly compensated for, leading to increased brake pedal travel.
7. Support sleeve: inserted into the brake housing. support.
8. Brake caliper: the brake housing is screwed to it. support.
9. Sealing ring.
10. Piston: Pre-lubricate the piston with a thin layer of mounting paste -G 052 150 A2-; diameter 57 mm.
11. Protective cap: do not damage it when installing the piston.
Removal
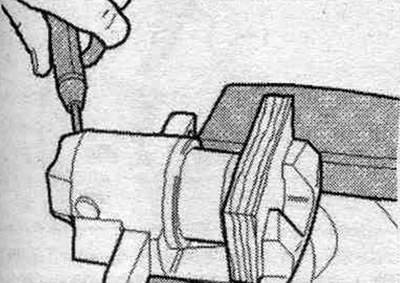
Press the piston out of the brake housing. calipers using compressed air. To prevent damage to the piston, install a wooden stop.
Remove the seal. ring. Use wedge "3409" for this.

Installation
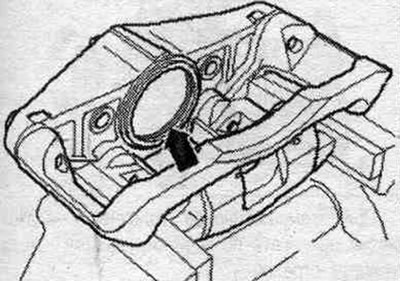
Insert the inner seal. ring in the groove "arrow" of the brake caliper.
Insert the seal. cuff so that it fits snugly against the caliper body around its entire circumference. Once pressed in, the seal must not be adjusted. cuff, removing it with your hands from the brake housing. caliper. Before installation, apply a thin layer of mounting paste -G 052 150 A2- to the piston and cuff. Lightly press the piston through the seal. cuff. To avoid damaging the seal. the cuff and piston must be installed without tilting.
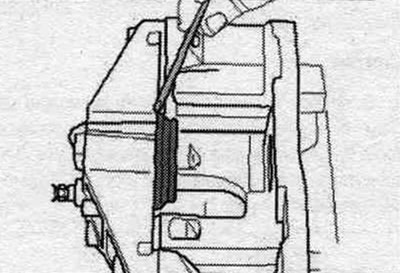
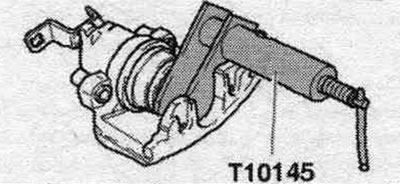
Using compressed air (maximum pressure 3 bar) push out the outer part of the edge of the sealing cuff. The outer part of the sealing cuff edge will then be outside the piston. Press the piston into the brake. support using the "T10145" device. To avoid damaging the seal. the cuff and piston must be installed without tilting. The inner part of the edge of the sealing cuff will then enter the groove of the piston.
[The original article is located on the online resource: AUDImanual]