
Table of contents: Turbocharger ↓ Removal and installation a… ↓
Turbocharger
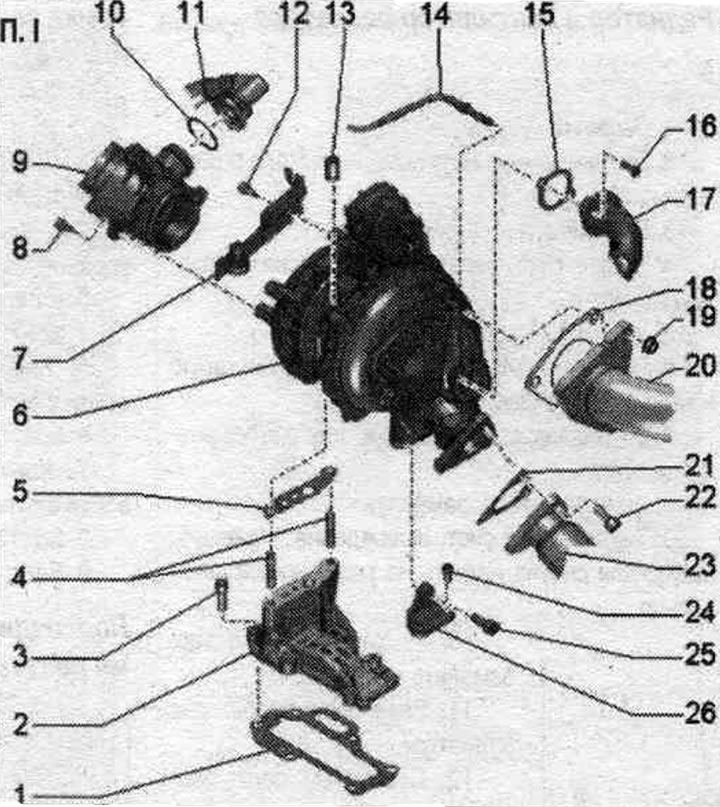
1. Gasket: replace.
2. Turbocharger bracket.
3. Bolt: tighten crosswise to 23 Nm in several steps.
4. Studs: Replace after each loosening of the nuts; 10 Nm.
5. Gasket.
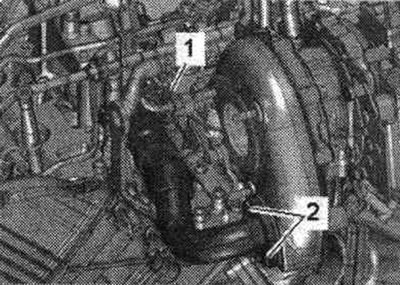
6. Turbocharger: with turbocharger control unit 1 "J724".
7. Electrical connector and engine cover bracket.
8. Bolt: 9 Nm.
9. Connecting pipe of the air guide hose: from the air flow meter "G70" to the turbocharger; before installation, clean from oil and grease.
10. Sealing ring: replace.
11. Engine crankcase ventilation hose.
12. Bolt: 9 Nm.
13. Nut: replace; apply heat-resistant paste to the threads.
14. Exhaust gas temperature sensor 1 "G235".
15. Gasket: replace.
16. Bolt: replace.
17. Tube: to the system radiator. exhaust gas recirculation.
18. Gasket: replace.
19. Nut: replace; apply heat-resistant paste to the threads.
20. Gasket: replace.
21. Bolt: replace; apply heat-resistant paste to the threads.
22. Exhaust manifold.
23/24. Bolt.
25. Turbocharger bracket.
Moment and sequence, tightening
Replace studs and nuts.
Tighten the bolts and nuts in 7 steps in the specified order.
| Step | Bolts/nuts | Tightening/reduced torque |
| 1 | studs for nuts "1, 2" | 10 Nm |
| 2 | "1, 2" | screw it in by hand until it stops |
| 3 | "1, 2" | 9 Nm |
| 4 | "1, 2" | turn 90° |
| 5 | "3, 4, 5" | screw it in by hand until it stops |
| 6 | "3, 4" | 9 Nm |
| 7 | "5" | 23 Nm |
Removal and installation a turbocharger
Caution! If the turbocharger has mechanical damage (for example, damage to the impeller), it is not enough to simply replace the turbocharger. To prevent further damage, the following steps must be taken. Check the housing and air filter element. filters, as well as air supply hoses for contamination. Check the entire system. charge air supply and intercooler for foreign objects. If in the system. if foreign bodies are detected in the air boost line, clean the air boost lines and replace the intercooler if necessary.
Remove the radiator frame cover "4". Remove the diesel particulate filter.
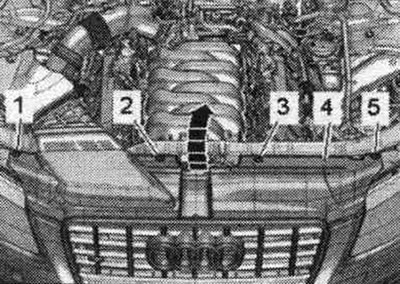
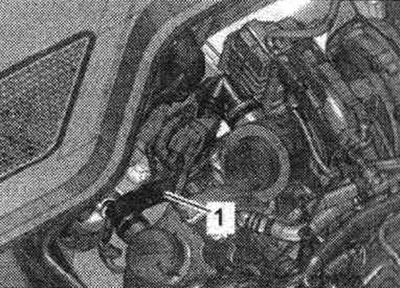
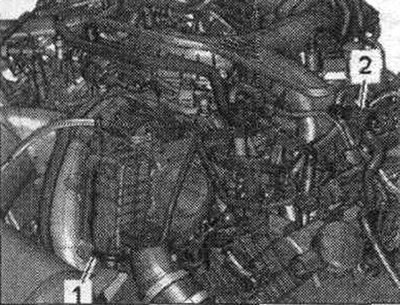
Unscrew the "arrow" bolts. Remove the air duct "1" from the intermediate flange "2" of the air duct housing. filter.
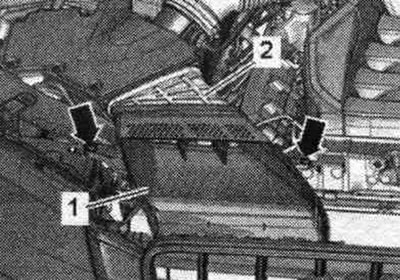
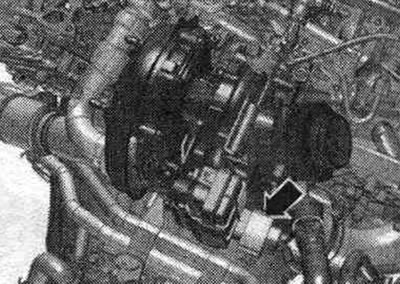
Unscrew bolts "2, 3". Remove the air duct hose by loosening the hose clamp "1".
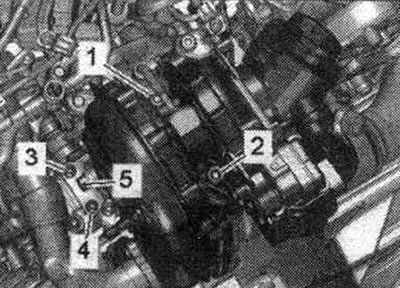
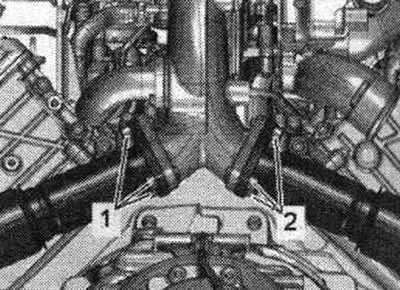
Unscrew bolts "1, 2".
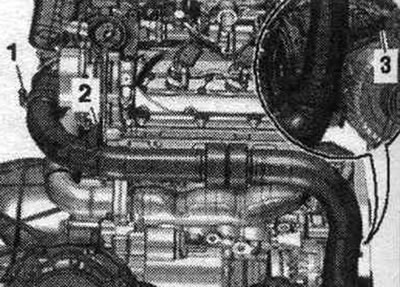
Disconnect the engine crankcase ventilation hose "1" by pressing the release buttons.
Disconnect the "arrow" connector.
Unscrew screws "2". Loosen the screw clamp and remove the system pipe. exhaust gas circulation.
Remove connector "2" from the bracket and disconnect it. Release the wire. "Pos. 1" should not be taken into account.
Loosen bolt "5". Unscrew nuts "1, 2" and bolts "3, 4". Remove the turbocharger.
Install
Installation in reverse order. Replace gaskets and seals. rings. Fill the turbocharger with oil through the oil supply line nipple. To secure all hose connections, use clamps of the appropriate series. To ensure that oil is supplied to the turbocharger, the engine must be run for approx. 1 minute at idle speed; do not give the engine high revs. Electrical connections and wiring. Install the air duct. Install a diesel particulate filter. Install the radiator frame cover. Wash down with OZ.