
Table of contents: Wear of the wiper blade rubber ↓ Checking the windshield wiper and… ↓ Filling the windshield wiper with… ↓ Replacing the wiper blade rubber ↓ Adjusting the spray nozzles ↓ Dismantling spray nozzles ↓ Removal and installation windshield… ↓ Dismantling and installation of the… ↓ Windscreen wiper malfunctions ↓ Windscreen wiper blade malfunctions ↓ Headlight cleaner repair ↓
Clean windows are an important prerequisite for your safety while driving. To ensure sufficient visibility on the road even in rain and snow, the car is equipped with a windscreen wiper and washer. The windscreen wiper can move at one of two speeds. There is also an intermittent wiper device, which makes the wiper move approximately every four seconds. Good cleaning results are only achieved if the spray nozzles spray water precisely onto the glass. In winter, the headlight cleaner pays off.
Wear of the wiper blade rubber
Windscreen wiper blades should fit tightly to the glass. However, the service life of the rubber is limited. Over time, the rubber wears out due to the movements of the windscreen wiper. In addition, under the influence of ozone and ultraviolet rays, the rubber becomes brittle. In addition, small scratches on the windscreen cause nicks in the rubber, which impairs the cleaning quality for a long time. For these reasons, the rubber of the wipers should be changed in the spring and autumn. Most of the work with the windscreen wiper can be done independently, in most cases a screwdriver is enough for this. However, for an inexperienced car enthusiast, replacing the windscreen wiper blade can turn into a test of patience, for some this work may seem like a puzzle. The work goes faster and easier if you use universal adapters (for example, the Bosch company), these adapters are sold in specialty stores and at most gas stations.
If the windshield wiper motor wires or fuses are faulty, the electrical equipment should be checked (see the relevant chapter).
Checking the windshield wiper and washer
1. Turn on the ignition, operate the lever with the windshield wiper blade.
2. Does the windshield wiper work at all speeds? Does it return to its original position when turned off?
3. Does the intermittent wiper function?
4. Is water sprayed through the windshield washer nozzles?
5. Do the rear wiper and washer work?
6. Does the headlight washer function?
Filling the windshield wiper with water
1. In summer, the tank can be filled with tap water. The cleaning quality is improved if you add a small amount of cleaning agent to the water. In winter, you need to add antifreeze to the water.
2. To ensure that the liquids mix well in the tank, first add the additives and then the water.
3. In severe frost, the spray nozzles may freeze. To prevent this, add one part denatured alcohol to two parts water (true, the resulting mixture has a rather pungent smell). To prevent the long pipe that goes to the rear window from freezing, operate the rear window washer several times before parking the car.
4. Before setting off, check that the windshield washer fluid reservoir is full.

Adding additive to the windshield washer reservoir
Replacing the wiper blade rubber
1. Fold back the windshield wiper arm.
2. Compress the wiper blade retaining spring until the notch comes out of the wiper arm hole.
3. Press down on the brush and remove it from the lever.
4. On one side, the rubber has notches for engagement with the spring clamps of the lever. To disengage the clamps, press the rubber protrusions with your fingernail or a small screwdriver.
5. Remove the rubber together with the side metal spring strips.
6. Attach the new rubber to the lower spring clips of the windshield wiper arm.
7. Push the right and left spring strips into the recess in the rubber. Insert the protrusions on the rubber into the corresponding locking recesses in the strips.
8. To engage the spring clips, press the tabs on the rubber again.
9. When installing the brush, make sure that the notch in the locking spring is located opposite the recess in the lever and can engage in this place.
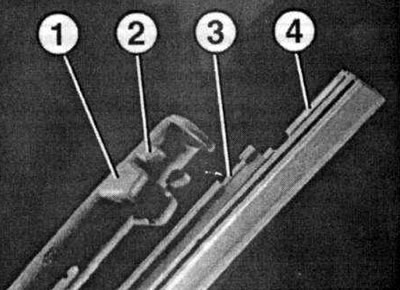
1 - wiper blade guide protrusion, 2 - rubber retaining clips, 3 - rubber guide profile, 4 - recesses in spring strip
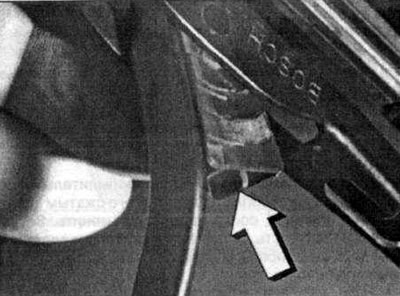
Replacing the wiper blade: First, fold back the wiper arm, then release the blade hinge at the small tab (arrow). The blade can then be pulled out of the wiper arm
Adjusting the spray nozzles
1. To ensure good visibility, the nozzles should not be installed too low. Otherwise, at high speed, the glass will get dirty before the water wets the entire surface of the window.
2. The nozzles are adjusted at the factory. To make the adjustment you will need the 3125A adjustment tool with the 3125/5A needle.
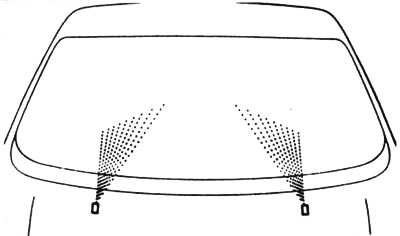
If the spray fields are not at the same height, the spray nozzles should be adjusted. If the nozzles are not adjustable, replace them
3. Using a water-soluble pencil, mark the four points on the glass as shown in the figure:
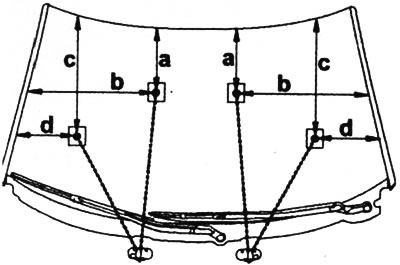
Values for adjusting spray nozzles taking into account driving conditions: a = 290±50 mm, b = 470±50 mm, c = 510±50 mm, d = 230±50 mm
4. These values take into account the driving conditions. If the car is stationary, the nozzles spray water with some displacement.
5. Using the adjustment tool, aim each nozzle towards the indicated points.
Dismantling spray nozzles
The best way to fix a clogged spray nozzle is to remove the nozzle and blow it out with compressed air. If this does not help, the nozzle will have to be replaced. Blocked nozzles can be avoided by installing a standard gasoline filter in the water line. Do not blow through nozzles in the opposite direction.
Spray nozzle base in the hood
1. Dismantling: Open the hood. Separate the spray nozzle base from the hood at the bottom (arrow in the picture).
2. Remove the water hose from the separated nozzle.
3. When installing in the reverse order, the connection of the hose to the spray nozzle should be accompanied by a click.
Removal and installation windshield wiper arms
1. Removal: Before removing the wiper arms, make sure the wiper motor is in the extreme position.
2. Remove the rubber seal of the battery compartment in the direction of the arrow and remove cover 1 forward.
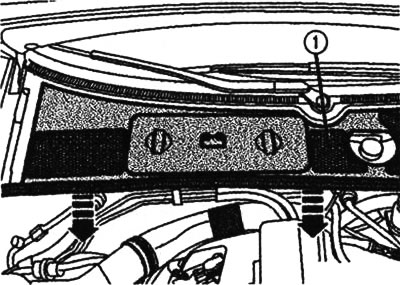
Removing the battery cover
3. Remove the retaining clips 1 and remove the air intake grille 5. Using a small screwdriver, pry up both caps 3, loosen the hex nuts 4 slightly and lightly tap the wiper arms 2 off the wiper arm shaft. Loosen the hex nuts completely and remove the arms.
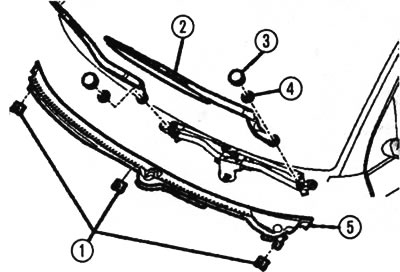
Removing the windshield wiper arms

Adjusting the windshield wiper arms
4. When installing, which is done in the reverse order, move the motor to the extreme position again. Place the brushes on the windshield and align them, while the following dimensions must be observed: a = 26 mm, b = 40 mm (see fig above).
5. These dimensions are equal to the distance from the brushes to the air intake grille of the battery section at the lower edge of the windshield. After alignment, tighten the wiper arm mounting nuts 4 to a tightening torque of 21 Nm.
6. Switch the windshield wiper to short-term operation. If necessary, align the arms again and tighten the nuts.
Dismantling and installation of the windshield wiper motor with frame, levers and rods)
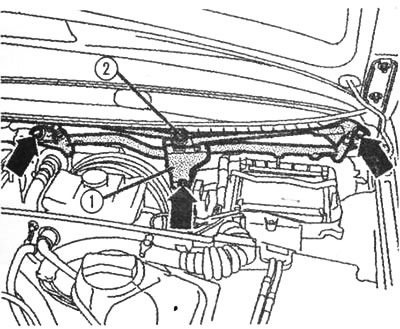
1. Remove the cover of the electronics unit in the battery compartment (arrows).
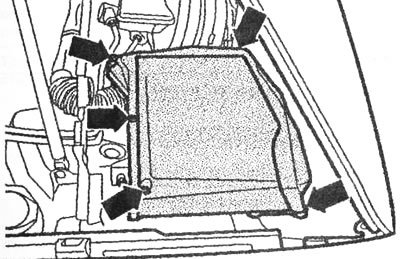
Removing the cover of the electronics unit in the battery compartment
2. Using a suitable tool (it is recommended to use a 80-200 squeeze lever) separate the windshield wiper rod from the ball head 2. Unscrew the guides for the pipes or hoses from the windshield wiper frame. Unscrew the screws (arrows) and completely remove the frame 1.
Removing the windshield wiper frame
3. Disconnect the electrical connector. Unscrew the engine from the frame (arrows).
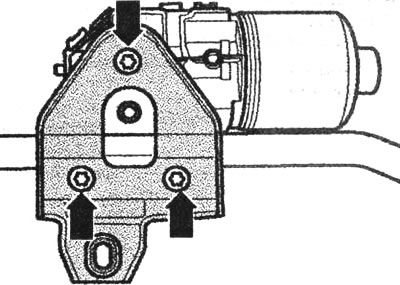
Unscrewing the motor from the windshield wiper frame
4. When installing in the reverse order, tighten the windshield wiper motor without the crank to the frame with a tightening torque of 9 Nm. Connect the connector, mount the motor with the frame in the car (tightening torque 8 Nm).
5. Turn the windshield wiper to the short-term operation mode to move the motor to the extreme position.
6. After this, align the crank J with the frame and tighten the nut 2 to 18 Nm. The angle a should be 2°.

Crank Angle Adjustment
7. Set the wiper blades to the extreme position.
Windscreen wiper malfunctions

Windscreen wiper blade malfunctions

Headlight cleaner repair
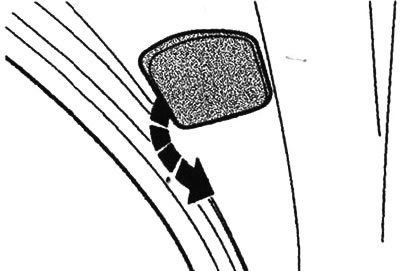
1. Removal: On the bumper, pull up the cover of the spray nozzles and carefully unhook the holders (arrow).
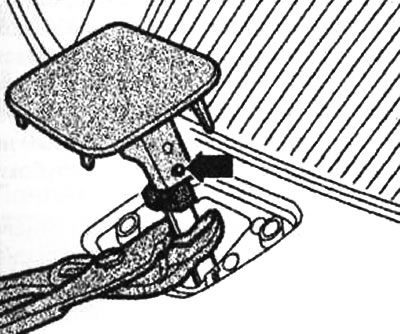
Headlight cleaning nozzle cover
2. Release the clamp and pull out the nozzle insert (arrows).
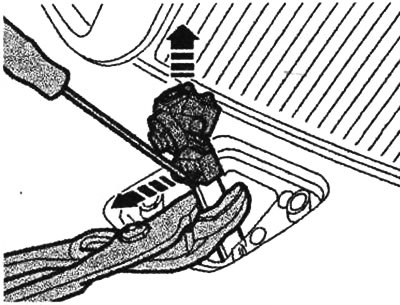
Removing the nozzle insert
3. If you intend to remove all the headlight cleaning spray nozzles, remove the front bumper, pull up the spray nozzle cover on the bumper and carefully unfasten the holders.
4. After this, press the release button to remove the water hose 3. Unscrew screws 1 and 2 and remove the spray nozzle.

Removing and installing the spray nozzle for cleaning the headlight
5. When installing in the reverse order, screw the spray nozzle to the front bumper (tightening torque 3 Nm), install the bumper. Since the spray nozzles are adjusted at the factory, there is no need to adjust them after installation.