
Table of contents: Checking the steering and front… ↓ Checking the condition of shock… ↓ Drive shafts ↓
Checking the steering and front suspension
1. Raise the front of the vehicle with a jack and install safety supports.
2. Visually check for damage to the dust boots of the ball joints and steering rods of the rack and pinion mechanism. A ruptured dust boot causes loss of lubrication of the unit and penetration of dirt into it, which leads to rapid wear.
3. On models with power steering, check the hydraulic tubes and hoses for flattening, kinking or other damage. There should be no leaks. Also check under pressure (turning the steering wheel all the way to one side and then to the other with the engine running) absence of hydraulic fluid leaks from under the steering gear covers, which indicates wear of the seals (cuffs) inside the steering gear.
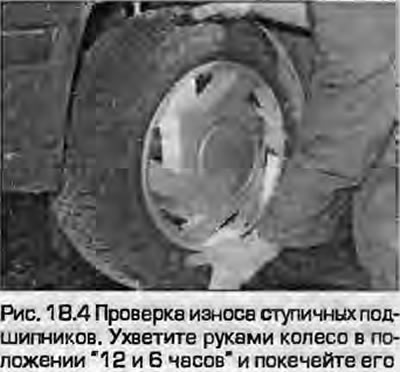
4. Grasp the front wheel at the 6 and 12 o'clock position and rock it (Fig. 13.4). There should only be a slight play; if the play is significant, you need to find its source. Ask an assistant to press the brake pedal and continue rocking the wheel. If the play has disappeared or has significantly decreased, the likely cause is worn hub bearings. If the play is still significant, the mounts and suspension are likely worn.
5. Now grasp the wheel with your hands at the 9 and 15 o'clock positions, and rock the wheel as before. Now the play can be classified as play in the steering or in the hub bearing. Wear of the outer tie rod end is obvious when rocking. Wear of the inner tie rod joint can be felt by feeling the joint with your hand through the rack and pinion boot. The wheel, of course, needs to be rocked.
6. Check the condition of the bushings and suspension supports by wedging and rocking them with a mounting blade or a powerful slotted screwdriver. A small movement is allowed, since the bushings and supports are made of rubber, but significant play indicates that the rubber has separated from the metal - it can be seen. Check the condition of all bushings, they should not have cracks, delamination or abrasions.
7. Lower the car. Ask an assistant to rock the wheel left and right about one eighth of a turn in both directions. The play may be barely noticeable. If not, carefully inspect all the supports and hinges described above. Also check the steering column hinges for wear and the condition of the steering mechanism itself.
Checking the condition of shock absorber struts
8. Check for any leaks in the shock absorbers. Leaking shock absorbers have irreparable internal damage and must be replaced.
Note: Struts/shock absorbers are always replaced in pairs on the same axle.
9. The effectiveness of the shock absorbers can be checked by rocking the car around the corners. If you stop rocking, the car should return to its original position without continuing to oscillate. If it continues to move up and down, the condition of the shock absorber is at least suspect. Check for wear and damage to the upper and lower rubber shock absorber mounts.
Drive shafts
10. Raise the front of the car and install safety supports, turn the steering wheel to the stop. Slowly turn the front wheel, checking the condition of the outer CV joint boot (constant velocity joint), squeezing it to release the accordion. Check for cracks, torn holes or decomposition of the boot rubber that could allow dirt to enter the hinge. Check the integrity of the boot mounting clamps. Repeat this operation on the inner hinge boots. If damage to the boots is found, replace them as described in paragraph 3 of chapter 8.
11. At the same time, check the condition of the joints by holding the drive shaft from turning and rocking the wheel. Repeat this operation for the inner joints. Noticeable play indicates wear of the splined connections or loosening of the joint mounting nut.