
Note: Before checking, adjust the engine oil level if necessary (see Chapter 1). Engine oil pressure depends on many factors, such as its temperature and viscosity, crankshaft speed and the condition of the oil filter, so measurements should be taken strictly at the crankshaft speed and engine temperature specified in the Specifications.
1. Remove the top engine cover (see Section 19 of Chapter 1).
2. On 1st generation 3.0 TDI models, remove the hollow bolt (2 in the illustration) fastening the oil supply line to the turbocharger.
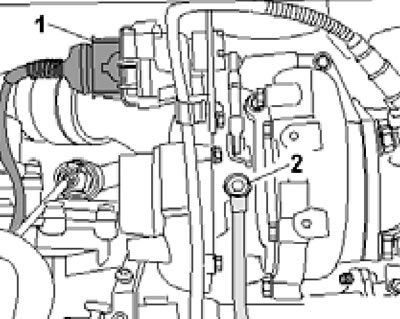
3.2. Hollow bolt (2) of the oil supply line on the turbocharger.
3. On 3.0 TDI SCR models, remove the bolt (1 in the illustration) and a hollow bolt (3) for fastening the oil supply line to the turbocharger.
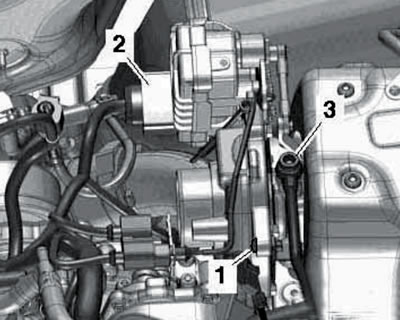
3.3. Bolt (1) and hollow bolt (3) of the oil supply line on the turbocharger.
4. On 3.0 TDI models (1st generation and SCR) screw the VAG1342/21 adapter with new seals into the turbocharger, as shown in the illustration, and screw the VAG1342 pressure gauge into it. Screw the engine oil pressure gauge into the D/V pressure gauge.
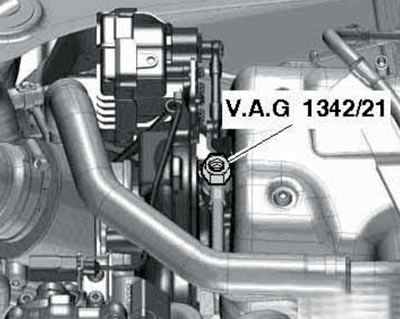
3.4. Adapter for measuring oil pressure.
5. On 2nd generation 3.0 TDI models, unscrew the engine oil pressure valve "F22" (see Section 33). Connect the VAG1342 pressure gauge with the VAG1342/14 adapter (see illustration) and screw it into the pressure gauge D/V "F22".
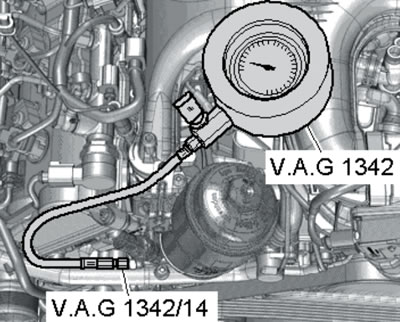
3.5. Measuring oil pressure on the 3.0 TDI 2nd generation engine.
6. On 4.2 TDI models, unscrew the "G8" engine oil temperature sensor (see Section 44), screw in the VAG1342 pressure gauge instead and screw it into the D/V engine oil pressure gauge.
7. Start the engine and check the oil pressure (see Specifications).
8. Installation is carried out in reverse order. Tighten the hollow oil feed line mounting bolt on the turbocharger with new seals to 15 Nm, and tighten the regular oil feed line mounting bolt to 9 Nm.
(The original source of the article can be found on the website: «AUDIMANUAL.RU»)