
Table of contents: Programming ↓ Setting the on time and operating… ↓ Operational inclusion ↓ Operational shutdown ↓ Remote radio control ↓ Additional heater ↓
The autonomous heater-fan can operate in the heating and cooling mode independently from the engine.
The independent heater works in combination with the air conditioner independently of the engine. Its operating principle is based on fuel combustion. It is primarily intended to warm up the interior and facilitates defrosting of the glass.
The heater can be used as an additional heater both when the engine is off and when driving (for example, at the engine warm-up stage).
The independent fan also operates independently of the engine and effectively helps reduce the temperature inside a car left in the sun.
The independent heating/ventilation mode is controlled via the driver information system (FIS). The time and duration of switching on can be programmed via the menu. The duration of the independent heater-fan operation can vary between 30 and 60 minutes. The independent heater-fan can also be switched on and off via the radio remote control.
Attention
- Operation of an autonomous heater in closed spaces is not permitted - there is a risk of poisoning.
- The operation of the independent heater is not permitted while the vehicle is being refueled - there is a risk of fire.
- The operation of the independent heater is accompanied by high-temperature exhaust emissions. Therefore, when parking the car, ensure that hot exhaust gases can freely exit from the lower side of the engine casing and that there is no direct contact between the exhaust gases and flammable materials.
Note
- Immediately after the fuel level in the tank reaches the reserve field and the gas station symbol lights up in the fault monitoring system, the fuel supply to the independent heater is stopped. The independent heater is switched off.
- The independent heater-fan switches off immediately when the battery is weak. To preserve the battery, do not use the independent heater several times in a row without breaks.
- The operation of the independent heater-fan does not require any special adjustment of the air conditioner. However, we recommend opening the air outlet devices.
- When operating the vehicle on RME fuel (diesel engine) please take into account the characteristics of this fuel.
- To speed up the cooling of the autonomous heater, after each time it is turned off, the circulation pump and fan continue to operate for some time, supplying hot air.
Programming
The independent heater/windscreen is controlled via the driver information system (FIS).
Programming and control is carried out with the vehicle stationary via the display settings modes of the driver information system FIS.
- Press the Menu key. The start menu appears.
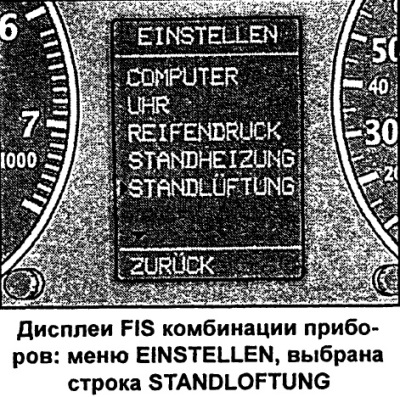
- Turn the rotary/push button to set the command selection arrow to EINSTELLEN (setup).
- Confirm selection by pressing the rotary/push button. The EINSTELLEN (setup) menu appears.
- In the same way, from this menu select the STANDHEIZUNG menu (autonomous heater) or STANDLOFTUNG (autonomous fan).
- Turn on the current function by turning/pressing the rotary/push button (check mark - yes, square - no) and, if necessary, make another setting.
The following types of settings are possible:
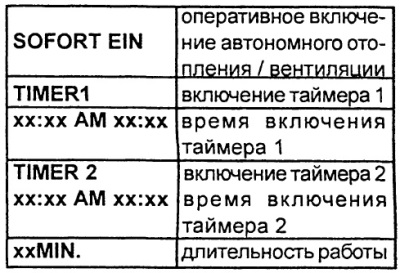
Setting the on time and operating time
The independent fan heater is configured via FIS.
Setting the turn-on time
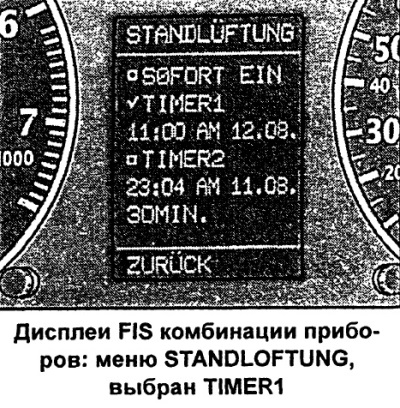
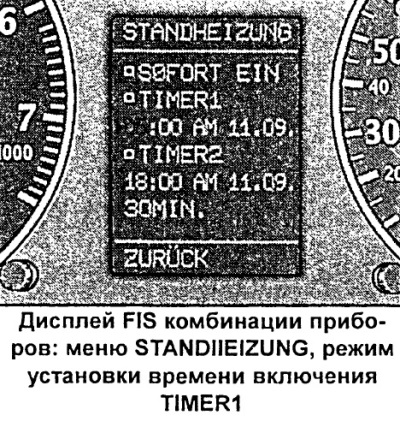
- In the STANDHEIZUNG menu (autonomous heater) or STANDLOFTUNG (autonomous fan) select the time to turn on the corresponding timer.
- Press the rotary/push button. The hour indication flashes.
- Turn the rotary/push button to set the hour indication.
After setting the time and duration of switching on, turn on the timer function as follows:
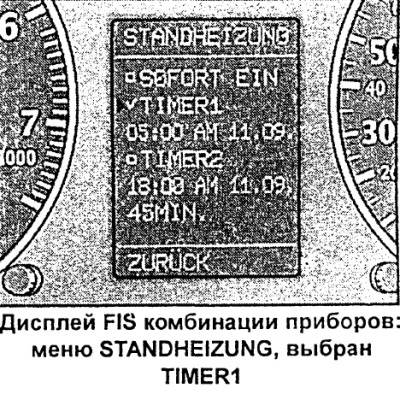
- In the STANDHEIZUNG menu (autonomous heater) or STAND-LUFTUNG (autonomous fan) select the current timer.
- Press the rotary/push button to set the check mark.
- Now it is possible to configure other functions or exit the menu via the ZURUCK command.
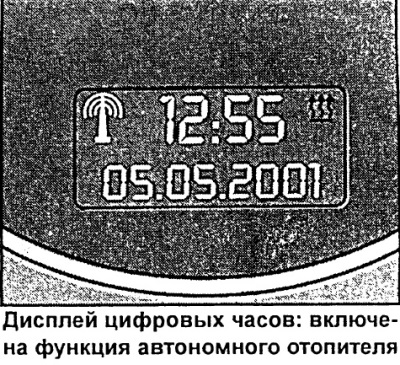
Timers that are in working mode are represented on the digital clock display as the following symbols.

When the independent heater or fan is operating, the corresponding symbol flashes.
It is not possible to turn on both timers at the same time. It is also not possible to turn on one timer for the independent heater and the other for the independent fan at the same time. When you check the box, the previous function is reset.
Operational inclusion
It is also possible to quickly turn on an independent heater-fan.

- In the STANDHEIZUNG menu (autonomous heater) or STAND-LUFTUNG (autonomous fan) select the line SOFORT EIN (operational inclusion).
- Press the rotary/push button to set the check mark. This turns on the independent heater/fan.
- Now it is possible to configure other functions or exit the menu via the ZURUCK command.
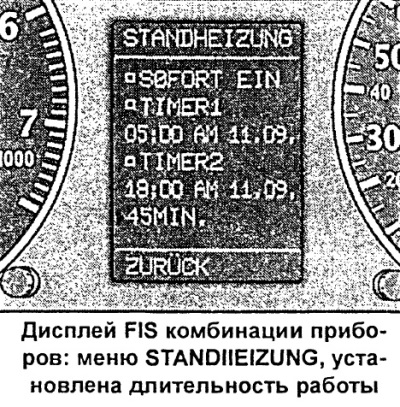
The duration of operation of the independent heater/fan after operational switching on is determined by the specified setting in the STAND-HEIZUNG/STANDLOFTUNG menu.
Operational shutdown
The independent heater-fan can also be switched off manually.
- In the STANDHEIZUNG menu (autonomous heater) or STANDLOFTUNG (autonomous fan) select the line SOFORT EIN (operational inclusion).
- Press the rotary/push button to remove the check mark. This switches off the independent heater/fan.
- Now it is possible to configure other functions or exit the menu via the ZURUCK command.
Remote radio control
It is also possible to radio-controlledly switch on or off the independent heater-fan.
Turning on
- Fully extend the radio remote control transmitter antenna.
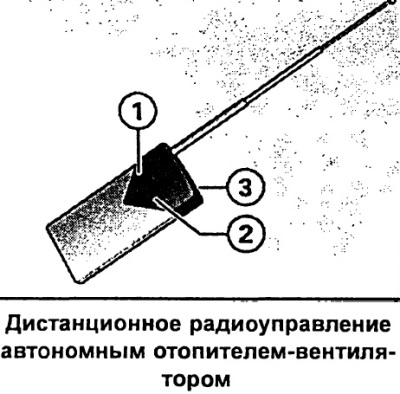
- Press the power button 1. The control lamp 3 of the transmitter flashes three times quickly and then slowly for about 30 seconds. This switches on the SOFORT EIN function (operational inclusion).
- Retract the antenna.
Shutdown
- Fully extend the radio remote control transmitter antenna.
- Press the switch 2. The control lamp 3 of the transmitter flashes three times. This switches off the SOFORT EIN function (operational inclusion).
- Retract the antenna.
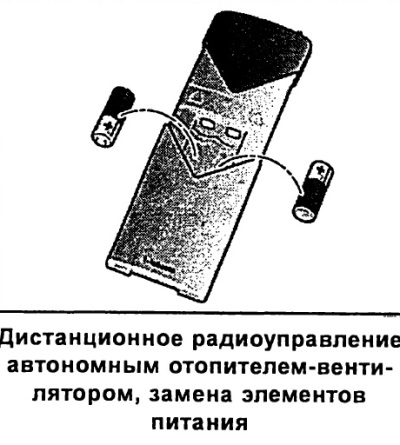
Replacing the batteries
- Move the transmitter cover back.
- Replace the batteries. The batteries are marked for proper installation. New batteries (1.5 V) must match the specifications of the original batteries.
- Close the lid.
The last mode of the autonomous heater-fan at the time of switching off is always switched on.
The operating time of the independent fan heater is determined by the setting of the corresponding FIS menu.
If you want to turn on the independent fan heater again after the time of its turn-on has expired and less than one hour after the last turn-on, you must first press the switch-off key 2 and only then the switch-on key 1.
However, after switching off with key 2, the control lamp 3 of the radio remote control transmitter continues to flash. This is due to the limited switching-on time (1 hour).
When switching on the independent fan heater via the SOFORT EIN menu command (operational inclusion), it cannot be turned off by remote control.
Additional heater
For quick heating of the passenger compartment, cars with turbocharged diesel engines are equipped with an additional heater. The additional heater switches on and off automatically depending on the coolant temperature, when the outside air temperature is below +5°C and the engine is running.
The additional heater can be switched off to save fuel by pressing the ECON button on the air conditioner.
[The article is a reprint of material from «AUDImanual.ru»]