
Table of contents: Removal ↓ Visual inspection of tightness and… ↓
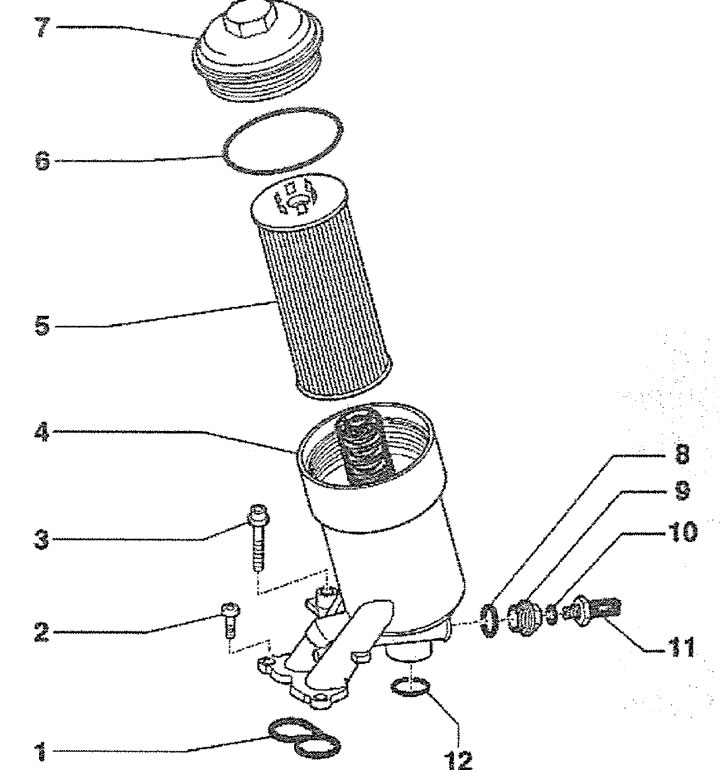
7.0. Oil filter. Cars with a 4.2L petrol engine:
1 - sealing gasket
2 - bolt. Tightening torque - 10 Nm
3 - bolt. Tightening torque - 22 Nm
4 - oil filter housing
5 - replaceable filter element of the oil filter
6 - sealing ring. To be replaced after each dismantling
7 - oil filter cover. Tightening torque - 25 Nm
8 - sealing gasket. To be replaced after each dismantling
9 - threaded plug. Tightening torque - 50 Nm
10 - sealing gasket. To be replaced after each dismantling
11 - oil pressure sensor
12 - sealing ring. To be replaced after each dismantling
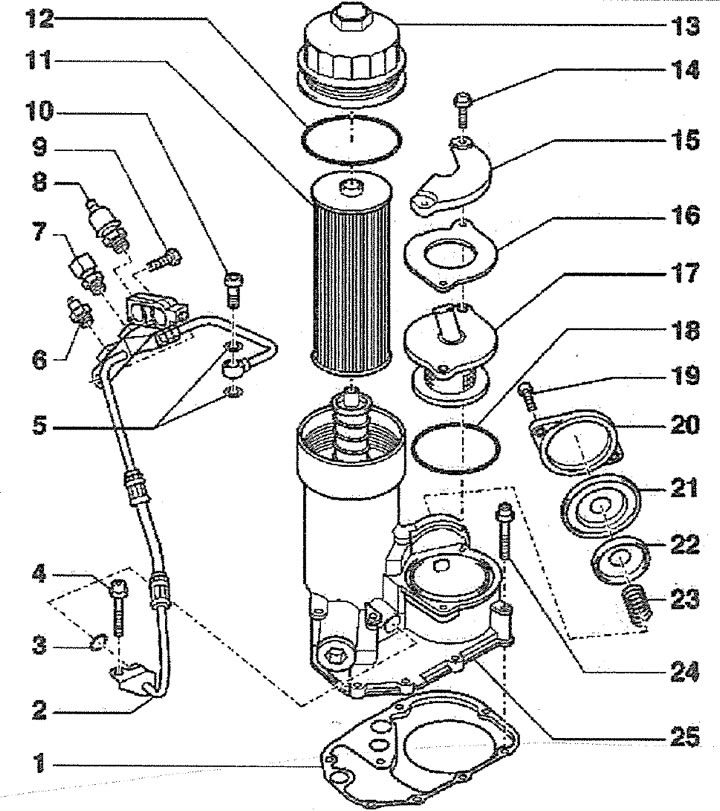
7.0a. Oil filter. Diesel vehicles:
1 - sealing gasket. To be replaced after each dismantling
2 - turbocharger oil supply line
3 - sealing ring. To be replaced after each dismantling
4 - bolt. Tightening torque - 10 Nm
5 - sealing gaskets. To be replaced after each dismantling
6 - threaded plug. Tightening torque - 15 Nm. The plug sealing gasket must be replaced after each dismantling
7 - transmission oil temperature sensor. Tightening torque - 15 Nm
8 - Engine oil pressure sensor. Tightening torque - 25 Nm
9 - bolt. Tightening torque - 22 Nm
10 - hollow bolt. Tightening torque - 15 Nm
11 - Replaceable filter element of the oil filter
12 - sealing ring. To be replaced after each dismantling
13 - Oil filter cover. Tightening torque - 25 Nm
14 - bolt. Tightening torque - 10 Nm
15 - heat shield
16 - retaining ring (if provided)
17 - connecting pipe of crankcase ventilation hose with oil separator
18 - sealing gasket. To be replaced after each dismantling
19 - bolt. Tightening torque - 10 Nm
20 - pressure reducing valve cover
21 - pressure reducing valve membrane
22 - pressure reducing valve pressure plate
23 - pressure reducing valve spring
24 - bolt. Tightening torque - 10 Nm (tighten bolts in a cross pattern)
25 - oil pump bracket
Removal
1. Remove the intake manifold (see the relevant chapter).
2. Drain the engine oil (see the relevant chapter).
3. Cars with a 4.2L petrol engine: Unscrew the oil filter cap (see arrow in illustration).
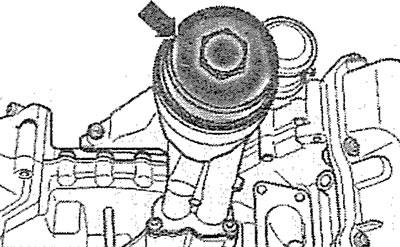
7.3 Unscrew the oil filter cap (see arrow). Cars with a 4.2L petrol engine
4. Diesel vehicles: Unscrew the oil filter cap (see arrow in illustration), using a special key.
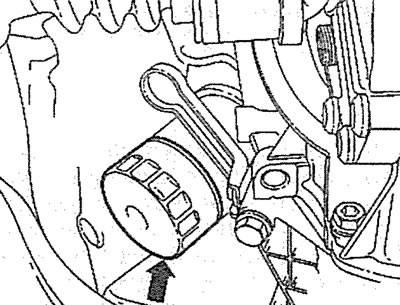
7.4. Unscrew the oil filter cap (see arrow), using a special key. Cars with a diesel engine
5. Wrap the oil filter housing with a rag to collect any remaining oil.
6. Cars with a 4.2L petrol engine. Remove the bolts (see arrows in the illustration) fasteners and remove the oil filter housing.
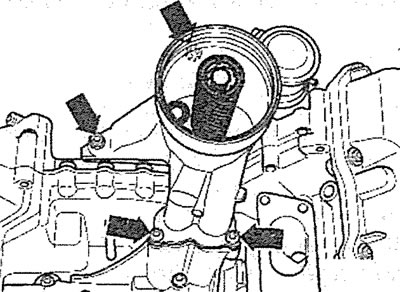
7.S. Unscrew the bolts (see arrows) fasteners and remove the oil filter housing. Cars with a 4.2 L petrol engine
7. Replace the replaceable filter element 3 and sealing ring 2 (see illustration).
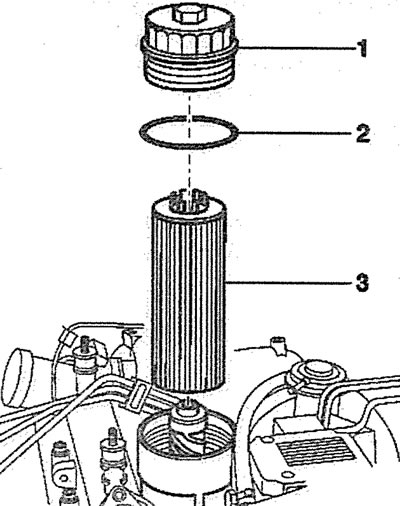
7.7. Replace the replaceable filter element 3 and sealing ring 2
The oil filter is installed in the reverse order of removal.
Visual inspection of tightness and oil leaks
If the engine is contaminated with oil, or if oil consumption is high, determine where it is leaking. To do this, inspect the following places:
8. Open the oil filler cap and check the gasket for porosity and damage.
9. Check the crankcase ventilation hose, especially the section between the cylinder head cover and the air filter.
10. Check the cylinder head gasket.
11. Check the sealing ring of the oil drain plug.
12. Check the oil filter gasket, which is located between the filter and the filter mounting flange.
13. Check the oil pan gasket.
14. Check the camshaft and crankshaft seals.
Since the leak usually spreads oil over a large surface area of the engine, it can be difficult to determine the leak location at first glance. The following search method is recommended:
15. Wash the engine. To do this, spray the engine with an aerosol cleaner and, after letting it work, rinse with water. Before doing this, cover the generator and fuse box with a plastic bag.
16. Sprinkle the outside of the connecting joints and their gaskets with lime or talc.
17. Check the oil level and top up if necessary.
18. Take a test drive. Since the oil liquefies when the engine is hot and therefore leaks faster, it is best to take this drive on a highway, covering a distance of about 30 km.
19. Inspect the engine after the test drive, illuminating the inspected areas with a flashlight, and identify the oil leaks. Eliminate any faults found.
Read the original source on the website: AUDIMANUAL.RU