
Cardan shaft from the gearbox side
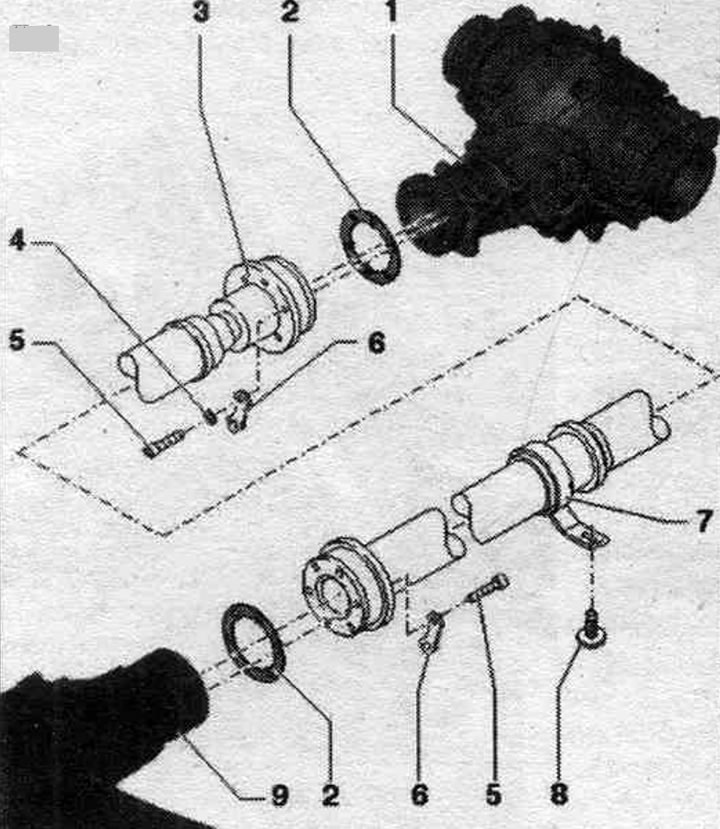
1. Rear main gear.
2. Gasket: replace damaged (bent) sealing ring; the seal whose rubber coating is coming off must be replaced; degrease the shaft with the flange and fit the gasket; the different colors of the sides do not matter during installation.
3. Cardan shaft.
4. Balancing disc: not available on all vehicles; it is probably located between the internal star screw and the balancing washer at the rear. main transmission; if present, this balancing disc must not be reinstalled after the propeller shaft has been removed from the rear. head of transmission.
5. Bolt: Always replaceable; self-locking; threaded holes for screws in flange shafts must always be cleaned (for example, using a tap); in reverse gear; at the gearbox: 30 Nm + 90°.
6. Sealing plate.
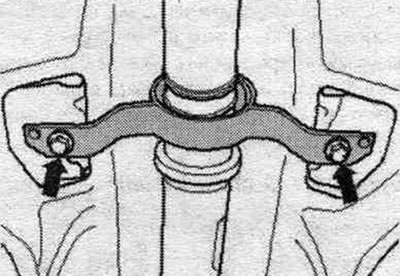
7. Intermediate support.
8. Bolt: 20 Nm.
9. KP.
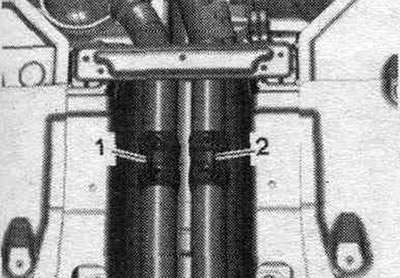
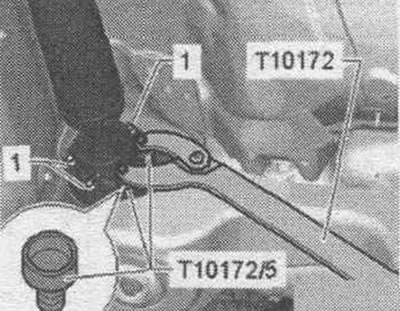
Tightening sequence and torque - propeller shaft and rear final drive
Always replace the propeller shaft bolts "1". Hold them against turning with the "T10172" counterhold and "T10172/5" adapters. Tighten bolts "1" in 3 stages.
Removal
Loosen the mounting bushings "1" and "2" and disconnect the system. exhaust system. Secure the front exhaust pipes to the side of the vehicle underbody. Remove the rear section of the system. exhaust gas release.
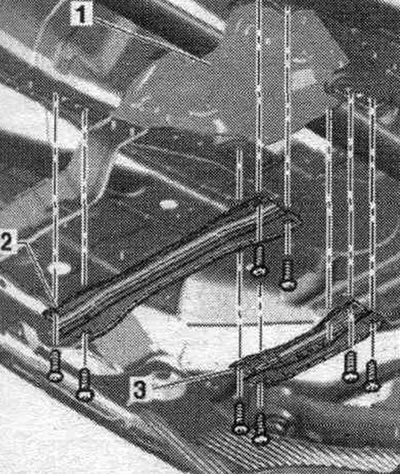
Remove crossmember "3". If present, remove front crossmember "2". Remove heat shield "1" from the Strelka vehicle body.
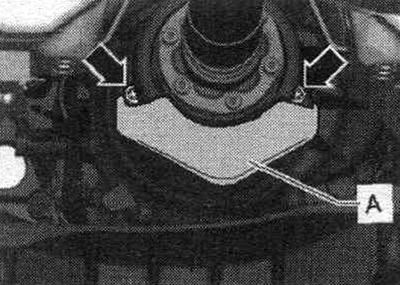
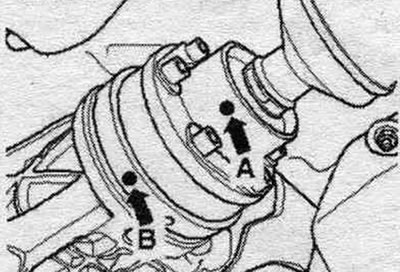
If present, remove heat shield "A" from the "arrow" gearbox.
Check if there is also pi on the driveshaft and on the flange/driveshaft at the rear. gl. transmission marking (colored dot) "Arrow A" and "Arrow B". If one of these marks is not visible (for example, "arrow A" on the driveshaft), mark the missing colored dot with paint. The mark on the driveshaft "arrow A" and the rear main gear "arrow B" must be located on the same line.
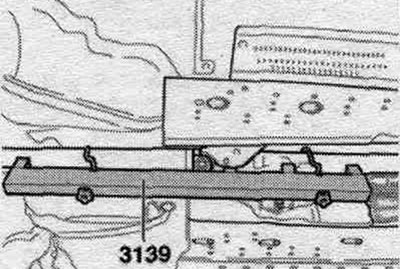
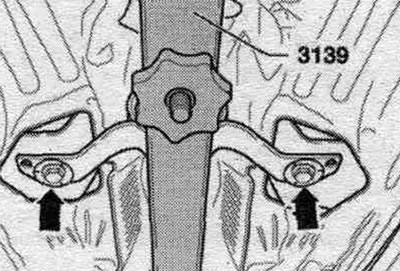
Install mont. device "3139" and tighten the plastic nuts. It is strictly forbidden to wear a mont. device for balancing plates.
Unscrew the "arrow" mounting screws for the intermediate support.
Loosen the bolts connecting the driveshaft to the gearbox, while holding it from turning using the T10172 and T10172/5 counter-supports. Remove the driveshaft from the gearbox and support it with a tilting jack.
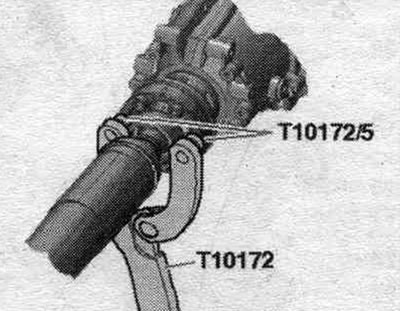
Remove the mounting bolts "1" (6 pieces) on the rear CV joint. Use the countersink "T10172" with the adapters "T10172/5". Remove the propeller shaft.
Installation
Installation in reverse order. Remove old and dry refractory grease from the CV joints and propeller shaft flanges. Fill with exactly the same volume of new high-temperature grease -G 000 633-. The threaded holes in the flange shafts for the transmission cardan shaft and rear main gear must be cleaned of any remaining locking agent. Cleaning can be done with a tap. Otherwise, the mounting bolts may break off when screwed in. After removing the propeller shaft from the rear. when installing the main transmission, additional equipment cannot be installed. balancing disc (thicker washer), which is located, possibly, between the balancing washer and the mounting screw. Always replace the driveshaft mounting bolts (self-locking). Check the seal of the cardan shaft on the rear flange. main transmission and on the gearbox flange for damage (bent, partially worn rubber layer). Replace the damaged seal. ring. Take into account the installation. position of the cardan shaft: CV joint/middle is located behind the intermediate support in the direction of the main shaft. rear gear. Install the propeller shaft, taking into account the installation. rear position. main gear: marks on the propeller shaft "arrow A" and rear main gear "arrow B" are located on the same line; maximum deviation of marks: 30°. Screw the bolts in by hand until they stop, but do not tighten them. Screw in the "arrow" mounting bolts until the intermediate support can still be moved.
Tighten the bolts "1" of the driveshaft at the rear, observing the tightening sequence. Tighten the bolts of the driveshaft at the front. Remove mounting tool "3139". Screw on the intermediate support of the propeller shaft without mech. stresses to the body. If present, secure heat shield "A" to the "arrow" gearbox. Install heat shield "1." If present, install front "2" and rear "3" crossmembers. Install sys. exhaust and align without tension.
This article was previously published on the resource AUDIMANUAL