
Table of contents: Removal ↓ Installation ↓
Removal
1. Disconnect the negative battery cable and move it away from the terminal - read the warnings in paragraph 1.
2. On AHL engines, remove the engine oil dipstick tube from the guide.
3. On AEB and AJL petrol engines, loosen the clamp and disconnect the intercooler air duct from the throttle body.
4. Remove the main accessory drive belt as described in Chapter 2A or 2B.
5. Remove the fan viscous coupling as described in chapter 3. It can be removed by inserting a hex key from behind, holding it still with a bolt inserted from behind and resting against the engine block.
Petrol engines
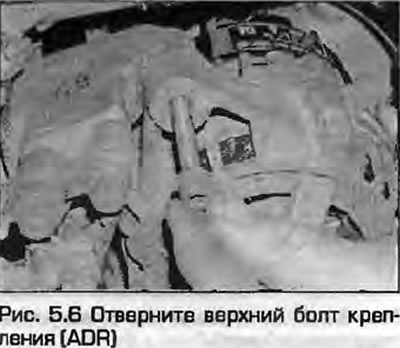
6. Unscrew the upper generator mounting bolt (Fig. 5.6).
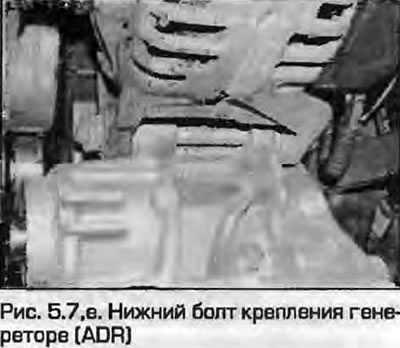
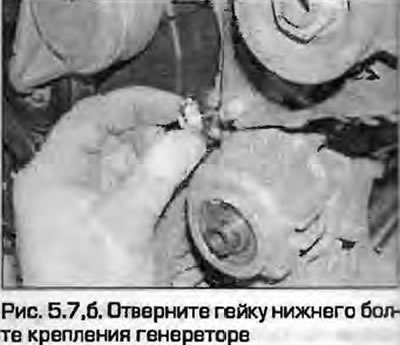
7. Loosen the nut of the lower generator mounting bolt, tilt the generator and remove the lower bolt by pushing it forward (fig. 5.7, a, b).
 |
 |
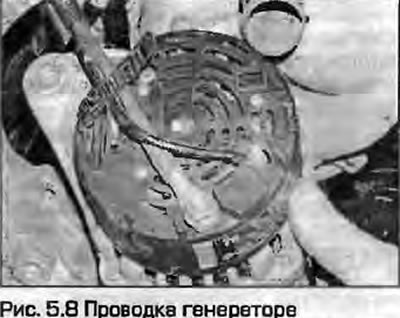
8. Carefully release the plastic clamp from the generator wiring (Fig. 5.8).
9. Loosen the nuts and disconnect the main wire and charge lamp wire from the rear of the generator.
10. On AHL engines, disconnect the wiring connector from the left headlight and remove the hydraulic fluid reservoir.
11. Move the cooling pipe to the side and remove the generator from the engine.
Diesel engines
12. Loosen the nuts and disconnect the main wire and charge lamp wire from the rear of the generator, then disconnect the wiring from the filter terminal.
13. Carefully release the plastic clamp from the generator wiring.
14. Supporting the generator, unscrew the mounting bolts.
15. Move the cooling pipe to the side and remove the generator from the engine.
Installation
16. Installation - reverse procedure. Install the main accessory drive belt - see chapter 2A or 2B. Tighten the generator mounting bolts to the specified torque.
(A link to the original source is available on the website AudiManual.ru)