
Table of contents: Removal ↓ Installation ↓
Removal
1. Disconnect the negative battery cable as described in paragraph 3.
2. Apply the handbrake, raise the front of the vehicle and install safety stands. Remove the lower protective cover from under the vehicle.
3. On models with air conditioning, remove the front panel of the body without disconnecting the radiator hoses and wiring. To do this, first remove the front bumper as described in chapter 11, disconnect the three quick-release fasteners of the noise-insulating panel, unscrew the bolts securing the air duct to the hood lock bracket and air filter. On the left side of the radiator, disconnect the wiring harness from the fasteners. Unscrew the bolts securing the hood lock bracket assembly at the bottom of the body, unscrew the upper bolts, which are located behind the headlights. With the help of an assistant, remove the entire front panel assembly and move it away from the car as far as possible. To hold the panel, Audi mechanics use special template brackets, however, you can make them from a rod by cutting threads on its ends. Screw these devices into the body side members. Note: Even on models without air conditioning, it is useful to remove the panel for better access.
4. On models with air conditioning, loosen the axle bolt and tensioner bolt, move the tensioner pulley up to relieve tension on the drive belt. Pull the belt off the crankshaft pulley, compressor pulley and tensioner. Remove the air conditioning compressor (see chapter 3). Move the compressor to the side and tie it up so it doesn't get in the way.
Warning: Do not disconnect the refrigerant pipes.
5. On AFN diesel engine only, remove the turbocharger support bracket on the right side of the engine. Loosen the nuts and remove the wiring harness from the starter.
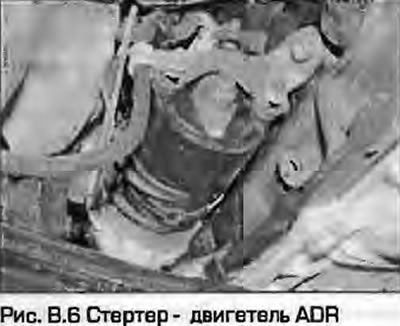
6. Unscrew the nut and disconnect the main wire from the starter terminal (Fig. 8.6).
7. Disconnect the power wire from the retractor relay.
8. On petrol engines, unscrew the bolt securing the starter bracket to the cylinder block.
9. Unscrew the nut and remove the wiring fastening to the motor bracket.
10. Unscrew the two remaining bolts securing the starter to the gearbox bell.
11. Lift the motor up and remove it forward from the hole in the bellhousing.
Installation
12. Installation - reverse procedure. Tighten the mounting bolts to the specified torque.
The original material is located on the website AudiManual