
Table of contents: Replacing the lambda probe ↓ Removal the air mass meter ↓ Removal injection valves ↓
Many injection system components do not require additional disassembly descriptions. Exceptions are described in the following sections.
Replacing the lambda probe
1. Disconnect the wire connector, loosen the wire clamp.
2. Before installation, lubricate the threads with assembly paste from the Audi workshop. The paste should not get on the splines of the probe.
3. The correct tightening torque for the lambda probe is 50 Nm.
Plug connectors at the rear left in the engine compartment

- 1 - knock sensor II (blue);
- 2 - heating and lambda probe signal (probe on the left; black);
- 3 - ignition coils (supply wire; white);
- 4 - ignition timing sensor (black);
- 5 - engine speed sensor (gray).
Plug connectors at the rear right in the engine compartment
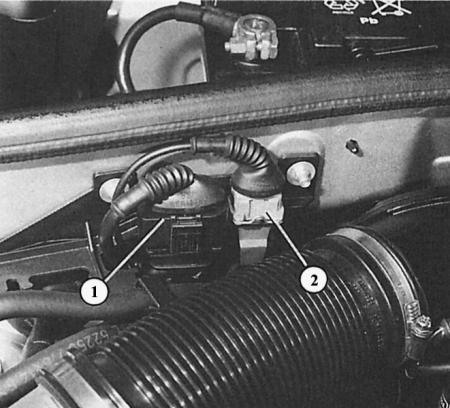
- 1 - heating and lambda probe signal (probe on the right; black);
- 2 - knock sensor I (blue).
Removal the air mass meter
1. Loosen the air intake hose clamp.
2. Disconnect the air mass meter connector.
3. Remove the upper part of the air filter housing with the air mass meter as described in Chapter Air filter and suction channels.
Removal injection valves
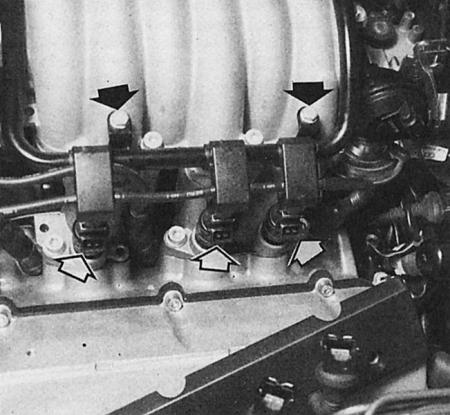
Injection valves (white arrows) can only be removed together with the fuel distribution pipe. To do this, loosen the mounting bolts of the distribution pipe (black arrows).
1. Remove the suction hose between the air filter (air mass meter) and the engine.
2. Disconnect and set aside the high voltage wires.
3. Disconnect the injection valve connectors.
4. Unscrew the fuel distribution pipe from the intake manifold on the engine.
5. Disconnect the vacuum hose from the fuel pressure regulator.
6. Remove the fuel distribution pipe with injection valves from the intake manifold on the engine.
7. To remove the individual injection valve, remove the retaining clip from the distribution pipe and pull out the valve.
8. Installation: Before installation, replace the O-rings on all injection valves.
9. Lubricate all O-rings with new engine oil.
10. Very carefully insert the injection valves one by one so that none of the O-rings are crushed or damaged.
The original article is available on the online resource AUDIMANUAL.RU