Execution order
1. Fill the expansion tank with fresh brake fluid and while bleeding, constantly monitor (!) the timely addition of fluid before its level drops. Otherwise, air will be sucked in again.
2. Sequence of actions: back right; back left; ahead on the right; ahead on the left.
3. Remove the dust cap from the bleed valve.
4. Put on the transparent hose (like from a windshield washer system) onto the wiped nipple and lower the free end of the hose into a container partially filled with brake fluid.
5. Have your assistant pump the brake pedal to create braking pressure.
6. Unscrew the bleed valve on the corresponding wheel by about 11/2 turns and release the pressure. At the same time, the assistant keeps his foot on the pedal and presses it.
7. Close the valve and pump up the pressure again.
8. Open the valve as well.
9. Repeat this process until no more air bubbles are visible in the hose. (If the hydraulic system is very empty, bleed it twice.) In this way, brake fluid is pumped through the valve, and, of course, air along with it.
10. If there are no more air bubbles, have your assistant hold the pedal at its lowest position while you close the bleed valve. Tighten it carefully, otherwise you will strip the threads.
11. Bleed the systems on the remaining wheel brakes in exactly the same way.
Tip: If the brake system does not bleed using the above method, despite repeated repetitions of this process (air bubbles are still visible), then you should close all the bleeding valves, start the engine and press the brake pedal several times. Then bleed the system again.
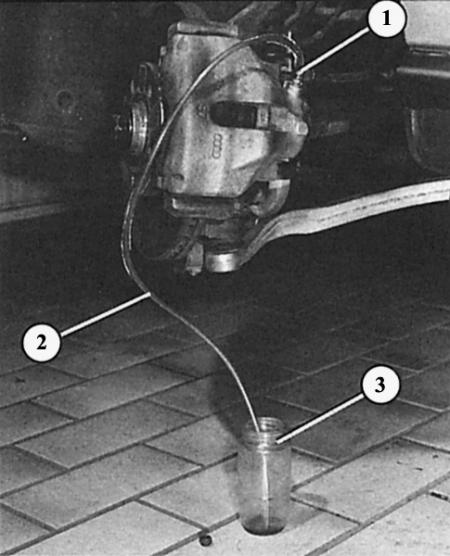
Bleeding the brakes on the front caliper. The bleeding valve (1) is opened with a SW 7 key. A transparent synthetic hose (2) is put on the valve and the pumped-out brake fluid is drained into a prepared container (3).
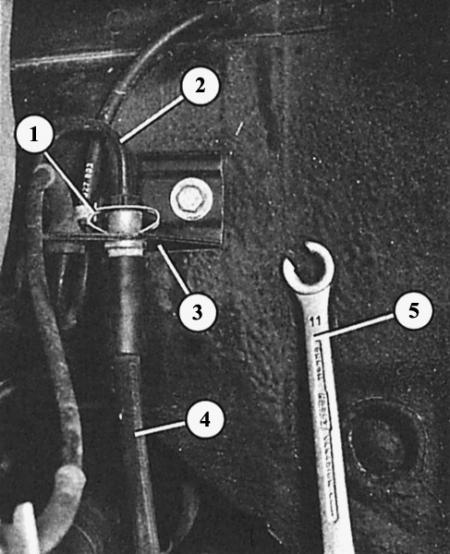
If the brake pipes (2) and brake hoses (4) are connected with metal brackets (3) to the chassis or to the body, then there must be a spring bracket for the hose (1). The following key (5) is suitable for disconnecting the brake pipes