



Table of contents: Flange and flywheel ↓ Removal and installation the driven… ↓
Flange and flywheel
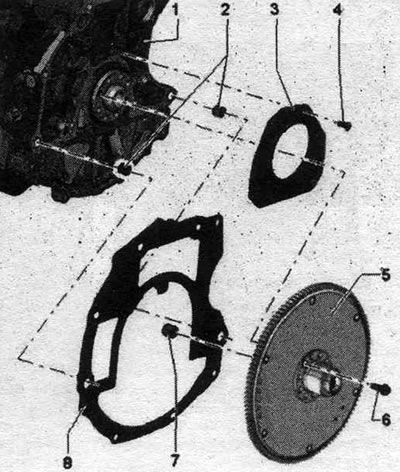
1. Cylinder block. 2. Centering bushings. 3. Sealing flange with lip seal: do not lubricate the working lip of the seal; before installation, remove any remaining oil from the crankshaft connecting rod journal with a clean rag. 4. Bolt: replace. 5. Driven disk. 6. Bolt: 60 Nm+90°; replace. 7. Needle bearing. 8. Intermediate shield: must be installed on mounting bushings; do not damage/bend during installation work; suspended from the flange.
Sealing flange on the gearbox side - sequential tightening
Tighten new bolts "1...6" in the specified order.
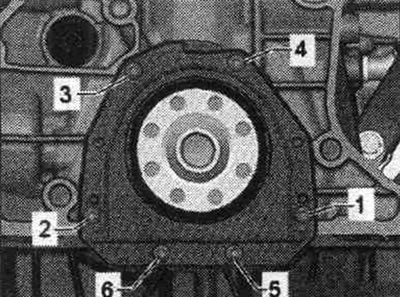
1. Tighten the bolts by hand. 2. Tighten the bolts to 4 Nm and tighten by 45°.
Note: Only 6 bolts are screwed in, leaving 2 threaded holes free.
Install the intermediate shield
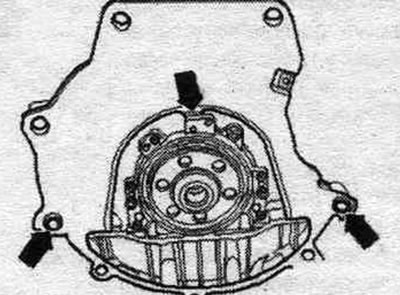
Hang the intermediate shield on the sealing flange and place it on the mounting bushings of the "arrow".
Removal and installation the driven disk
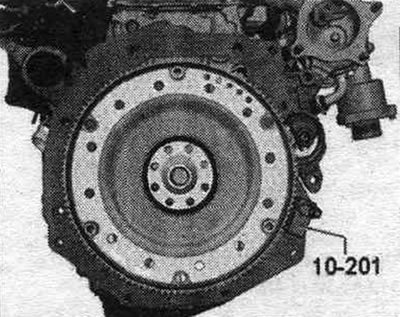
The gearbox has been removed. Use the "10-201" counterstop to remove the bolts. Risk of damage to the outer surface of the bearing flange on the driven disk. To loosen and tighten the driven disk mounting bolts, use a socket wrench (the length of the key handle is not less than 40 mm). Unscrew the bolts, remove the driven disk and the timing rotor.
Installation
Installation in reverse order. Replace the driven disk bolts. A needle bearing is installed in the driven disk of a car with a manual transmission. Before installing the disc, make sure the needle bearing is already installed. To secure the bolts, move the counter support "10-201".
The original version of the article is posted on the website AudiManual