



Table of contents: Removal and installation the… ↓ Removal and installation the… ↓ Sealing flange on the belt pulley… ↓
Removal and installation the vibration damper
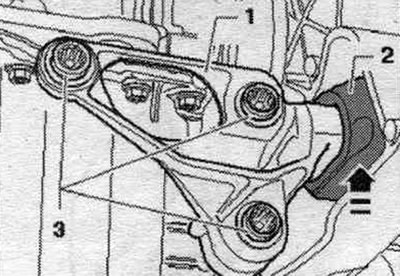
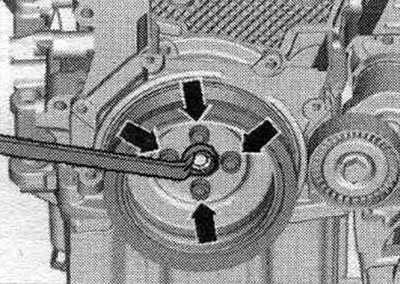
Remove the front sound insulation "1". On vehicles with a crossmember "3", move the lock mounting beam to the technical inspection position. On vehicles without crossmember "3", remove the radiator fan control unit "J293". Remove the poly V-belt. Remove the cap from the vibration damper. To loosen the driven disk bolts, use the bent open-end wrench "1" to hold the central bolt on the vibration damper.
Replace the vibration damper arrow bolts. Unscrew the bolts and remove the vibration damper.
Installation
Installation in reverse order. Replace bolts that were tightened with additional tightening.
Mounting position: The "arrow" hole in the vibration damper must be located above the protrusion on the crankshaft timing belt pulley.
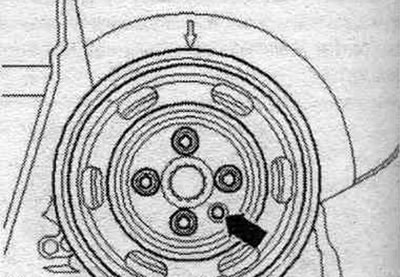
Install the radiator fan control unit "J293". Install the poly V-belt. Install the lock mounting beam.
Removal and installation the additional holder. units
Remove the generator. Remove the high pressure pump. Remove the 4/2-way valve. Remove the "arrow" bolt. Remove bolts "1" and "2" and remove the timing belt idler rollers.
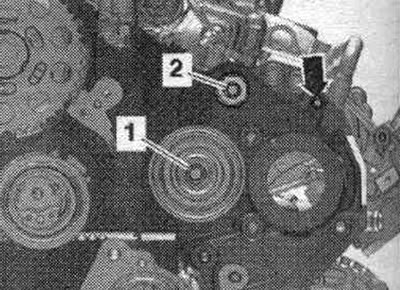
For reinstallation, mark the position of the poly V-belt pulley of the vane pump in relation to the hub "arrow".
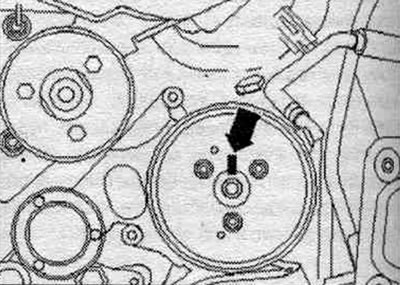
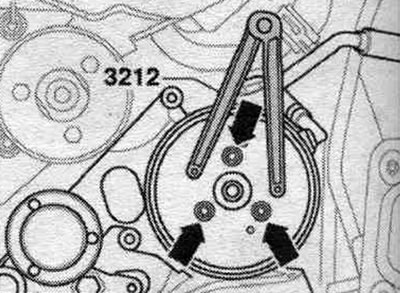
Unscrew the "arrow" bolts, using a 2-hole "3212" wrench as a support, and remove the poly V-belt pulley of the impeller pump.
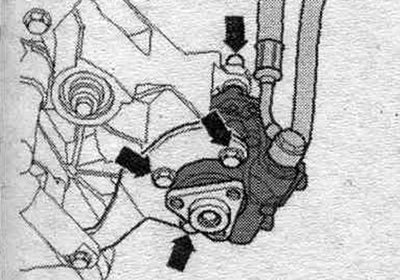
Unscrew the "arrow" bolts and tie up the vane pump with the connected hydraulics. highways to the side.
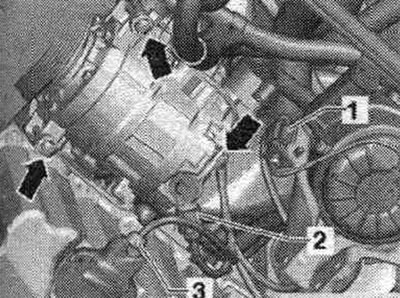
Disconnect plug connections "1" and "2" and release the electrical wires. Unscrew the compressor "arrow" bolts. Tie the compressor with the connected lines to the side. "Pos. 3" should not be taken into account.
Unscrew bolts "1...6" and remove the additional holder. units.
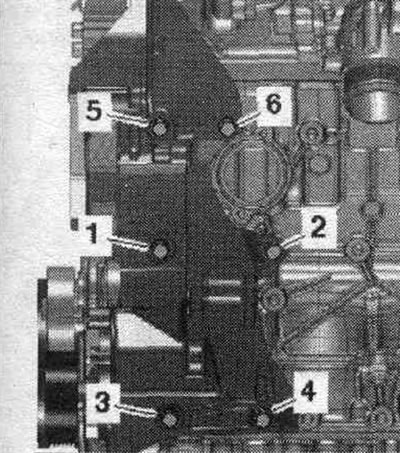
Installation
Installation in reverse order. Replace the bolts. which were tightened with additional turning. If on the top right between the additional holder. units and cylinder block are missing mounting bushings, insert mounting bushing. Tighten the bolts of the additional holder. units. Install the compressor. Install a vane pump. Install 4/2-way valve. Install a high pressure pump. Install the timing belt (adjust the timing phases). Install the generator.
Sealing flange on the belt pulley side
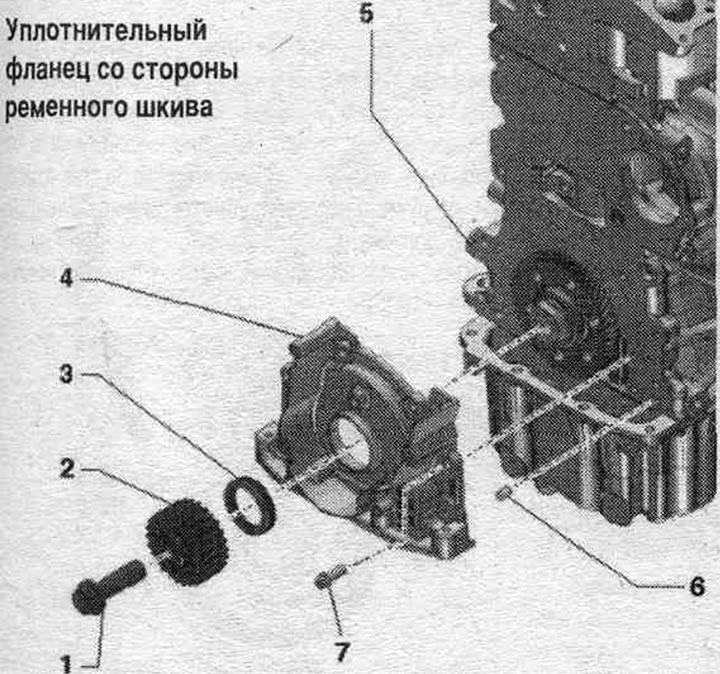
1. Bolt.
2. Crankshaft timing belt pulley: There should be no oil on the mating surfaces between the timing belt pulley and the crankshaft; installation is possible only in one position.
3. Shaft gasket: for the crankshaft on the belt pulley side; do not lubricate with oil.
4. Pulley side sealing flange: must fit onto the locating pins.
5. Cylinder block.
6. Mounting pin: 2 pcs.
7. Bolt.
Sealing flange on the pulley side - torque and sequence, tightening
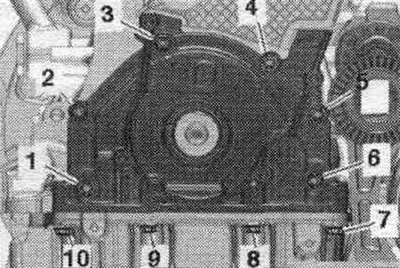
Tighten the bolts in 3 stages in the sequence shown.
| Stage | Bolts | Tightening torque |
| 1 | "1...10" | screw in by hand until it stops |
| 2 | "1...6" | tighten crosswise to 15 Nm |
| 3 | "7...10" | 15 Nm |
[Material republished from the website: AUDIMANUAL.RU]