



Table of contents: Poly V-belt drive ↓ Removal and installation a poly… ↓ Removal and installation the… ↓ Removal and installation the… ↓ Removal and installation additional… ↓
Poly V-belt drive
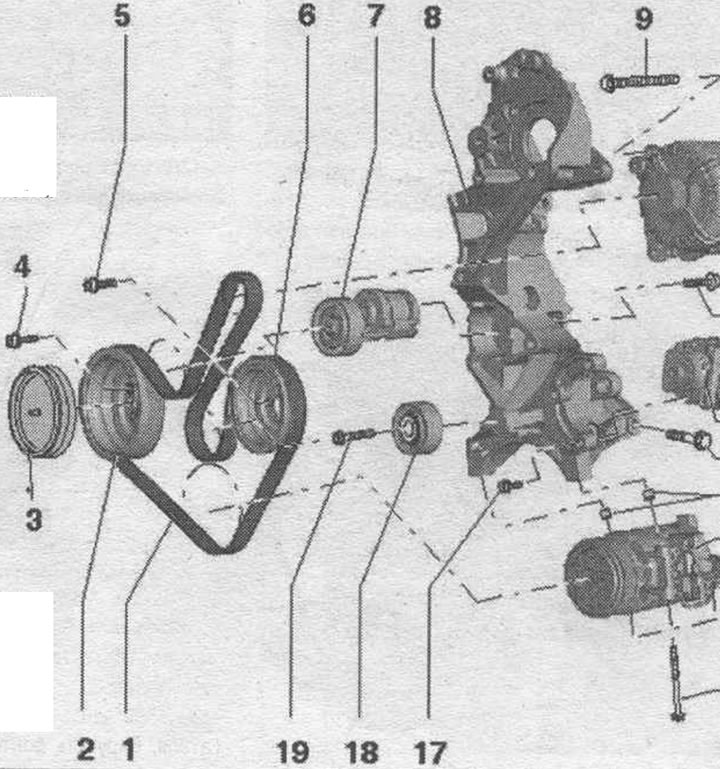
1. Poly V-belt: check the degree of wear; before removing, mark the direction of travel with chalk or a felt-tip pen; when installing, ensure correct position on the pulleys.
2. Torsional vibration damper with a poly V-belt pulley; installation is possible only in one position.
3. Torsional vibration damper cover.
4. Bolt: replace; 10 Nm + 90°.
5. Bolt.
6. Belt pulley of vane pump.
7. Poly V-belt tensioner: use the "T40098" clamp to secure it.
8. Additional bracket. units.
9. Bolt.
10. Three-phase generator.
11. Bolt: 20 Nm + 180°.
12. Vane pump.
13. Bolt: replace.
14. Guide bushing: ensure correct position in the holder.
15. Air conditioning compressor: do not loosen/disconnect the refrigerant lines; when installing, pay attention to the position of the mounting bushings.
16/17. Bolt.
18. Poly V-belt idler roller: install in the correct position.
19. Bolt: replace; 20 Nm + 90°.
Auxiliary bracket. units - sequence and bolt tightening torques
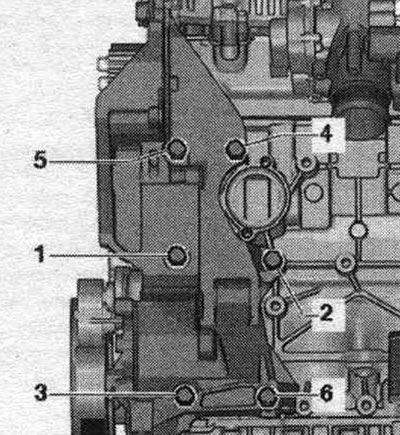
Replace the auxiliary bracket bolts. units and install them as follows; bolts "1, 5, 6" M10x60; bolt "2" M10x40; bolts "3, 4" M10x155. Tighten the auxiliary bracket bolts. units in sequence. "1...6" in 5 stages as follows.
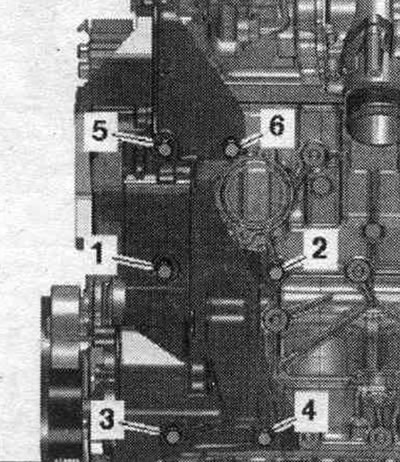
1. Screw all bolts in by hand until they stop. 2. Tighten all bolts to 40 Nm. 3. Tighten bolts "1" and "2" further by 60°. 4. Tighten bolts "3" and "4" further by 180°. 5. Tighten bolts "5" and "6" further by 60°.
Removal and installation a poly V-belt
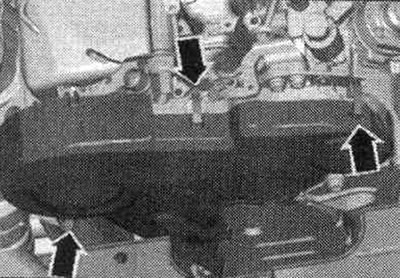
Remove the engine cover "arrows". Release the clips "arrows", remove the toothed belt protective cover.
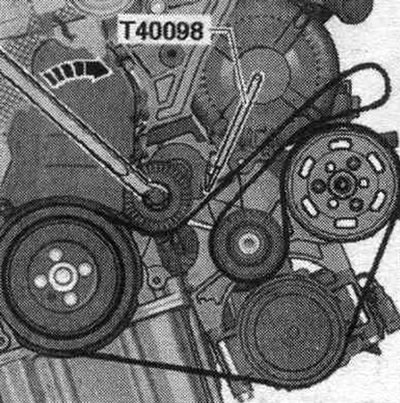
Turn the tensioner in the direction of the arrow, remove the poly V-belt from the alternator pulley, and secure the tensioner with the T40098 clamp. Remove the poly V-belt.
Installation
Installation in reverse order. Place the poly V-belt as shown in the figure.
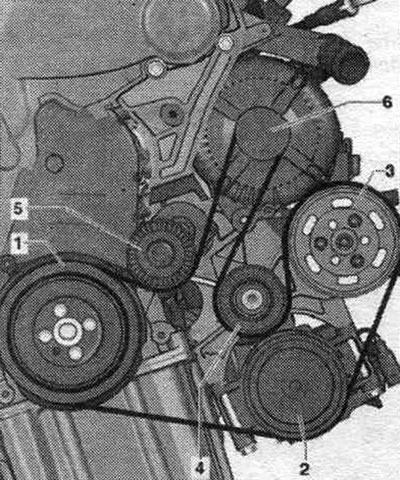
1. Torsional vibration damper. 2. Air conditioning compressor. 3. Vane pump pulley. 4. Roller. 5. Tensioner element of the poly V-belt. 6. Generator.
When installing a poly V-belt, it is necessary to ensure that it is positioned correctly on the pulleys. Start the engine and check the running of the poly V-belt.
Removal and installation the tensioner element of the poly V-belt
Remove the poly V-belt. Release the "arrow" hose clamps and remove the air duct hose.
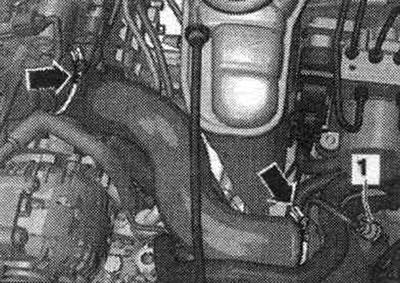
Unscrew bolt "1", remove tension element "2" of the poly V-belt.
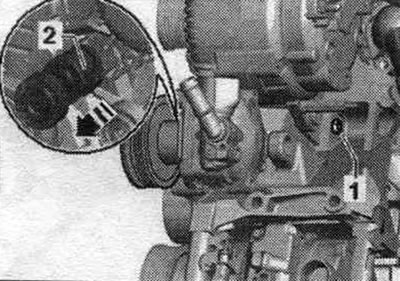
Installation in reverse order.
Removal and installation the torsional vibration damper
Remove front noise insulation "1".
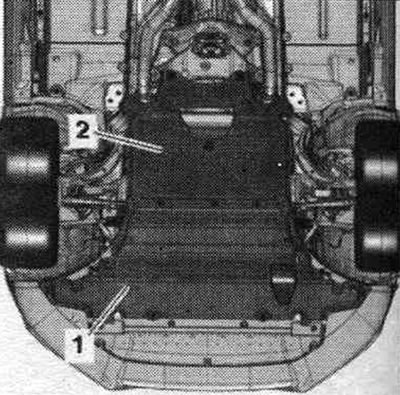
On a car with a "3" crossmember, bring the radiator frame to the service. position. On vehicles without crossmember "3", remove the radiator fan control unit "J293". Remove the poly V-belt. Remove the damper cover.
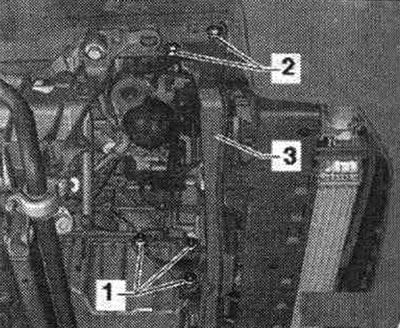
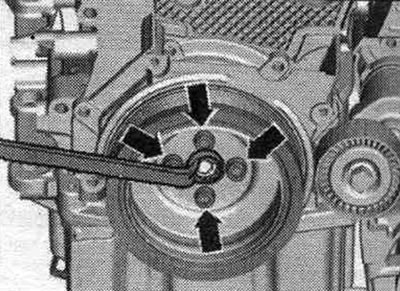
Unscrew the arrow bolts while holding the central bolt. Remove the vibration damper.
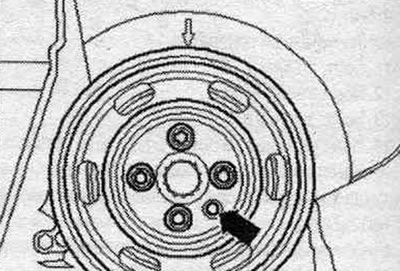
Installation
Installation in reverse order. Install the torsional vibration damper with new original bolts. Installation is possible in only one position: The "arrow" hole in the vibration damper must be located above the bulge of the toothed belt gear.
Sealing flange on the belt pulley side
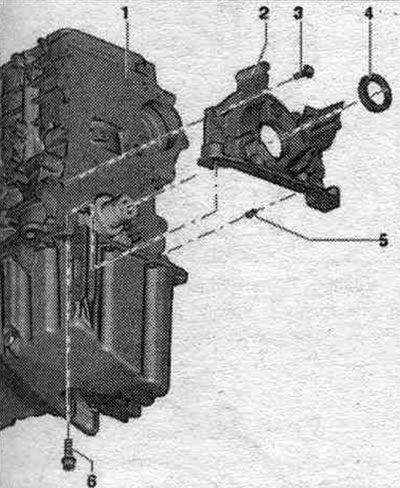
1. Engine block. 2. Sealing flange. 3. Bolt. 4. Lip seal. 5. Guide sleeve. 6. Bolt.
Aftereffects, tightening
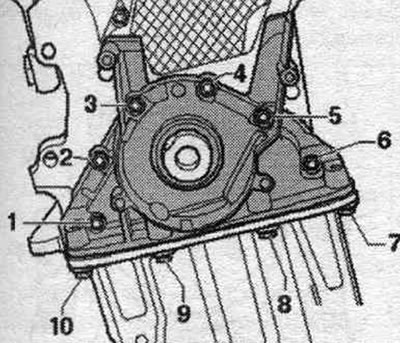
1. Screw the bolts in by hand in sequence. "1...10". 2. Tighten the bolts in sequence. "1...6" with a torque of 15 Nm. 3. Tighten the bolts in sequence. "7...10" with a torque of 15 Nm.
Removal and installation additional bracket. units
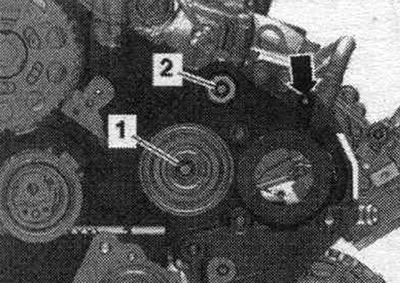
Remove the generator. Remove the high pressure pump. Drain the coolant. Unscrew the bolt "arrow". Loosen bolts "1" and "2", remove the timing belt idler pulleys.
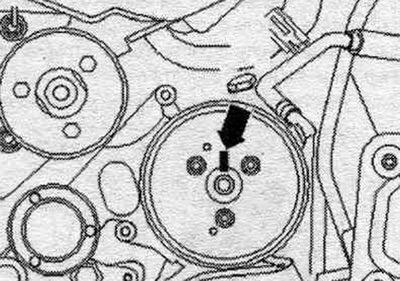
Mark the position of the belt pulley relative to the hub. To do this, apply the "arrow" mark.
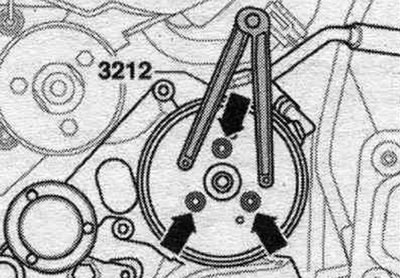
Loosen the "arrow" bolts. To do this, use a 2-hole "3212" wrench as a counterhold.
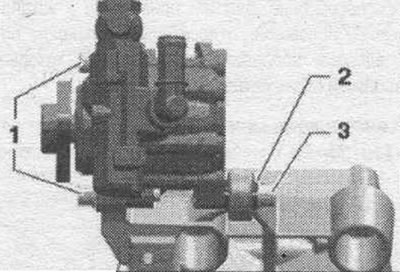
Unscrew bolts "1" (3 pcs.) and bolt "3". Secure the vane pump with the connected hydraulics. highways to the side. Remove the compressor from the additional bracket. units and secure them to the side.
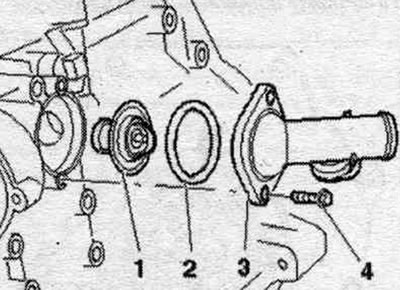
Loosen bolts "4" securing fitting "3" using a 10 mm "3185" swivel wrench, unscrew using the "T10058" attachment and remove fitting "3" with thermostat "1".
Unscrew bolts "1...6" and remove the additional bracket. units.
Installation
Installation in reverse order. Replace bolts that were tightened with additional tightening. If on the top right between the bracket add. if the fitted bushing is missing from the units and cylinder block, insert it. Tighten the additional bracket bolts. units. To install the vane pump, it is necessary to slightly move back the sleeve "2" of the bolt "3" in the bracket. Install a high pressure pump. Install the timing belt. Install the generator. Fill with coolant.
[The original text is available on the website: audimanual.ru]