
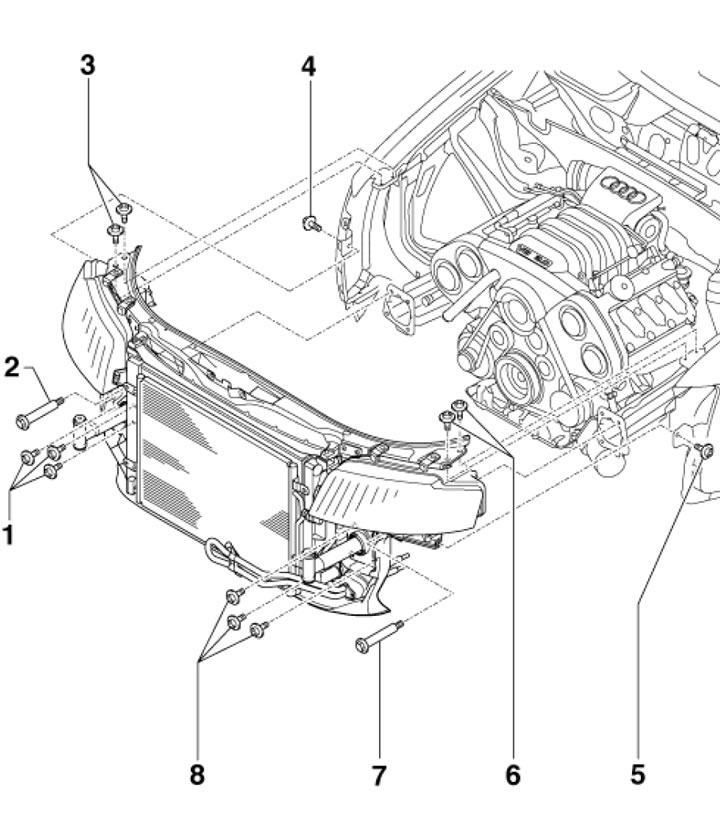
6.1. Radiator frame installation details 1, 8 Bumper buffer mounting bolts, 40 Nm; 2, 7 Tool No.3369 for service position, 10 Nm; 3, 6 Bolts and screws, 10 Nm
2. Remove the front wheels.
3. On models with independent/additional heating, remove the screw (1 in illustration 5.4) its exhaust pipe on a sound-insulating casing.
4. Unscrew the fasteners (1 and 2 in Illustration 5.5) and remove the front soundproofing screen.
5. Remove the front bumper cover (see Chapter 11).
6. Squeeze and remove the protective cover of the power steering fluid reservoir (see illustration 5.13).
7. Remove the connectors (1 and 2 in Illustration 5.16) from the bracket, disconnect them and put the wiring aside.
8. If there is a casing (1 in illustration 5.11) on the right side of the engine compartment, remove this cover.
9. Disconnect the EVAP valve solenoid connector (1 in illustration 5.12) and remove the electromagnetic valve. Unscrew the screws (arrows) and remove the air duct (2).
10. Remove the bolts on the left and right sides of the radiator frame (see illustration 5.19) and remove the engine compartment seal on the radiator frame and on the connecting edges of the wings.
11. Screw in fixture No.3369 (see illustration 5.20) into the free holes of both bumper buffers. Unscrew the bolts (arrows) securing the buffers and carefully pull the radiator frame forward.
12. Install the radiator frame in the reverse order. Tighten the bolts securing the thrust support to the radiator frame with a force of 28 Nm.
The text is based on materials from the website: audimanual.ru