
1. Place the front of the vehicle on jack stands and remove the wheels. Lock the brake discs by screwing in two wheel mounting bolts. In vehicles with a brake pad wear indicator, disconnect the detachable connection 1. To do this, slightly lift the locking tab at the bottom of the connector 2. then turn it 90'. Pull the bottom of the connector out of the holder.

Disconnect the connector 1 of the brake pad wear indicator
2. Turn the steering wheel to access the pads.
3. Remove the lower mounting screw from the brake caliper housing. While doing this, hold the guide pin.
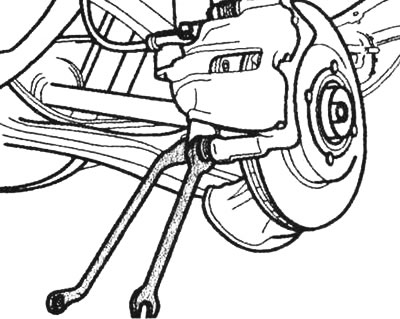
To rotate the brake caliper upward, unscrew the lower mounting screw
4. To remove the brake pads, turn the brake caliper upward.
5. Remove the brake pads. If you intend to reuse the pads, be sure to label them. If the old pads are not installed in the same place, this will cause uneven braking action.
6. If you are installing new pads, the piston must be pressed into the cylinder. If you do not have a special tool, you can use a clamp for this. Secure the piston with a piece of wood. Do not damage the cuff. Before pressing the piston, it is necessary to suck the brake fluid out of the reservoir using a siphon. Otherwise, when adding fluid, it may leak out and cause damage.
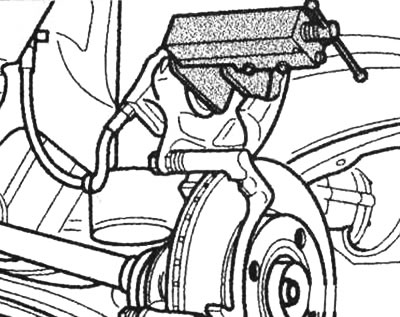
Before inserting new brake pads, the piston must be pressed back into the cylinder
7. The caliper body can only be cleaned with alcohol. Insert the brake pads, turn the caliper down and tighten the mounting screw to 30 Nm (the repair kit includes four self-locking hex head screws).
8. After completing the installation of the pads, press the brake pedal several times. This will ensure that the pads are in the correct position. After this, check the fluid level in the expansion tank.