
Table of contents: Removal the wheel arch liners ↓ Removal the wing ↓
Front Fender Fastener Locations (6)
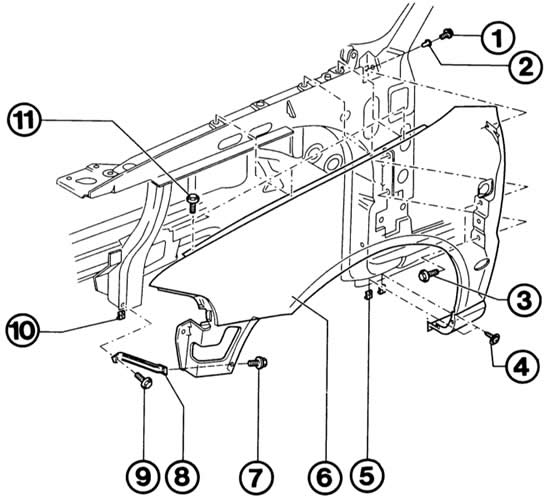
- 1, 3, 7, 9, 11 - hexagon head threaded bolts;
- 2 - threaded rivet;
- 4 - Phillips head self-tapping screw;
- 5, 10 - sheet metal nut;
- 8 - bracket.
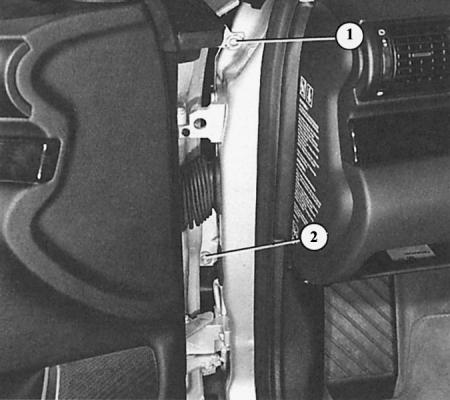
The illustration shows two wing mounting bolts (1 and 2) that are accessible with the front door open.
The front wings unscrew. On the contrary, the rear side parts are firmly welded - there is no scope for amateur activity.
Removal the wheel arch liners
1. Remove the appropriate front wheel.
2. Hang the side of the bumper from the bracket on the wing. To do this, press the bumper down to the height of the bracket and simultaneously pull it away from the body.
3. Loosen all wheel arch liner mounting screws.
4. Turn the quick release fastener to the lower engine cover 90° to the left.
5. Remove the wheel arch liner from the spacer pins and press it inward away from the wheel opening.
6. When installing, tighten the screws gently, otherwise the threads in the plastic will be stripped!
Removal the wing
1. Remove the wheel arch liner.
2. Remove the bumper.
3. Remove the turn signal.
4. Unscrew one Phillips-head screw or TORX bolt from the front and two from the back along the lower edge of the wing.
5. Unscrew the bolt under the cutout for the turn signal, the second one in front in the cutout for the wheel.
6. Unscrew the trim at the rear of the wheel arch (closing part). To do this, loosen the two bolts.
7. Now both bolts on the metal mounting crossbar at the rear of the wing are accessible – unscrew them.
8. Open the front door – unscrew the bolt above the hinges.
9. Remove the hex bolts along the top edge of the wing.
10. Remove the wing.
11. When installing, adjust the gap in relation to the hood with the upper wing mounting bolts still loose. It should be approximately 3.0 mm.
This article was copied from an online resource: AUDIMANUAL.ru