Table of contents: Examination ↓ Removal ↓
Examination
The interior blower fan has four rotation speeds, set using the rotary switch for blowing and heating the interior. The rotation speed is provided by the corresponding resistance (resistor). The resistors are connected to the "ground" (-) circuit of the fan motor. This means that the positive charge supplied to the motor remains unchanged.
If the cabin fan is noisy when operating at low speed, first check the corresponding resistance. If, despite the correct resistance, the windshield wipers do not work, the problem is caused by a defect in terminal X of the unloader relay.
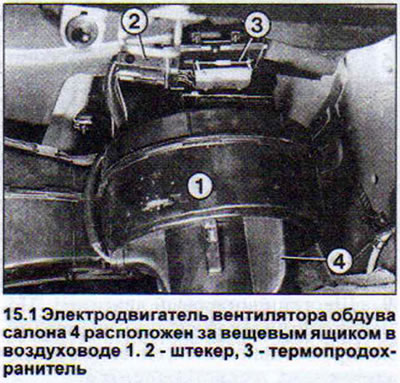
1. Open the glove compartment lid. Press the lid stops slightly inward and lift them up. This will allow the glove compartment lid to open completely and provide access to the electric fan for blowing air into the passenger compartment (see illustration).
2. Disconnect the two-pole plug of the fan motor and connect two auxiliary wires to the connecting contacts. One wire from the positive pole of the battery to the contact that was connected to the wire with black and blue insulation, and the second from the negative pole to the contact that closes to the wire with brown and red insulation.
If the blower fan motor is working properly, the fan will spin at full power. If it does not, replace the fan.
If the interior ventilation fan does not rotate at all speed levels, the cause may be a defect in one of the resistors.
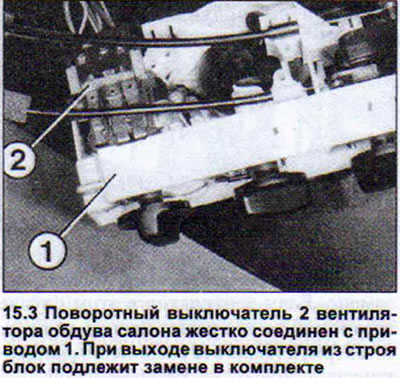
3. Remove the board with the resistors and visually check their condition. If one of the resistors has burned out, replace the board completely. If the resistance is normal, then the power supply wire may be broken, as well as the rotary switch on the control panel may be defective. In this case, the control unit must be replaced as a set (see illustration).
Removal
The fan electric motor can only be removed as a set together with the impeller.
4. Remove the glove box. The fan motor is inserted into the air duct from the bottom up.
5. Use a screwdriver to press the locking pin on the engine housing.
6. Turn the motor housing in the air duct to the right (clockwise) and remove it from the air duct.
7. Clean the air duct from any leaves, etc. If you notice additional resistance, remove the glove box.
8. Remove the Phillips-head screw that secures the resistance plate.
9. Press the retaining clip down and remove the board.
When installing, make sure the board is tightly seated in place. If necessary, seal with sealing compound.
AUDI recommends changing the dust filter, which is standard since 8/92, every 30,000 km.
10. Remove the soundproofing gasket from the rear of the engine compartment.
11. Unscrew the rotary lever of the protective cover between the engine compartment and the windshield.
12. Remove the cover.
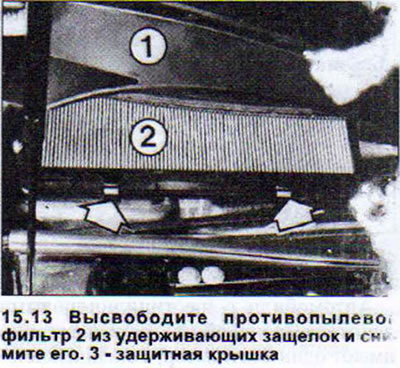
13. Release the dust filter from the retaining clips and remove it (see illustration).