



Table of contents: Removal ↓ Installation ↓
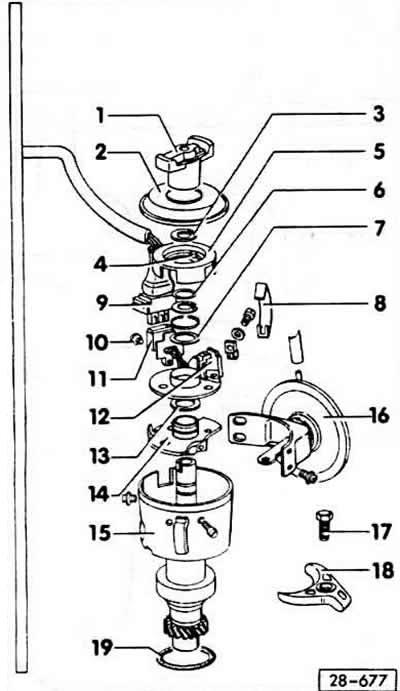
1 - distributor runner
2 - anther
3 - lock washer
4 - pin
5 - rotor plate screen
6 - spring washers
7 - washer
8 - bracket
Do not install with the dust cover removed, as this may damage the rotor screen plates.
9 - connection plug.
When connecting and disconnecting, the ignition must be off
10 - holder head
11 - socket connector
12 - Hall sensor, lightly lubricate the supporting surfaces.
13 - washer
14 - main board
15 - ignition distributor
16 - membrane mechanism of the vacuum regulator of ignition advance
17 - clamp bolt, 25 Nm
The figure shows the ignition distributor of the TSZ-H system.
18 - holder
19 - seal
Complete removal of the ignition distributor is only necessary for major repairs.
Removal
Disconnect the battery ground cable.
Setting the engine to TDC of the piston of the first cylinder
Set the gearbox to neutral and apply the handbrake.
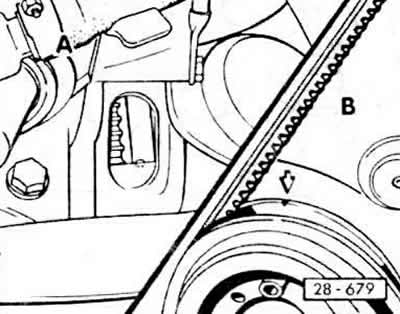
Using the SW 19 change head, turn the crankshaft clockwise by the central pulley bolt until the notch on the pulley aligns with the arrow on the toothed belt cover "B". At the same time, the "O" mark on the flywheel in the clutch housing aligns with the reference edge "A".
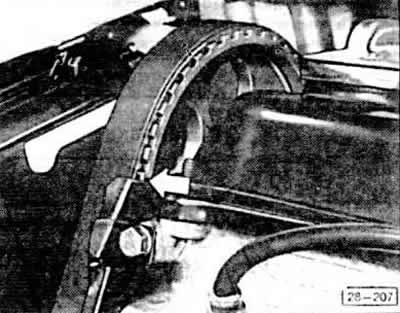
Attention: Depending on the model, you may need a longer replacement head, such as the HAZET880TZ-19 with a 3/8-inch drive, to turn the engine.
Check that the mark on the camshaft gear matches the top edge of the cover, otherwise turn the crankshaft one revolution. To do this, engage 4th or 5th gear and move the car. or lift the front of the car, put it on trestles and turn the front wheel with the gear engaged.
Engine 90, 115 hp, designations RM (from 8.90), AAD
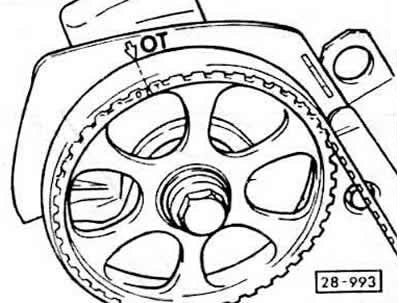
Check that the mark on the camshaft gear matches the arrow on the toothed belt cover, on top, otherwise turn the crankshaft one revolution. To do this, engage 4th or 5th gear and move the car, or lift the front of the car, put jacks under it and turn the front wheel with the gear engaged.
Disconnect the ignition cable from the distributor or remove the distributor cover by prying the mounting bracket from the side with a screwdriver.
Disconnect the hose from the vacuum regulator membrane mechanism on the distributor.
Loosen the clamp bolt on the distributor base, remove the holder and take out the distributor.
Caution: Do not change the position of the engine crankshaft when the distributor is removed.
Installation
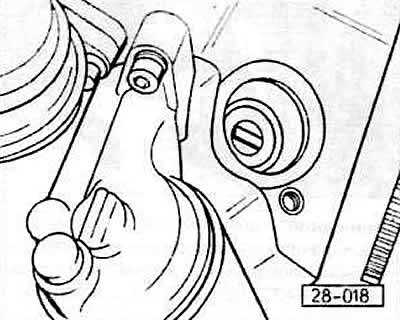
Before installation, check that the crankshaft is in the TDC position of the piston of the 1st cylinder. This means that the marks on the crankshaft pulley must coincide at the same time (serif and arrow) or on the flywheel ("O" and reference edge) and camshaft gear (serif and edge).
Place the oil pump shaft journal into the distributor hole parallel to the crankshaft (longitudinal axis of the engine).
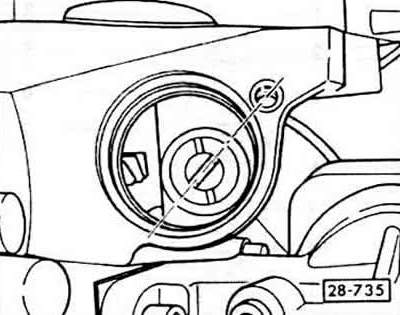
Engine 90, designations RM (from 8.90)
As shown in the figure, the spline of the oil pump journal should be aligned with the adjacent threaded hole.
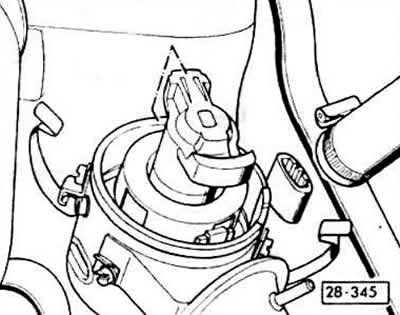
Install the distributor runner so that the mark on the tongue is above the mark on the edge of the distributor housing. The boot must be removed for this.
Insert the distributor in this position. Secure the holders with the clamping bolt. Do not forget the seal.
Remove the distributor runner, put the boot on and put the runner back in. Check that the runner is locked by gently rotating it back and forth.
Clean the inside of the distributor cap.
Place the hose on the diaphragm mechanism.
Connect the battery ground cable.
Adjust the ignition timing.
The original article is located on the online resource: AUDIMANUAL.ru