



Turn off the ignition and leave it off for at least 20 seconds.
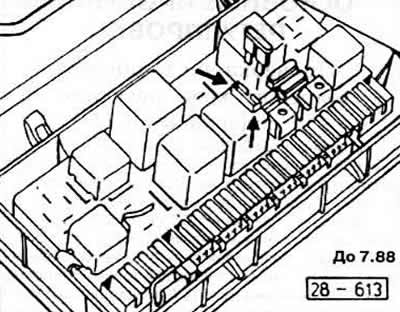
Short-circuit the contacts on the fuel pump relay with a spare fuse.
Connect the voltage indicator to the diagnostic connector "A" (black) and "B" as shown in the figure (brown). The diagnostic connector is located in a recess under the shelf in the driver's footwell.
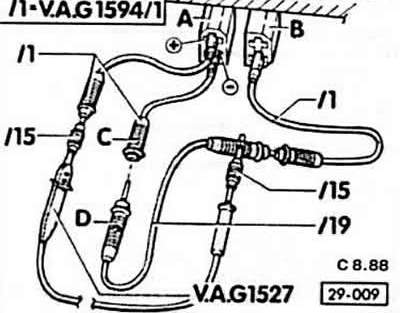
Connect plugs "C" and "D".
Start the engine and let it idle.
After waiting 4 seconds, remove the fuse or disconnect plugs "C" and "D".
Warm up the lambda probe. To do this, increase the speed from 2000 to 3500 rpm for 1 minute.
Attention: At the speed over 4000 rpm the indicator module switches off. Stop the engine and, having inserted the fuse back, activate the module.
While the engine is idling, take readings from the indicator (up to 7.88 from the instrument panel). If the LED (malfunction lamp) blinks 3 times in 2 seconds, which means the CO content is in the permissible range of lambda adjustment. To check the value, despite the correct signals of the lamp, check the lambda adjustment.
If the LED is constantly on, the cold mixture is too rich.
If the LED does not light, the cold mixture is too lean or the LED (bulb) is faulty.
If the LED (light) flashes 25 times per second, the lambda probe is not warmed up, the lambda probe cable is faulty or broken, or the plug connection is disconnected.
The original article is available on the online resource Audimanual.ru