
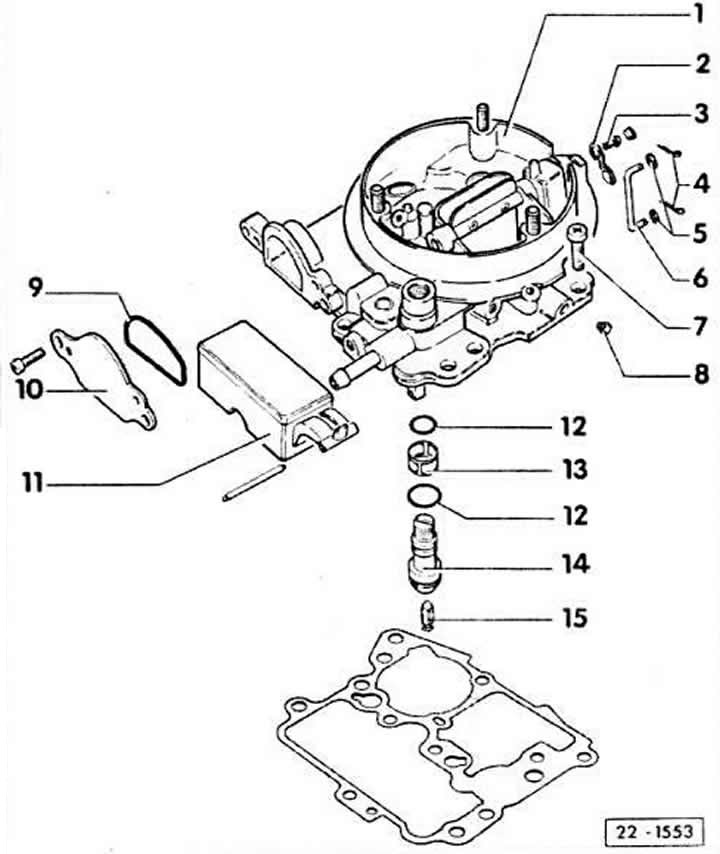
1 - upper part of the carburetor
2 - air damper lever
3 - bolt
4 - cotter pin
5 - washer
6 - connecting rod
7 - fastening bolt, 5 Nm. Coat the bolts with protective agent D6 and tighten evenly
8 - air filter
9 - gasket
10 - lid
11 - float
12 - sealing ring
13 - grid
14 - float needle seat. Cover with protective varnish
15 - needle. Connect to float before installation
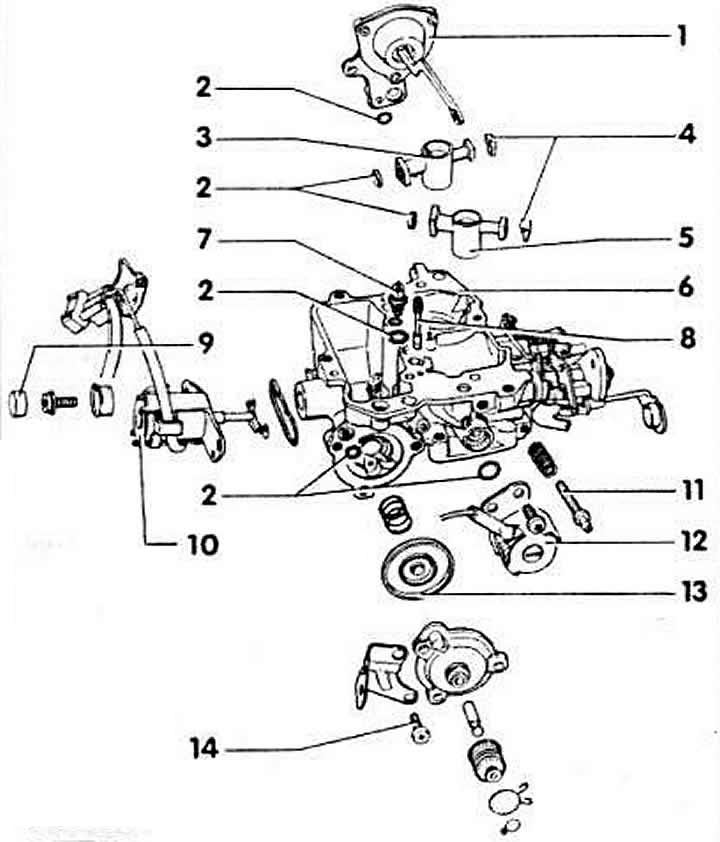
1 - air damper opening diaphragm device
2 - sealing ring
3 - sprayer of the ll-th chamber. Attention: Do not mix up sprayers of the 1st and 2nd chambers
4 - latches
5 - 1st chamber atomizer
6 - lower part of the carburetor
7 - Full Power Enrichment Valve
8 - idle system mixing pipe
9 - seal. When the electromagnetic valve is removed, it is destroyed.
10 - electromagnetic valve. To turn off the main jet channel. Installed only on 1.8 l engines. Should click when turning the ignition on and off.
11 - idle speed adjusting screw
12 - idle speed control valve. Should click when turning the ignition on and off.
13 - accelerator pump membrane
14 - bolt. Cover with protective agent D6.
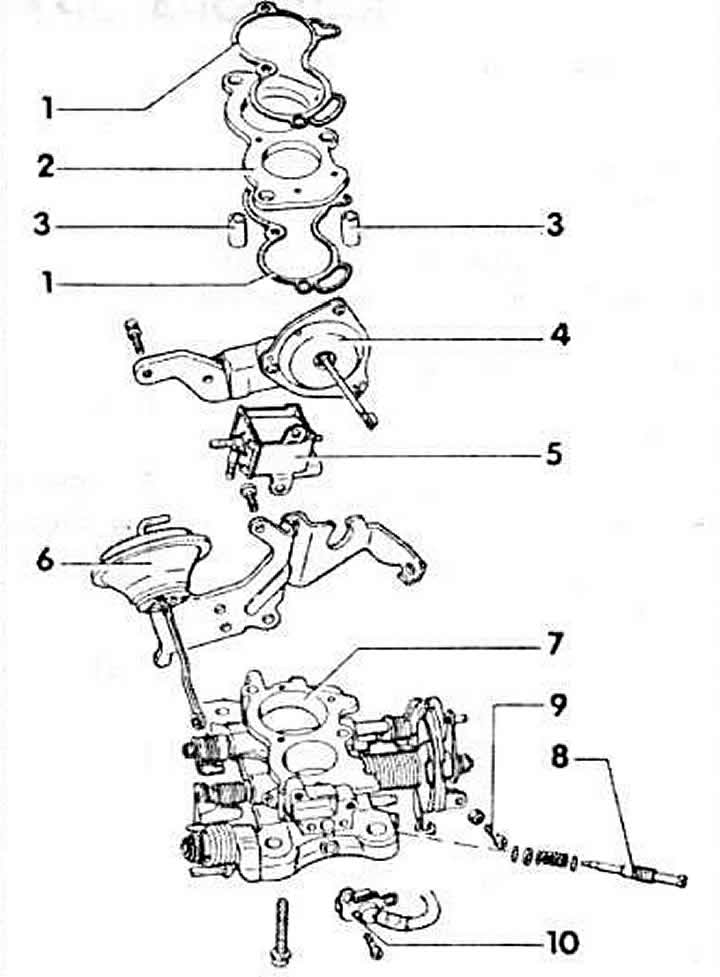
1 - gasket
2 - intermediate flange
3 - guide bushing
4 - throttle control device For manual transmission - to increase the feed; For automatic transmission - to increase the idle speed.
5 - control valve For manual transmission - to increase the feed. For automatic transmission - to increase the idle speed.
6 - vacuum device for controlling the throttle of the ll-th chamber
7 - throttle body
8 - CO adjustment screw
9 - adjusting bolt. For manual transmission - to increase the feed. For automatic transmission - to increase the idle speed
10 - medium load channel heating
Removal and installation the carburetor
Removal
Disconnect the ground cable from the battery.
Remove the air filter.
Mark and disconnect the carburetor vacuum hoses. Tape and disconnect the idle air cut-off valve and intake manifold heater wires.
Pull the gas drive upwards from the support, do not disconnect the protection. Otherwise, you will have to adjust the gas drive during installation. Remove the bracket from the semicircle segment and disconnect the gas drive.
Disconnect the air damper drive.
Remove the fuel hose from the carburetor and plug it with plugs, for example, bolts of a suitable diameter.
Keihin-I carburetor: Remove 4 hexagonal carburetor mounting bolts.
Keihin-il carburetor: unscrew the 4 fastening nuts on the base and remove it together with the bolts.
Remove the carburetor. Cover the intake manifolds with a clean cloth
Installation
If the carburetor flange has been removed, tighten it to 13 Nm and, depending on the version, bend the locking plate. Install the carburetor.
Keihin-I carburetor: carefully tighten the bolts to 7 Nm.
Keihin-ll carburetor: tighten the nuts to 20 Nm.
Install the vacuum hoses according to the marks.
Put on the fuel hose and secure it with a clamp.
Connect the vacuum damper drive and adjust.
Attach the carburetor drive, insert the bracket into the semicircular segment. Insert the drive into the support.
Connect the electrical wires in accordance with the marks applied.
Install the air filter.
Connect the ground cable to the battery. Check idle speed, adjust if necessary.