



Table of contents: Removal ↓ Installation ↓
Removal
Loosen the wheel bolts, raise the front of the car, remove the wheels.
Note: If the same pads are to be installed, they must be marked. Reversing the pads from inside to outside and vice versa or from right to right or vice versa is not allowed.
Caution: Reversing may cause uneven braking. It is recommended to use genuine VW/AUDI pads. It is essential to replace all front pads at the same time, even if only one pad has reached the wear limit.
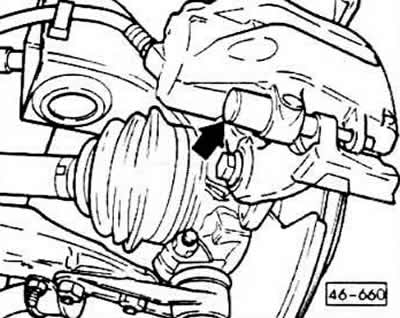
Remove the cap.
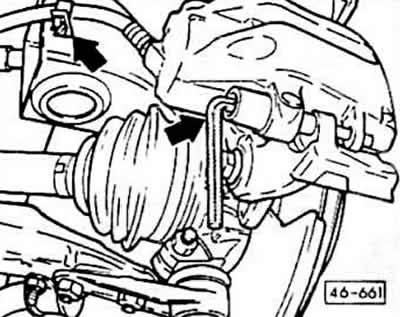
Unscrew the lower guide pin with a SW7 key.
Open the brake hose holder on the steering knuckle.
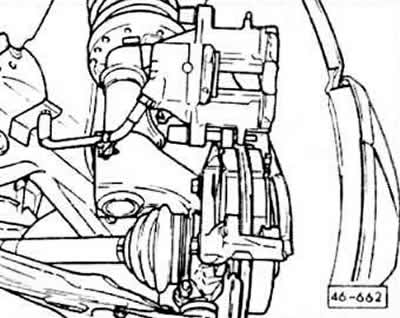
Rotate the brake caliper upward and secure it.
Remove the brake pads.
Installation
Caution: When the pads are removed, do not press the brake pedal, otherwise the pistons will come out of the housing.
Clean the guide surfaces and the seat of the pads in the housing well with a suitable soft metal brush or wash with a cloth soaked in alcohol. Do not use any solvents containing mineral oils or sharp tools.
Before installing the pads, check the brake disc for grooves with your fingers. If necessary, disc brakes can be ground down (work in the workshop), if they are thick enough.
Measure the thickness of the brake discs.
Check the piston dust boot for ruptures. Replace a damaged dust boot immediately, as penetrating dirt will quickly cause the caliper to lose its tightness. This requires disassembling the caliper (work in the workshop).
Check the fit of the heat shield in the piston.
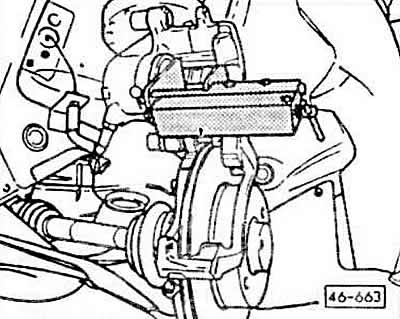
Press the piston down with a special return device. This can also be done with a strong wooden tool; rod (hammer handle), however, paying special attention to ensure that the piston is not warped and that the dust boot is not damaged.
Caution: When the piston is pressed, the brake fluid is squeezed out of the brake cylinders into the reservoir. Monitor the level. Fluid in the reservoir, if necessary, suck out the brake fluid.
When sucking, use a plastic bottle that is only for brake fluid. Do not use beverage bottles. Brake fluid is poisonous and should never be sucked out through a hose by mouth. Use suction devices. After replacing the pads, the brake fluid level in the reservoir should not exceed the MAX mark, since the fluid expands when heated. Leaking brake fluid flows onto the master cylinder, destroys paint and causes corrosion.
Note: If the pads are heavily worn, check the ease of piston movement. If the piston is difficult to move, repair the caliper (work in the workshop).
Insert the brake pads so that the linings face the disc.
Lower the caliper and secure the brake with the guide bolt with a force of 25 Nm.
Please note: The repair kit includes 2 mounting bolts that are not suitable for TEVES brakes.
Place the cap on the guide bolt.
Secure the wheels. Lower the vehicle and tighten the wheel bolts crosswise to 110 Nm.
Note: Press the brake pedal hard several times until strong resistance appears. This will center the pads and ensure that they take the correct working position.
Check the fluid level in the tank and top up to the MAX mark if necessary.
Carefully run in the new brake pads by applying light pressure on the brake pedal several times, from 80 km/h to 40 km/h. Allow the brakes to cool between braking.
Attention: Avoid full braking during the first 200 km.
[The full version is posted on the resource «AUDIMANUAL.RU»]