
1. With the engine removed from the vehicle, remove the pistons and connecting rods as described in Chapter 45.
2. Remove the oil pump (Chapter 44) and rear oil seal with casing (Chapter 43).
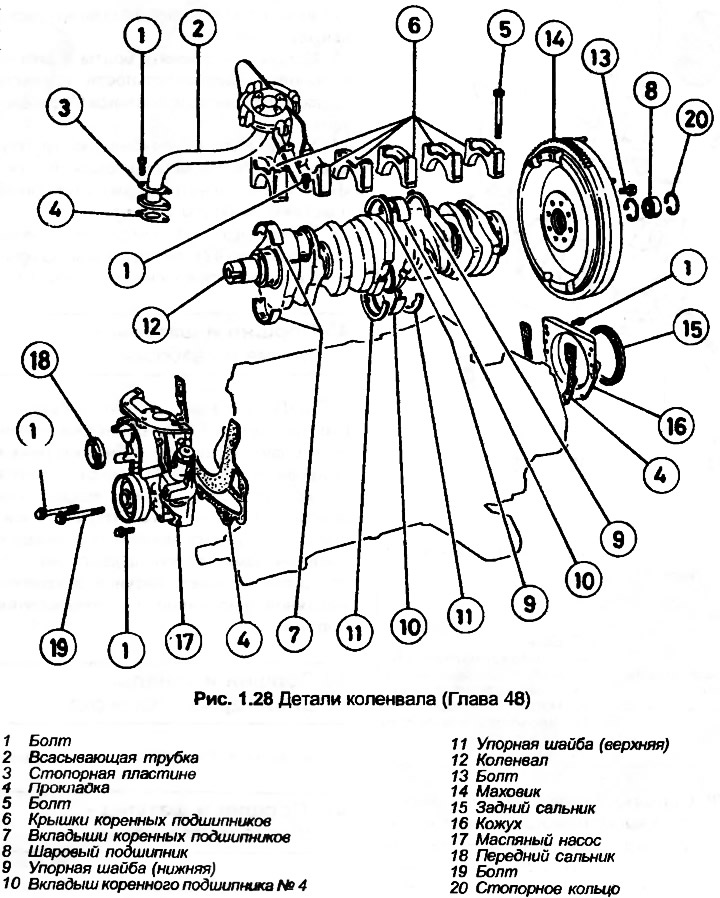
3. Check that each main bearing cap is numbered.
4. Loosen and remove cover bolts No.1, 2, 3, 5 and 6, then remove the covers.
5. With cover No.4 installed, determine the lateral clearance of the crankshaft using a feeler gauge, inserting it between the thrust washer and the crankshaft bridge. Compare the wear in the thrust washers with the lateral clearance given in Specifications.
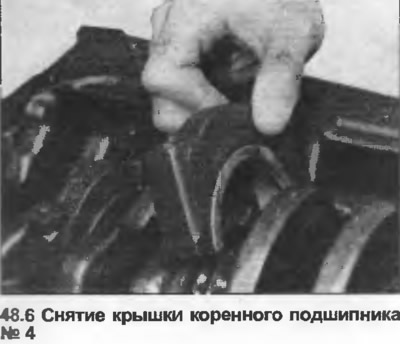
6. Unscrew and remove the main bearing cap No.4 (photo).
7. Store each bearing shell with the cover.
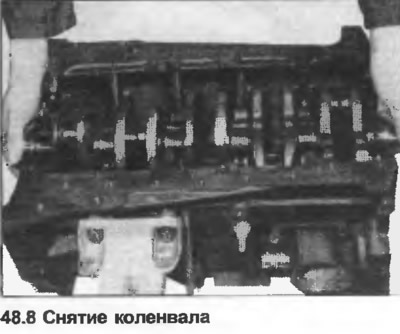
8. Lift the crankshaft out of the crankcase (photo).
9. Remove the bearing shells from the crankcase.
10. See Part A below, Chapter 22, but note that on some models the rear bearing is secured to the flywheel by two retaining rings
11. Place the cylinder block on a bench, crankcase side up.
12. Position the upper main bearing shells in the crankcase so that the tabs fit into the recesses. Lubricate the shells. If you are installing old shells, make sure they are installed in the correct locations. They should all have oil grooves.
13. Lower the crankshaft into the crankcase.
14. Position the lower main bearing shells in the caps.
15. Place the thrust washers on each side of cover #4, using grease to hold them in position. Make sure the surface with the grease grooves faces out.
16. Lubricate the bearing shell, then install the main bearing cap No.4, insert and tighten the bolts to the tightening torque specified in the Specification.
17. Using a feeler gauge or micrometer, check that the lateral clearance corresponds to the data in the Specifications.
18. Lubricate the remaining main bearing shells, then install the caps, insert and tighten the bolts to the specified tightening torque Specification.
19. Check that the crankshaft rotates freely.
20. Install the rear oil seal and casing (Chapter 43), oil pump (Chapter 44), pistons and connecting rods (Chapter 47).