



Table of contents: TDC mark threaded cap, tightening… ↓ Oil pressure regulating valve "N428" ↓ Sealant layer for camshaft frame,… ↓ Install the guide frame ↓ Accessory of main bearing shells… ↓ The belonging of the bearing shells… ↓ Camshaft Frame Bearing Inserts… ↓
Note: To perform installation work, it is necessary to secure the engine using the V6-FSI engine mount "VAS 6095/1" 5-on the bracket for the engine and gearbox "K4S 6095".
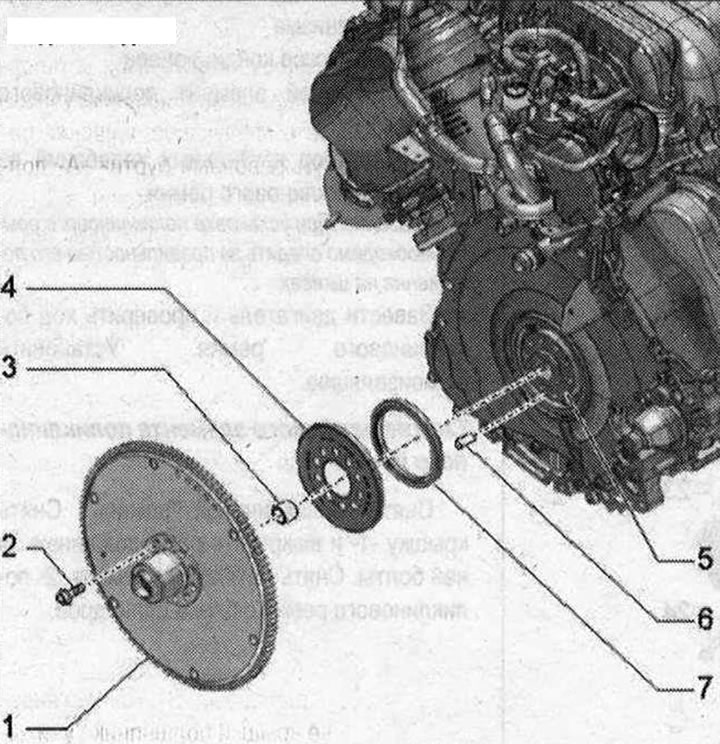
Slave disk 1. Driven disk with bearing flange. Make sure there are no cracks or signs of wear on the bearing flange mating plane, in the holes for the clutch module and torque converter; 2. Bolt. Replace. 60 Nm + 90° turn; 3. Needle bearing (not for vehicles with dual clutch transmission 0B5 or automatic transmission 0B6). Press out; 4. Engine speed sensor ring gear "G28"; 5. Crankshaft; 6. Mounting pin; 7. Crankshaft oil seal on the gearbox side. Replace
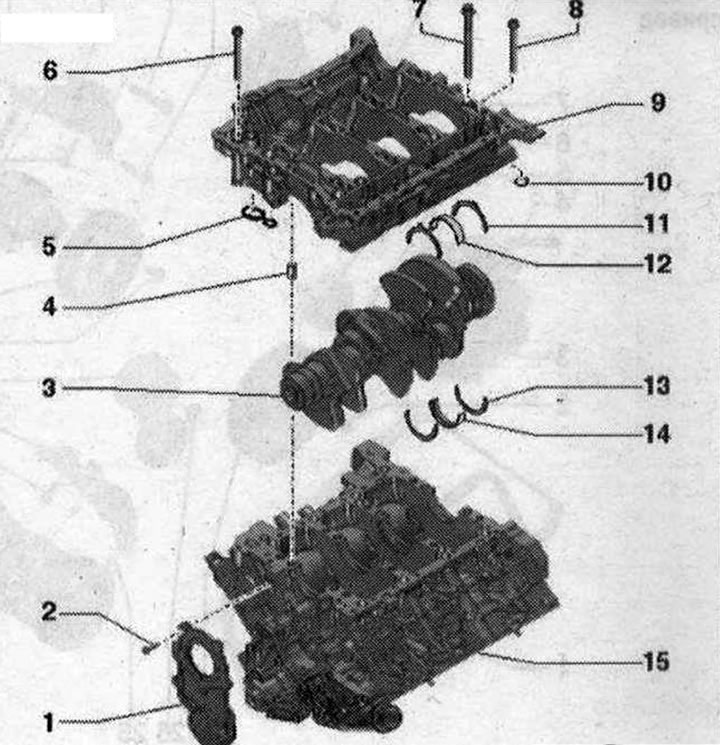
Crankshaft 1. Sealing flange on pulley side; 2. Bolt; 3. Crankshaft; 4. Mounting sleeve. 4 pcs. Install in camshaft frame; 5. Gasket. Replace; 6. Bolt for the seating surfaces of the crankshaft frame to the cylinder block. Bolts of different lengths and with different heads; 7. Long bolt, large flange for inner row of camshaft frame; 8. Short bolt, small flange for outer row of camshaft frame; 9. Camshaft frame with oil pressure adjustment valve "N428" for dismantling remove the chain damper bar of the control mechanism drive. Remove and install the oil pressure adjustment valve "N428"; 10. Sealing cuff. Replace; 11. Axial lock washer (only on the main bearing 3). Mounting position: lubrication grooves facing outwards. Observe fixation in the support frame; 12. Bearing shell for camshaft frame without oil groove. Mark previously used shells, but not on the working surface. Replace bearing shells worn down to the nickel layer. Install in the proper position. Install new camshaft frame bearing shells with the correct color marking; 13. Not installed; 14. Bearing shell for cylinder block with oil groove. Mark previously used shells, but not on the working surface. Replace bearing shells worn down to the nickel layer. Install in the proper position. Install new bearing shells with the correct color marking; 15. Cylinder block
TDC mark threaded cap, tightening torque
Tighten the threaded screw "arrow" to a torque of 14 Nm. Replace the O-ring.
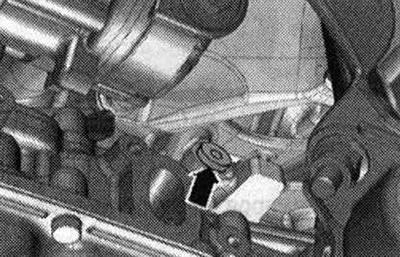
Oil pressure regulating valve "N428"
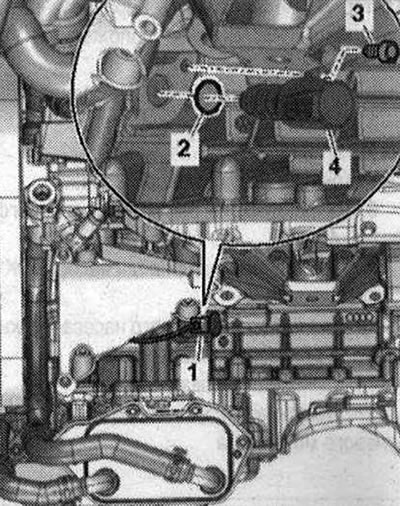
1. Electrical plug connection; 2. Replace the O-ring; 3. Bolt, 9 Nm; 4. Oil pressure regulating valve "N428"
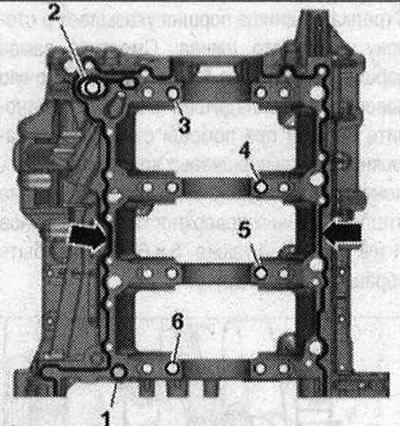
Sealant layer for camshaft frame, position of mounting bushings
Clean the seating surfaces; there should be no oil or grease on them. Apply a bead of sealant "arrows" to the clean mounting surfaces of the camshaft frame, as shown in the figure. The groove of the mounting surface should be filled with sealant. The beads of sealant should protrude above the mounting surface by 1.5... 2.0 mm. Apply seals "1" and "2". Check whether the centering bushings "3... 6" are installed in their places in the camshaft frame, as shown in the figure.
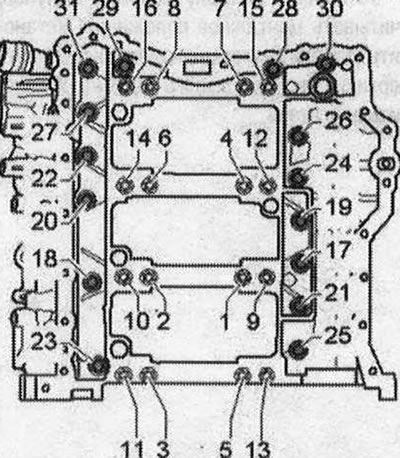
Install the guide frame
Replace the camshaft frame mounting bolts. Insert the long bolts into the inner row of the camshaft frame. Tighten the bolts "1...31" in 3 stages:
- 1. Tighten the bolts in sequence "1...16" to a torque of 50 Nm.
- 2. Tighten the bolts in the sequence "1...16" by 90°.
- 3. Tighten the bolts of the camshaft frame mounting surfaces to the cylinder block in the sequence "17...31" to a torque of 23 N·m.
Accessory of main bearing shells installed in the cylinder block
At the factory, bearing shells of the correct thickness are installed in the cylinder block. Colored dots on the bearing shell are used to mark the thickness of the bearing shells.
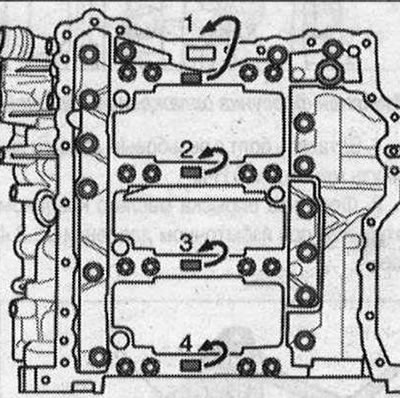
The belonging of the bearing shells to the cylinder block is indicated by a letter next to the corresponding bearing.
| Letter on the camshaft frame | Bearing color |
| R | = red |
| G | = yellow |
| B | = blue |
| S | = black |
Camshaft Frame Bearing Inserts Accessory
The correct thickness of bearing shells is installed in the camshaft frame at the factory. Colored dots on the bearing shell are used to mark the thickness of the bearing shells.
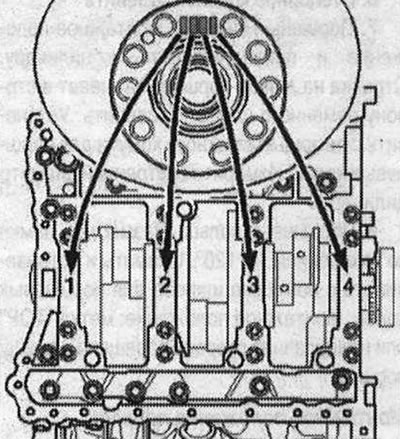
The belonging of the bearing liners to the camshaft frame is marked on the crankshaft flywheel flange by a row of letters. The first letter in the row is intended for bearing "1", the second for bearing "2", etc.
| Letter on the crankshaft | Bearing color |
| R | = red |
| G | = yellow |
| IN | = blue |
| S | = black |