
Caution: Due to the automatic adjustment of the rear brakes, the parking brake does not usually need to be adjusted. However, when replacing the handbrake cables or the rear brake caliper, the parking brake must be adjusted. The foot brake must be bled and its operation must be flawless.
Press the brake pedal fully down at least once.
Fully release the parking brake lever.
Pull up to remove the ashtray from the rear of the center console.
Use paint to mark the position of the wheel relative to the hub. This is necessary to reinstall the wheel in its original position, which maintains its balance.
With the vehicle standing on its wheels, loosen the rear wheel mounting bolts.
Raise the rear of the car and secure it on stands, remove the bolts and remove the wheels.
If present, remove any non-reusable plastic parts from the parking brake cable compensator.
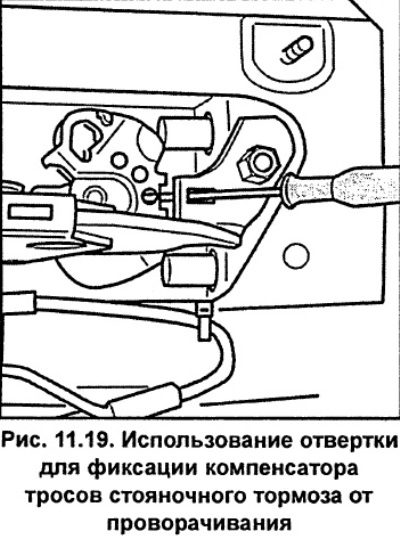
Secure the compensator using a size 2 screwdriver (fig. 11.19), so that it does not turn. The central console is not shown in the picture only to better present the main parts.
Tighten the parking brake cable in the following sequence:
- Remove the retainer 4 (fig. 11.20).
- Turn the adjusting nut 1 until it stops, while the groove for the locking pin should be covered.
- Move parking brake cable housings 2 and 3 (fig. 11.20) towards each other.
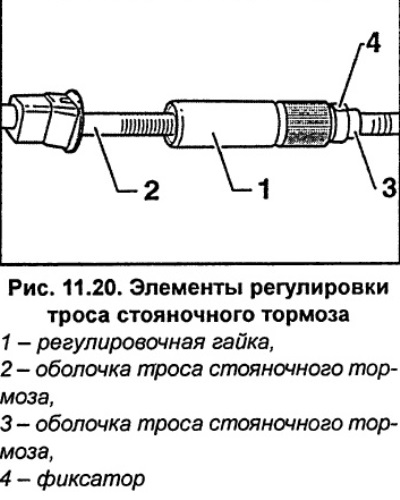
Turn the adjusting nut 1 (fig. 11.20) in the opposite direction until a groove for the retainer appears.
Install the retainer.
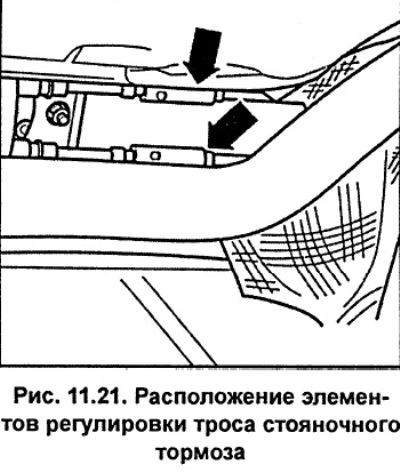
By pulling simultaneously in different directions, stretch the parking brake cable sheaths 2 and 3 (fig. 11.20) on both parking brake cables until the cable is fully tensioned (arrows). At the same time, check that the parking brake lever on the caliper does not move (see fig. 11.22).
Remove the screwdriver from the parking brake cable compensator (see fig. 11.19).
Apply and release the parking brake several times.
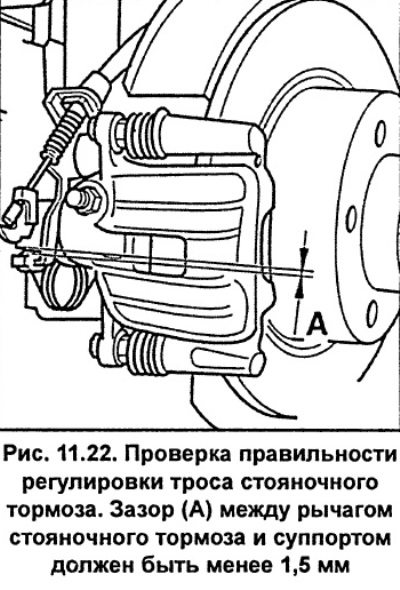
Check the correct tension of the parking brake cables. When the cables are correctly tensioned, the distance between the parking brake lever and the brake caliper should be less than 1.5 mm (see fig. 11.22).
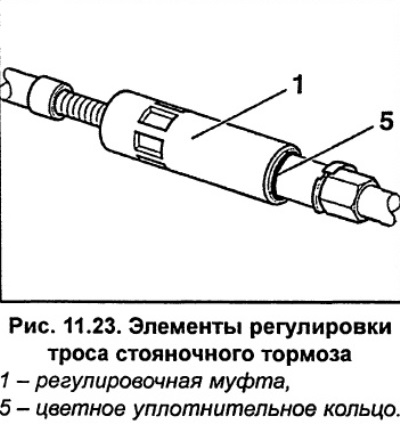
If readjustment is necessary, unscrew or screw the adjusting sleeve 1 (fig. 11.23), until the distance between the parking brake lever and the caliper is no more than 1.5 mm (see fig. 22).
Caution: Do not completely unscrew the adjusting sleeve 1 (fig. 11.23), the colored sealing ring 5 must not be visible on the edge of the adjusting element sleeve. Otherwise, water and dirt will penetrate into the adjusting element.
Apply a thin layer of grease to the flange that centers the wheel disc. Install the wheel, aligning the previously applied marks, and secure it with bolts. Lower the car to the ground and tighten the wheel mounting bolts to a torque of 120 Nm.
Place the ashtray back in its original place.
(The original version is on the portal «AUDIMANUAL.ru»)