
Table of contents: Rear trim. bumpers ↓ Rear linings. allroad bumpers ↓ Removal and installation rear trim.… ↓
Rear trim. bumpers
For vehicles with lane change assist, please note the following. If the back is removed. if the bumper is reinstalled or modifications have been made to it, the lane change assist system should be calibrated.
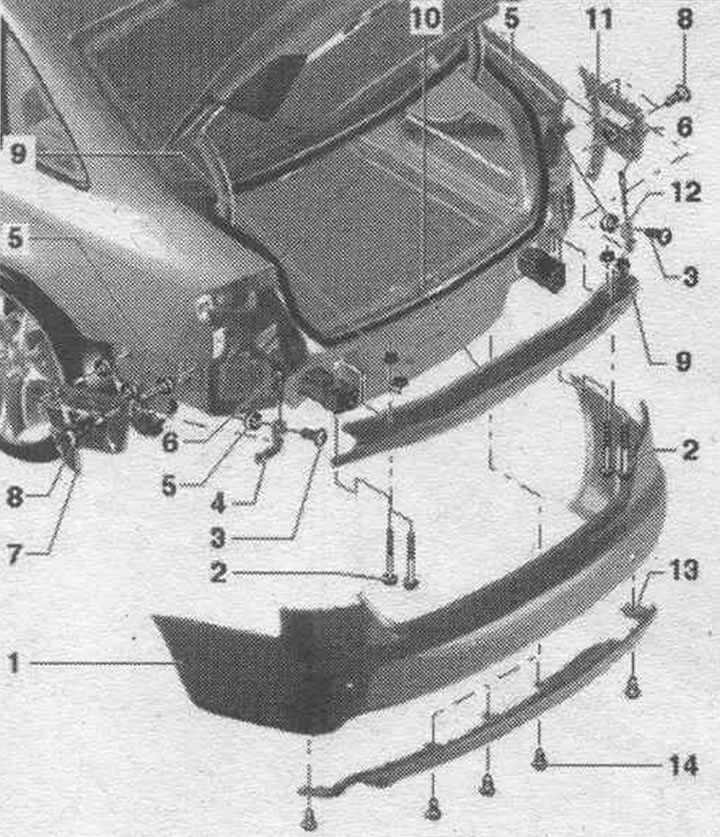
1. Rear trim. bumpers.
2. Bolt: 17 Nm.
3. Bolt: 1.5 Nm.
4. Guide element, upper: insert into the guide element and secure.
5. Clamp.
6. Pins: Pull them upwards before removing the bumper cover.
7. Left guide.
8. Bolt: 1.5 Nm.
9. Nut: 17 Nm.
10. Bumper beam.
11. Right guide.
12. Guide element, upper: insert into the guide element and secure.
13. Spoiler.
14. Bolt; 1.5 Nm.
Guide element - sequence, tightening
Tighten the bolts in sequence. "1...5" with a torque of 1.5 Nm.
Rear linings. allroad bumpers
Below only the differences from the standard bumper are described. Removal and installation of the bumper cover is carried out in the same way as on standard bumpers.
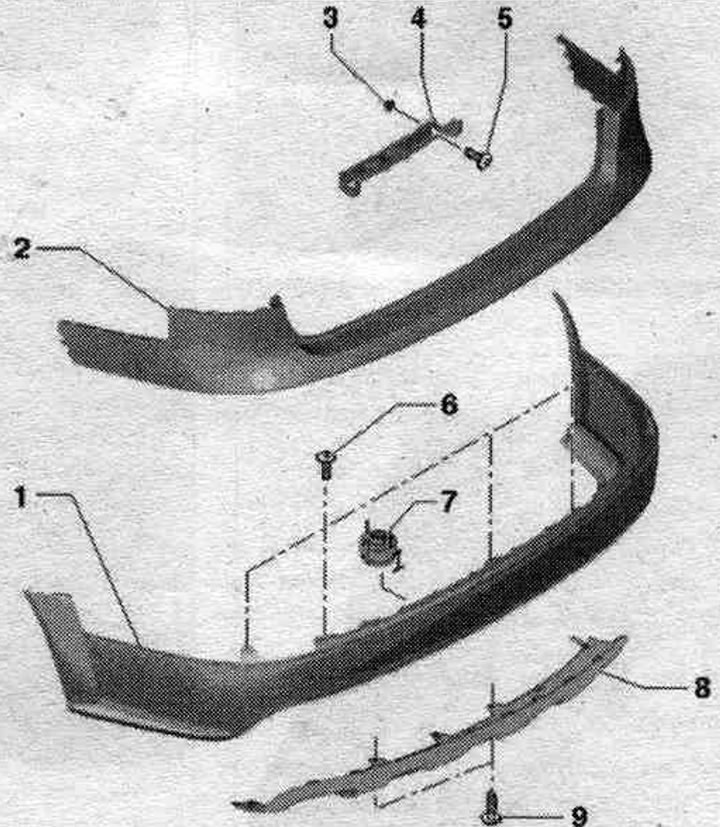
1. Spoiler: before removing the spoiler, unlike the standard bumper, you only need to remove the 2 spacer clips on the left and right, the bumper cover is removed; unlock the latches to the trim gradually around the perimeter and remove it from the trim back; when installed, the latches must be fully fixed in the cover plate.
2. Bumper trim: When reinstalling the old bumper trim, the old support element "7" is not removed; when replacing the bumper cover, it is necessary to install a new support one.
3. Clamp.
4. Mounting plate.
5. Bolt: 2.5 Nm.
6. Bolt: 1.5 Nm.
7. Support: unlock. The support element is installed only for the new bumper cover.
8. Underbody protection: the bumper cover is removed, unscrew bolts "6" and "9" and remove the underride guard to the rear.
9. Bolt: 1.5 Nm.
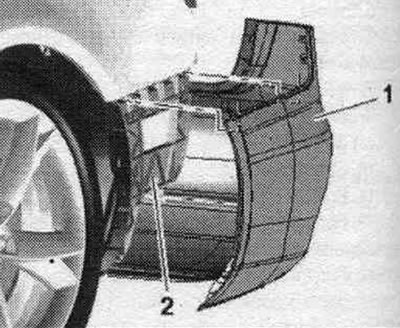
Disconnecting the expansion clamp
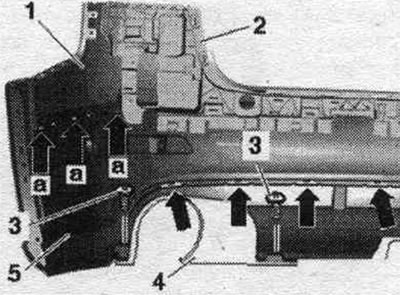
Press the clamping pin "3" through the expansion clamp on the spoiler "2" on the left and right upwards and thereby unlock it. Remove the spacer clip from spoiler "2" and bumper cover "1". When installing, secure the spacer clip again with the clamping pin.
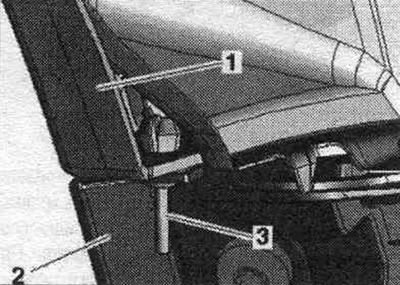
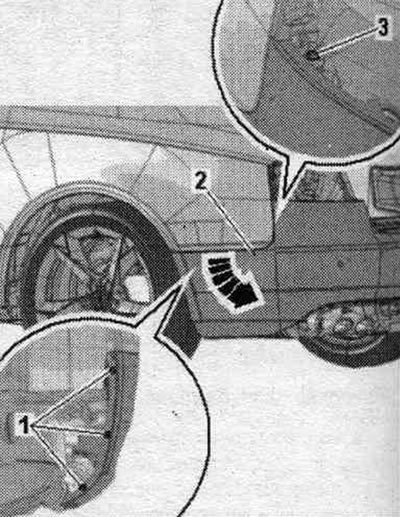
Disconnecting the latches
To remove the trim "1" or spoiler "5", release the latches, including those under the end part "2", and remove them relative to each other. To remove the underride guard "2", unscrew the bolts "3", release the latches "arrows" and remove it back from the spoiler.
Installation of the support element
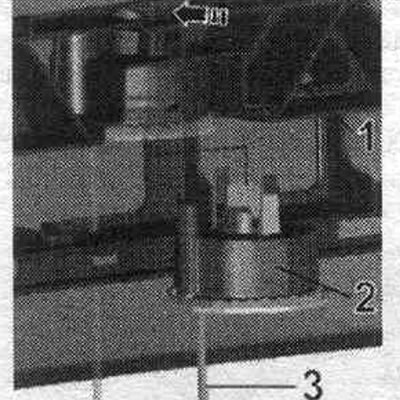
The support element is installed only for the new bumper cover. To remove, press the "arrow" latch to the side and pull the support element downwards from the "1" trim. Insert the "2" support element into the trim as shown in the figure and secure it in place. The safety plate may only be removed after the final installation of the lining.
Unlocking the support element
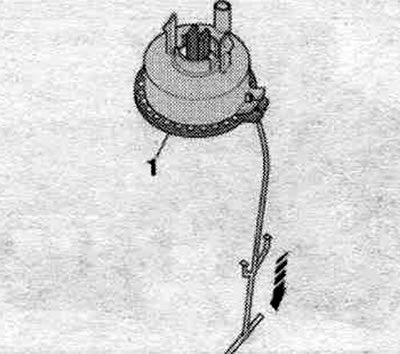
Under no circumstances should the support element be unlocked in the removed position; risk of injury. When reinstalling the old bumper cover, the old support element is not removed. When replacing the bumper cover, it is necessary to install and secure a new support element at the bottom of the bumper cover. After the bumper cover is fully installed, release the support element by pulling the safety plate marked "arrow." This relieves tension in the support element and presses the bumper cover against the crossmember.
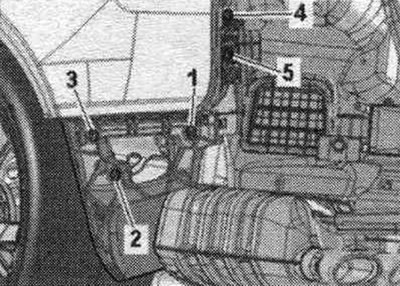
Removal and installation rear trim. bumpers
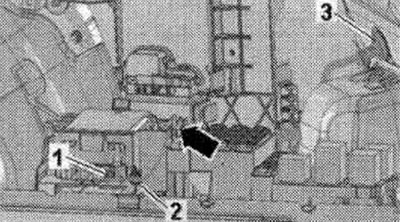
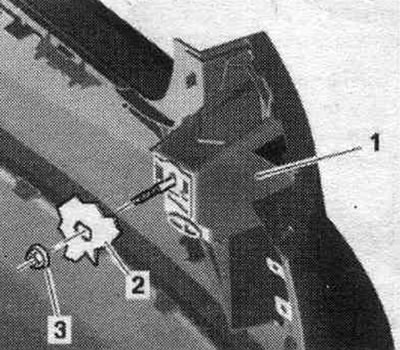
Remove the taillight. Disconnect (if available) connector "1" of the used parking aid "J446". Disconnect the "arrow" wire from the control unit bracket by cutting the cable ties "2". Press the sleeve "3" outward.
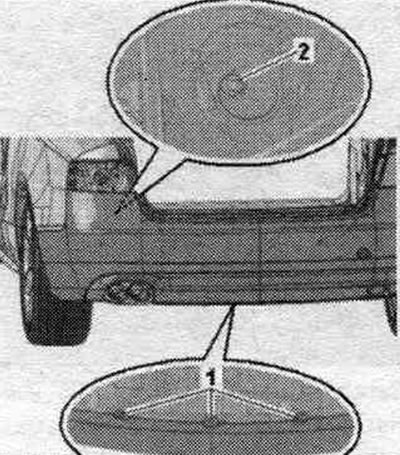
Unscrew nut "3" of threaded pin of lining "1".
Remove bolts "1" on the lower part of the bumper trim.
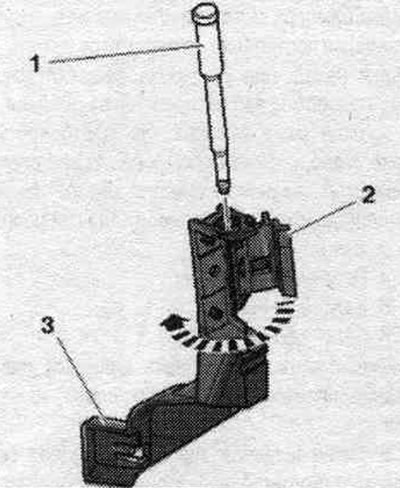
Guide element bolt
Before removing the bumper cover backwards, you should pull bolt "1" up from the guide element "3" on the left and right. When installing, the hinge "2" on the upper guide element must fold forward "arrow" before the bolt is installed. Unscrew bolts "1" on the right and left on the front bumper trim.
Unscrew the bumper trim retainer; to do this, unscrew bolt "3" from the upper guide element. Remove the left and right bumper trim on the side part "arrow". Remove the bumper trim "2", in doing so it is necessary to route the wiring of the parking assistant sensor out of the body guide.
Installation
Installation in reverse order. When installing, it is necessary to fully secure the side fasteners of the guide element "2" into the bumper cover "1". Fold the hinge of the upper guide element forward and insert the bolts.
Connect (if available) used parking assistant connector "J446". Install rear. flashlight.
The original article is posted on the resource: AUDImanual