
Table of contents: Decorative roof strip ↓ Removal and installation the front… ↓ Removal and installation the rear… ↓ Removal and installation the front… ↓ Removal and installation the rear… ↓
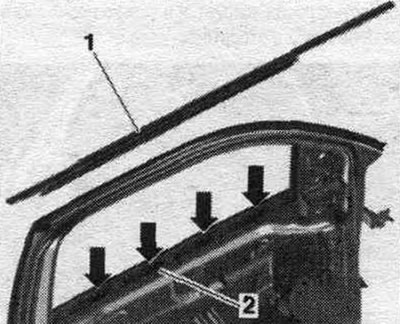
Decorative roof strip
Pay attention to the difference in execution. The decorative roof strips are not riveted to the body and must be removed downwards. Decorative roof strips in the "Surface Gloss" design must not be twisted or bent. To remove the decorative roof trim, it is not necessary to remove the side window.
Sedan
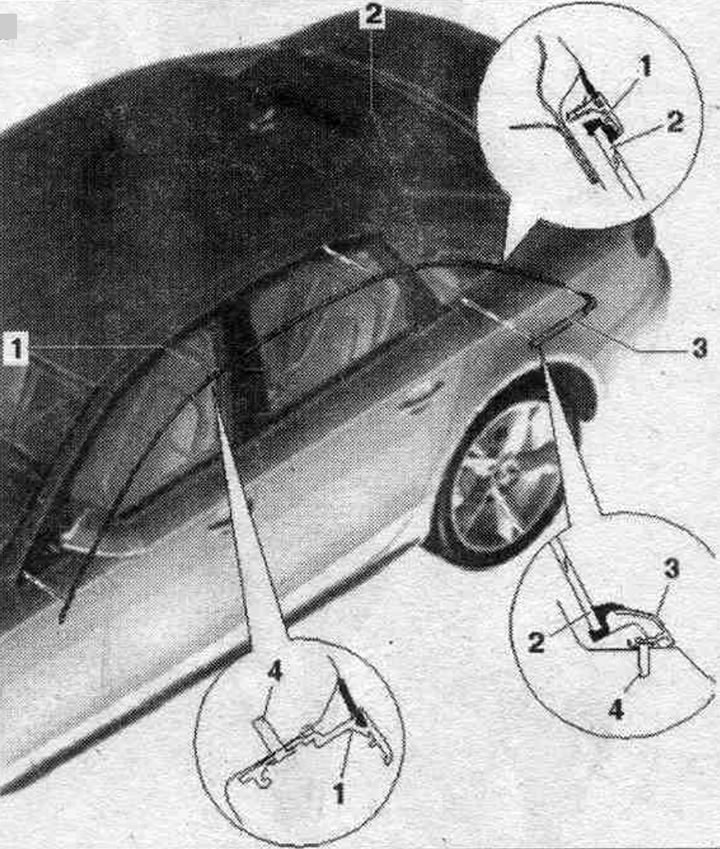
1. Roof trim: Roof trim is standard, unlock the roof trim on the C-pillar, starting from the body; roof trim strip in "Surface shine" version: remove the lower trim strip of the C-pillar side, starting from the side with the clips, carefully pry the roof trim strip out of the clips and carefully remove it over the side. glass and unlock it on the body flange, unlock the decorative strip of the roof of the A-pillar on the body, starting from the top.
2. Side glass.
3. Decorative strip: to remove from the C-pillar, remove it from the clips starting from the side, remove the decorative roof strip from the side clips on the roof, remove the decorative strip from the decorative roof strip.
Avant
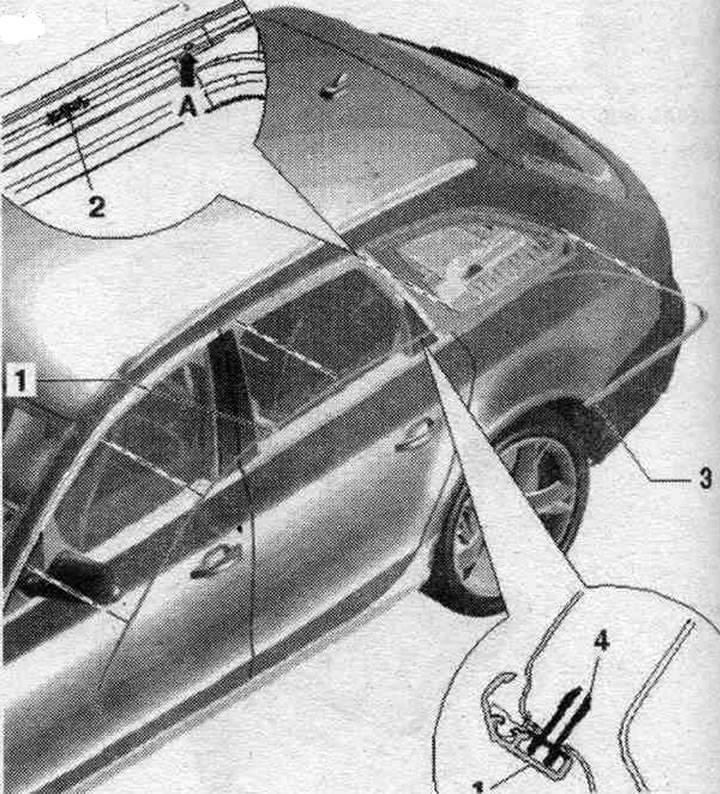
1. Roof trim: Standard roof trim: Unlock the roof trim on the C-pillar, starting from the body; roof trim strip in "Shine Surface" version: remove the lower trim strip of the C-pillar side, starting from the side and back from the clips, carefully pry the roof trim strip out of the D-pillar clips and carefully remove it over the side. glass and unlock on the body flange; unlock the decorative strip of the A-pillar roof on the body, starting from the top.
2. Mounting bracket.
3. Decorative strip of the side part.
4. Clamp.
Removal and installation the front B-pillar trim
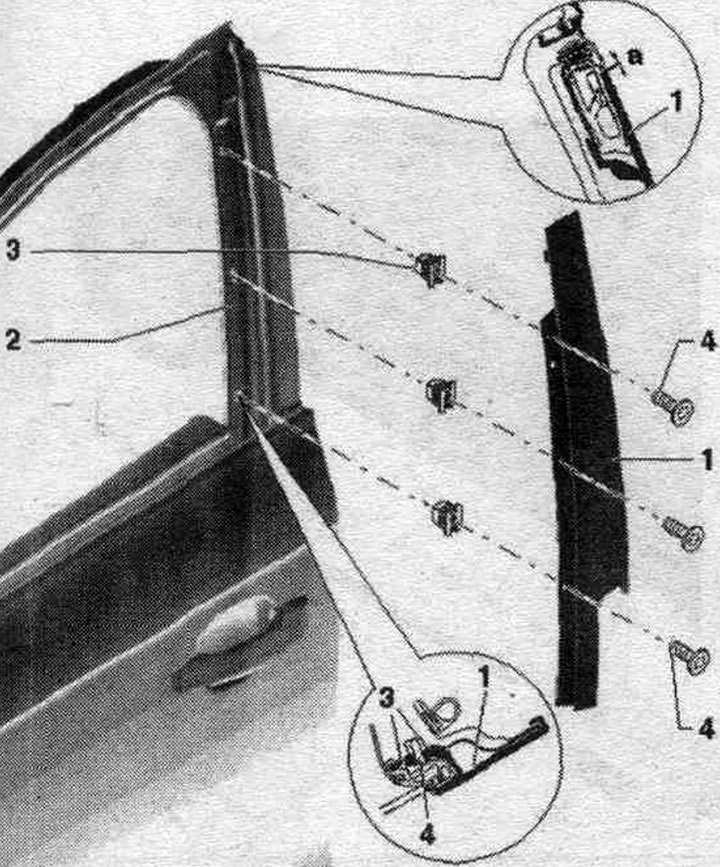
1. B-pillar trim: lower the door glass, release the window guide in the B-pillar area from the trim and remove it in an upward direction, unscrew the bolts "4" and remove the trim from the door in an upward direction, when installing the glass guide trim, treat the guide in this area with a soap solution.
2. Door.
3. Clamp.
4. Bolt: 2.5 Nm.
Removal and installation the rear trim. b-pillars and C-pillars
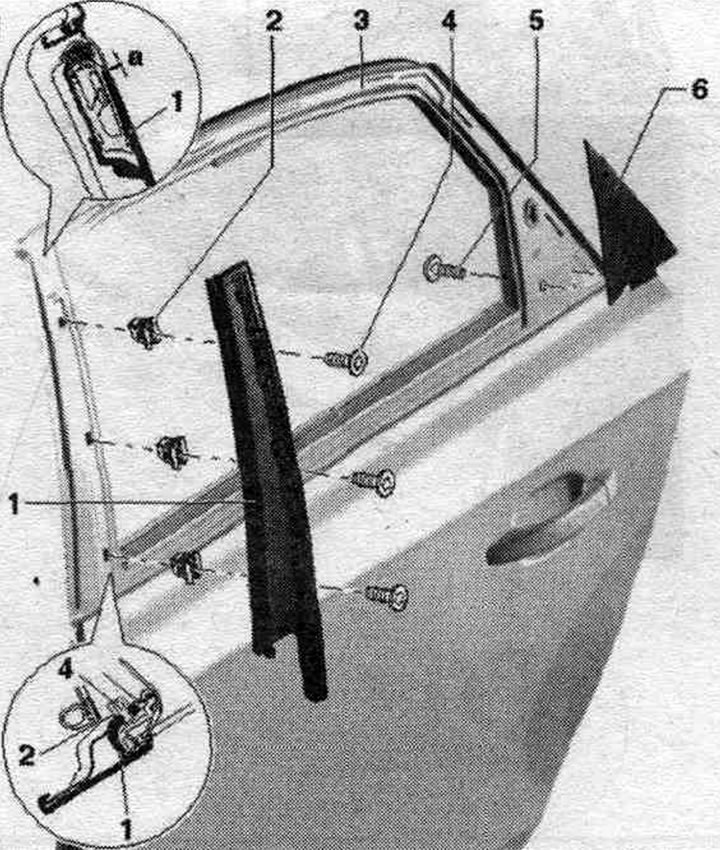
1. B-pillar trim: remove the door glass, remove the B-pillar trim, release the window guide in the B-pillar area from the trim and remove it in an upward direction, unscrew the bolts "4" and remove the trim from the door in an upward direction; when installing the glass guide, treat the guide in this area with a soap solution.
2. Clamp.
3. Door.
4/5. Bolt: 2.5 Nm.
6. C-pillar trim: detach the glass frame trim in the C-pillar area, unscrew the bolts, move the trim down from the clips and remove it from the side.
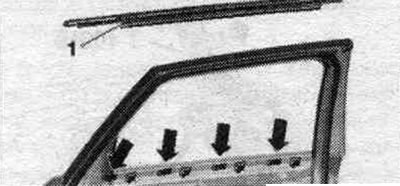
Removal and installation the front pressure plate. glass
After removal with the door glass installed, the pressure plate must be replaced. Removal without destruction is only possible after removing the door glass and window regulator. Move the door glass to the "Open" position. The door trim is now removed. Remove the outside mirror. Before removing the pressure plate "1", it must first be released from the "arrow" fasteners of the door "2".
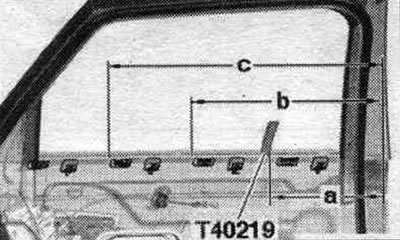
Install the 1st puller "T40219" on the mirror "triangle" between the outer glass pressure plate and the door glass. Move the 1st puller "T40219" a distance "c" to the side and back. Pull the 1st puller "T40219" upwards and at the same time hook it onto the glass pressure bar. The marking line on the "T40219" puller must be covered by the upper edge of the glass pressure bar. Insert the 2nd puller "T40219" between the glass and the pressure bar in the B-pillar area. Move the 2nd puller "T40219" a distance "b" to the side and hook it from below. Insert the 3rd puller "T40219" into the B-pillar area, move it a distance "a" to the side and hook it. All dimensions to the glass pressure plate are measured from the B pillar.
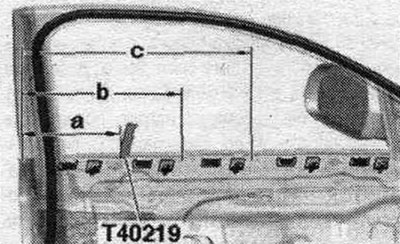
Size a = 185...230 mm.
Size b = 350...385 mm.
Size c = 520...555 mm.
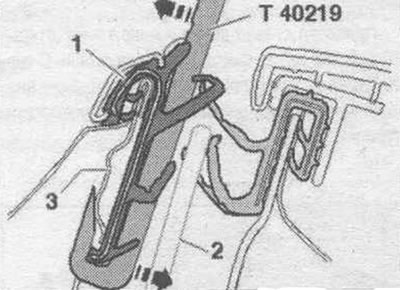
Lightly press the "T40219" puller outward and unlock the glass pressure bar.
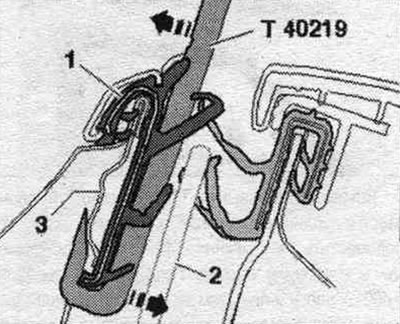
The pressure plate "2" will thus gradually be completely unfastened and only then can it be removed upwards from the door flange "1".
Installation
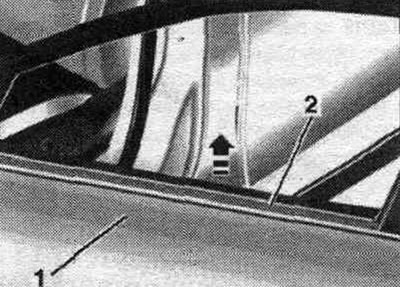
The latches on the outer door panel should not be bent, otherwise they will have to be bent back to their original position. Press the glass pressure bar from the outside, starting from the A-pillar, into the door latches with your hands. Install outside mirror.
Removal and installation the rear pressure plate. glass
Move the door glass to the "Open" position. The door trim is removed. The C-pillar trim has been removed. Before removing the "1" clamping strip, it must first be released from the door "arrow" clips.
Insert the 1st puller "T40219" between the door glass and the pressure plate on the C-pillar trim. Move the 1st puller "T40219" a distance "a" to the side and forward. Pull the 1st puller "T40219" upwards and at the same time hook it onto the glass pressure bar. The marking line on the "T40219" puller must be covered by the upper edge of the glass pressure bar. Insert the 2nd puller "T40219" between the glass and the pressure plate on the C-pillar trim. Move the 2nd puller "T40219" a distance "b" to the side and hook it from below. Insert the 3rd puller "T40219" on the C-pillar trim, move it a distance "c" to the side and hook it. The dimensions of the glass clamping bar are measured from the B pillar.
Size a = 240...275 mm.
Size b = 425...460 mm.
Size c = 605...640 mm.
Lightly press the "T40219" puller outward and unlock the glass pressure bar.
The pressure plate "2" will thus gradually be completely unfastened and only then can it be removed upwards from the door flange.

Installation
The latches on the outer door panel should not be bent and should not fit against the door glass, otherwise they will have to be bent back to their original position. Starting from the B-pillar, use your hands to fully insert the outer pressure plate into the door latches.