
Table of contents: Radiator grille ↓ Removal and installation the… ↓ Removal and installation the outside… ↓
Radiator grille
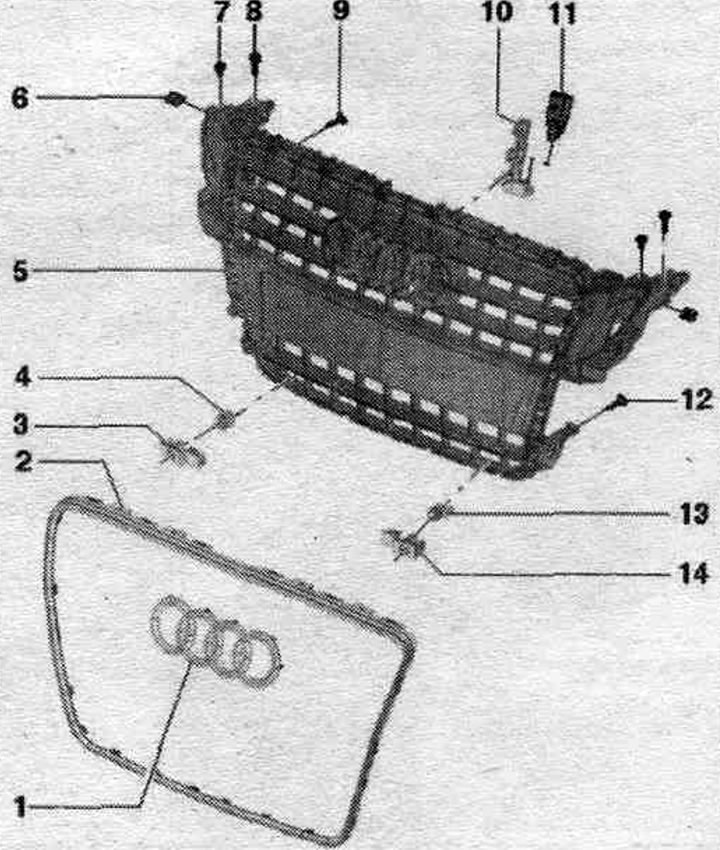
1. Emblem: cannot be removed without damaging it.
2. Decorative strip of the radiator grille.
3. Right-hand parking assistant sensor mount.
4. Front right parking assistant sensor in the middle "G253".
5. Radiator grille.
6. Bracket.
7/9. Bolt: 1.5 Nm.
8. Bolt: 4 Nm.
10. Bracket for outside temperature sensor "G17".
11. Outdoor temperature sensor. "G17".
12. Bolt: 1.5 Nm.
13. Front parking assistant sensor in the middle left "G254".
14. Left parking assistant sensor mount.
Removal and installation the radiator grille
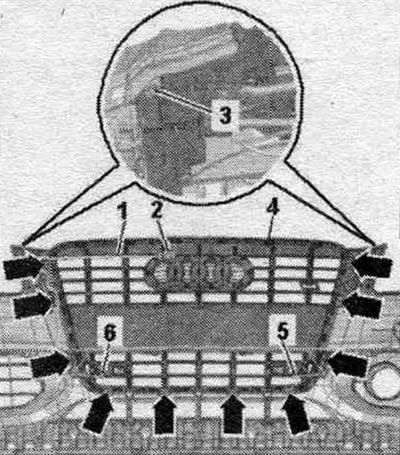
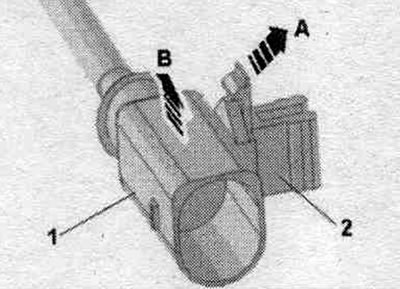
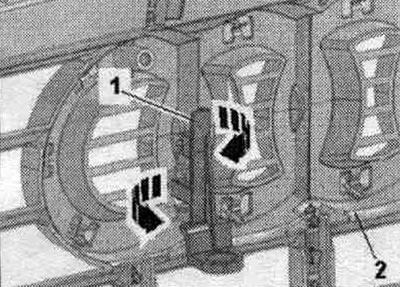
Remove the bumper cover. Removing the damping element. Remove bolts "3". If present, release the parking assist sensor wiring harness from the radiator grille by disconnecting plastic clamp "1". Remove connector "2" from the bracket.
To do this, press the stopper in the direction of arrow A and remove the plug connector 1 in the direction of arrow B from the bracket 2. Unscrew the bolts of the arrows.
Remove the reinforcement cable "1...3". Disconnect the plug connectors "5" and "6" of the parking assistant sensors. Unscrew the bolts "arrows" and remove the radiator grille "4" from the bumper trim. If it is necessary to remove the parking assistant sensor, unlock the mounting clamps and remove the mount.
Installation in reverse order. Install the damping element. Install the bumper cover.
Removal and installation the outside temperature sensor bracket. "G17"
Remove the outside temperature sensor. "G17". Unlock the "arrow" clamps and remove the bracket "1" from the radiator grille "2".
Installation in reverse order. Install the bracket onto the radiator grille and press until it locks into place. Install the outside temperature sensor. "G17".
(This article was copied from the website: «audimanual.ru»)