
Table of contents: Front noise insulation ↓ Rear noise insulation ↓
Front noise insulation
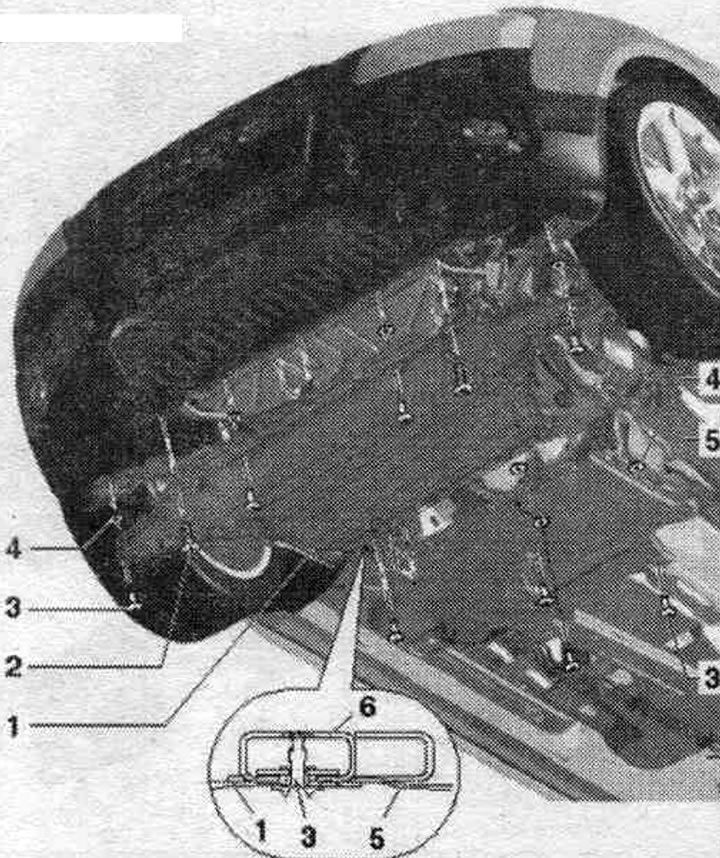
1. Soundproofing casing: removal: spoiler front. the wheels are removed, unscrew bolts "1" and "2", as well as the bolts at the bottom of the fender liner (3 pieces on each side) and remove the body insulation in the rear direction under the bumper: when installing, the front noise insulation must be installed under the bumper. On vehicles with an additional heater, pay attention to the correct route of the exhaust pipe through the sound insulation.
2. Bolt 5 Nm; 2x.
3. Quick release clamp: To remove, turn 180° to the left, when installing, the clamp should click into place when screwed in.
4. Washer.
5. Soundproofing screen, rear.
6. Radiator frame.
Car with additional heater
On vehicles with an additional heater, the end of the exhaust pipe "arrow" should pass perpendicularly through the bushing in the sound insulation.
Rear noise insulation
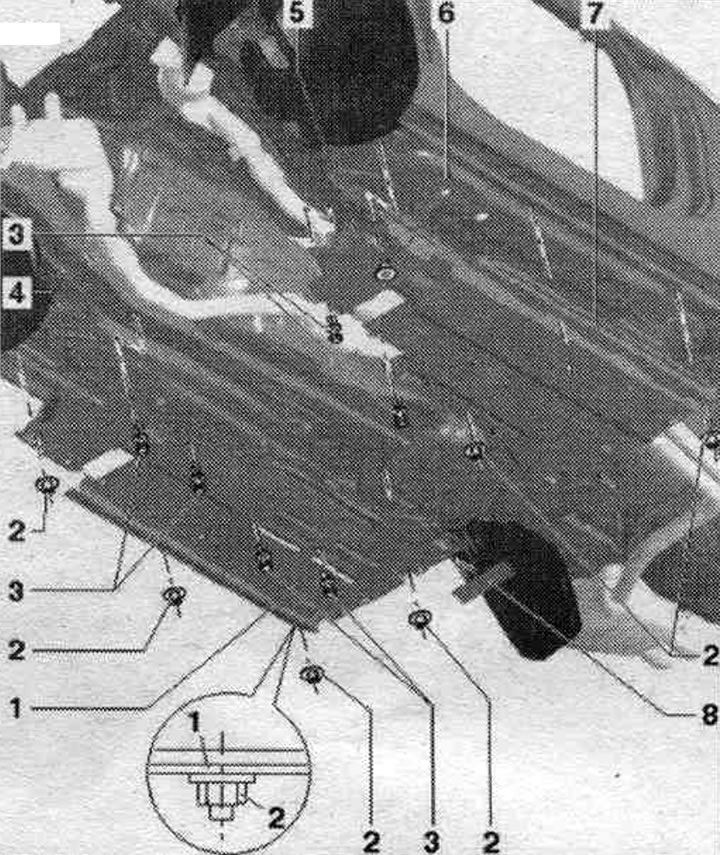
1. Soundproofing screen, rear: on the soundproofing, unscrew the 3 rear quick-release clamps: unscrew the quick-release clamps "6" and remove them in the rear direction.
2. Block of crossing stretchers.
3. Gearbox cross beam.
4. Bracket: Insert into the gearbox cross member as shown in the figure
5. Washer.
6. Quick release clamp: To remove, turn 180° to the left; when installing, the clamp should click into place when screwed in.
7. Bracket: Install on the side with the block of crossing stretchers.