
Table of contents: Front bumper ↓ Removal and installation the… ↓ Removal and installation the front… ↓ Removal and installation the end… ↓ Removal and installation the front… ↓ Removal and installation the damping… ↓ Removal and installation the… ↓ Removal and installation the air… ↓
Front bumper
Bumper trim
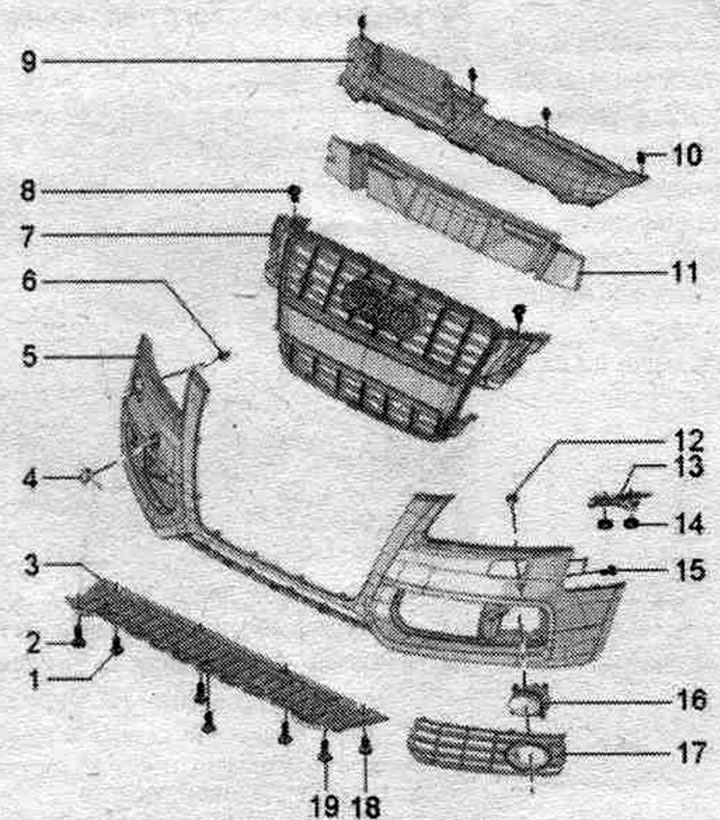
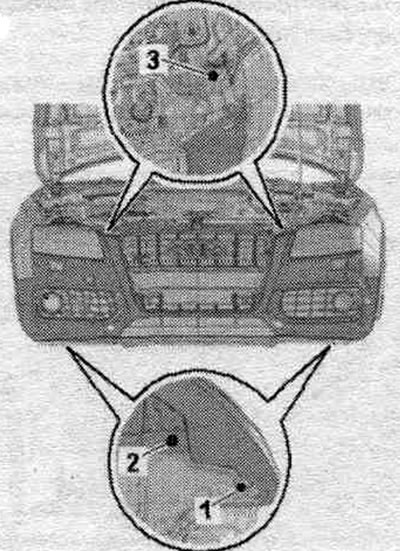
1. Bolt: 3 Nm.
2. Bolt: 1.5 Nm.
3. The end part of the bumper trim.
4. Towing hook cover.
5. Bumper trim.
6. Front right parking assistant sensor "G252".
7. Radiator grille.
8. Bolt.
9. Facing of the closing panel.
10. Blind rivet: When removing, unscrew the clamping pin, when installing, press the clamping pin.
11. Damping element.
12. Front left parking assistant sensor "G255".
13. Fastening the lining of the ler. bumpers.
14. Bolt: 4 Nm.
15. Nut: 4 Nm.
16. Fog lights.
17. Air intake grille.
18. Bolt: 3 Nm.
19. Bolt: 1.5 Nm.
Allroad bumper cover
Below only the differences from the standard bumper are described. Removal and installation of the bumper cover is carried out in the same way as on standard bumpers.
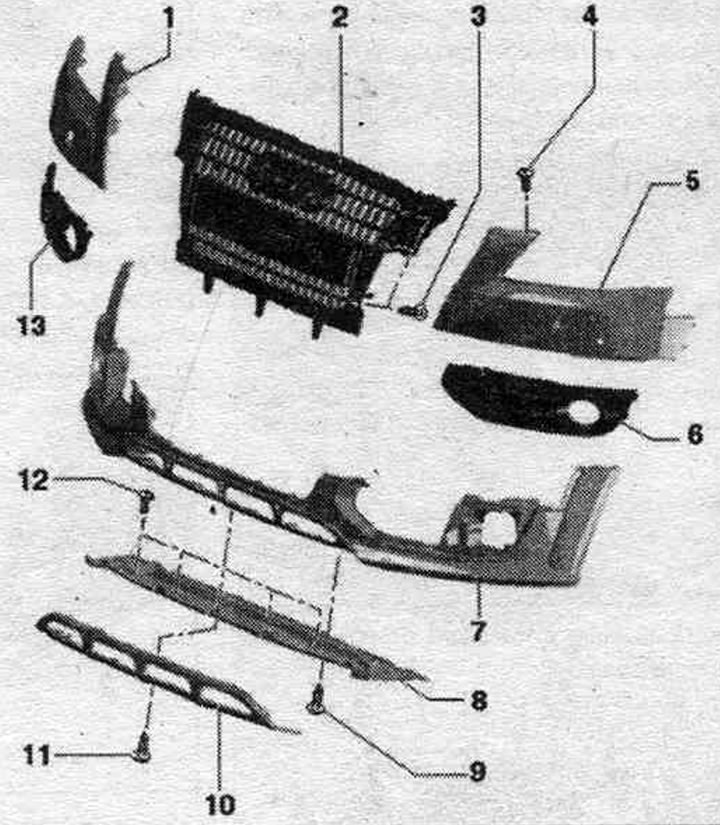
1. Right bumper cover.
2. Radiator grille: unscrew the threaded connections.
3. Bolt: 1.5 Nm.
4. Bolt: 4 Nm.
5. Left bumper trim.
6. Left air intake grille.
7. Front spoiler: before removing the front. spoiler, unlike the standard bumper, you only need to remove 2 spacer clips on the left and right.
8. Wing trim: bumper cover removed; unscrew the bolts "12" and remove the end part back from the underride guard.
9. Bolt: 1.5 Nm.
10. Underbody protection: bumper cover removed; unscrew bolts "12" and bolt "11" and remove the underride guard forward from the front. spoiler and end part.
11/12. Bolt: 1.5 Nm.
13. Right air intake grille.
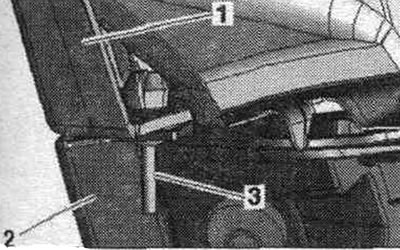
Expansion clamp front. spoilers
Press the clamping pin "3" through the expansion clamp on the front spoiler "2" on the left and right upwards and thereby release it. Remove the spacer clamp from the front. spoiler "2" and bumper cover "1". When installing, secure the spacer clamp again with the clamping pin.
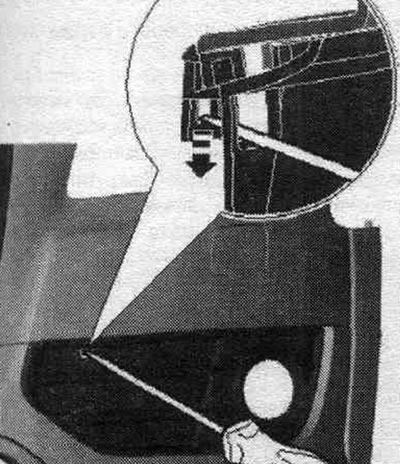
Removal the air intake grille on the left and right
Insert a small screwdriver into the slot on the air intake grille, as shown in the picture. Unlock the clips on the air intake grille in the direction of the arrow and remove it forward.
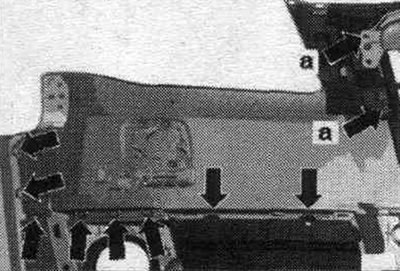
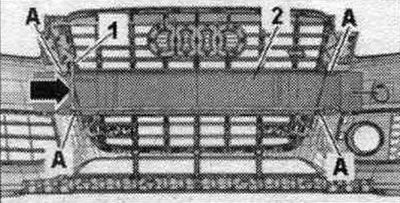
Removal the right and left bumper trim
The bumper cover has been removed. Remove the screws "arrow A". Unlock the clips from the outside in and remove them from the spoiler or radiator grille.
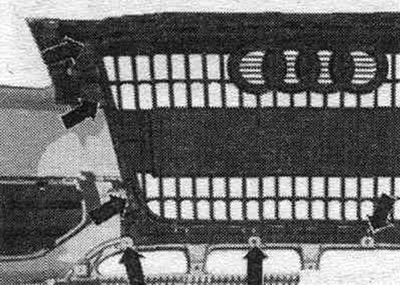
Removal the radiator grille
The bumper is removed. Unscrew the "arrow" screws on the radiator grille and remove it upwards from the spoiler and sides.
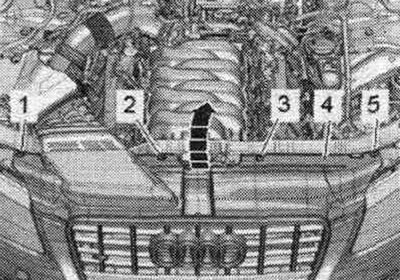
Removal and installation the radiator frame trim
Remove the bolts "1, 2, 3, 5" clamps. Lift the "4" trim of the radiator frame "arrow" and remove it from the radiator grille.
Installation
Installation in reverse order. Insert the radiator frame trim with the guides into the fasteners on the radiator grille and bumper trim. Insert the clamps and press the bolts until they stop.
Removal and installation the front trim. bumpers
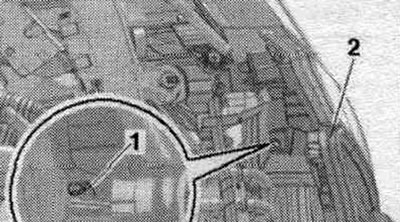
Remove the radiator frame trim. Disconnect plug "2" of the outside temperature sensor. "G17" and plug connector "1" of the parking assistant sensor.
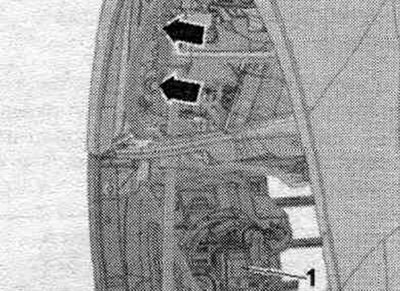
Remove bolt "3". Remove bolt "2" and quick-release clamp "1" on the front panel sound insulation. bumpers.
Remove the wheel arch liner. Disconnect plug connector "1" from the fog lights. Remove the "arrow" bolts. Disconnect the front side panels and remove the bumper trim forward.
Installation
Installation in reverse order. Install the wheel arch liner. Install the radiator frame cover.
Adjusting the front trim. bumpers
Remove the radiator frame trim. If the gap size is uneven, then install a wrench on the adjusting bolt "1" and adjust the gap size of the front lining. bumper "2". Check the gap and repeat the adjustment if necessary.
Removal and installation the end part of the front trim. bumpers
Unscrew bolts "1" and "2". Remove the end part of the front trim. bumpers back in the direction of travel.

Installation in reverse order.
Removal and installation the front trim fastening. bumpers
Remove the trim panel front. bumper. Unscrew the "arrow" nuts and remove the "1" fastener from the front trim. bumpers.
Installation in reverse order. Install the front lining. bumpers.
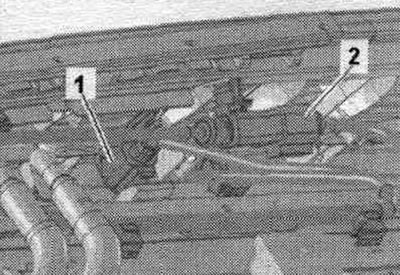
Removal and installation the damping element
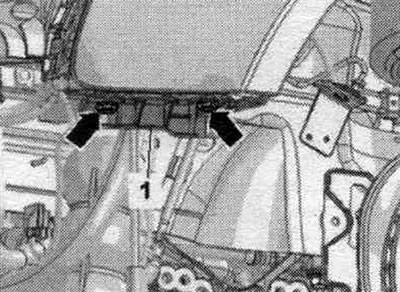
Remove the trim panel front. bumper. If present, release the electrical wiring harness "1" of the front parking aid sensor "arrow". Remove the damper element "2" from the brackets "A".
Installation in reverse order. Install the front lining. bumpers.
Removal and installation the injector cover of the system. headlight cleaning
Open the cover "1" of the injector "arrow A". Using a screwdriver, pry the cover "1" of the injector from the inside, remove it from the mount "2" "arrow B", and hang it on the opposite side.
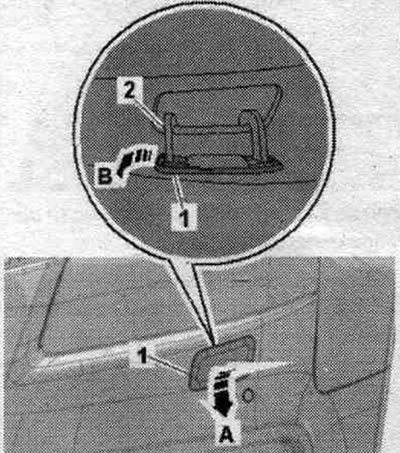
Installation in reverse order. Install the nozzle cover until it clicks into place.
Removal and installation the air intake grille
Unlock the "arrow A" latches using a screwdriver. Remove the air intake grille "1" from the lower part of the bumper trim "arrow B".
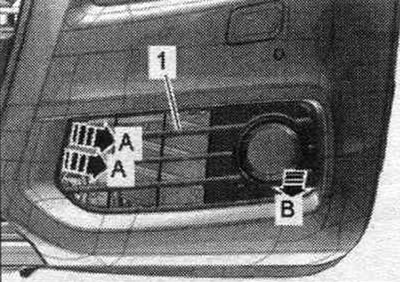
Installation in reverse order.
[The original text of the material can be found on the website «AudiManual»]