
Table of contents: Fuel filler flap ↓ Replacing the fuel hatch liner. tank ↓ Emergency fuel filler flap release… ↓
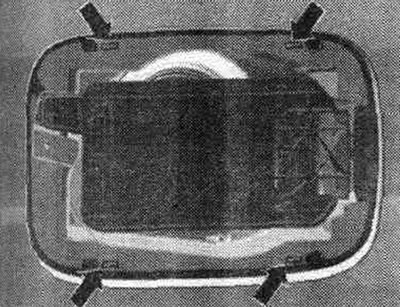
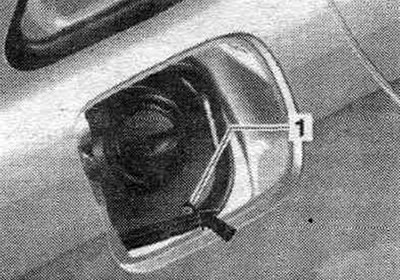
Fuel filler flap
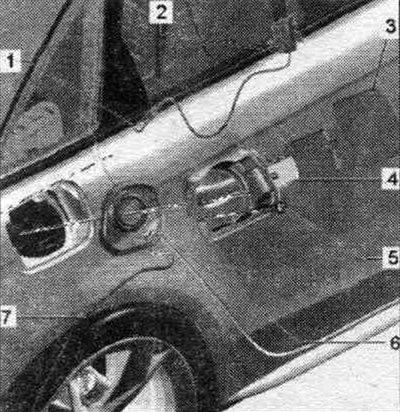
1. Cable pull for emergency opening.
2. Electric motor for opening the fuel filler flap "V155": removal: remove the fuel filler flap, disconnect the cable from the central used comfort system "J393" in the luggage compartment in the forward direction, remove the electric motor for opening the fuel filler flap "V155" from the body flange in the forward direction and disconnect the plug connector; installation: install el. the "V155" fuel filler flap opening motor onto the flange, while inserting the emergency opening element into the luggage compartment.
3. Fuel hatch cover. tank.
4. Fuel tank hatch: after removal, it must be replaced, remove the fuel tank hatch cover. tank, insert the traction rope through the hole in the fuel hatch neck. tank, install the fuel hatch. tank with a tilt until the locking protrusions engage with the lowered flange on the side, connect the fuel tank flap and the el. with bolts. fuel filler flap opening motor "4".
5. Bolt: 1.7 Nm.
6. Fuel hatch insert. tank.
7. Drain hose: Install without bends.
Replacing the fuel hatch liner. tank
1. Fuel filler neck hatch unit. tank.
2. Electric motor for opening the fuel filler flap "V155".
3. Bolt: 1.7 Nm.
4. Fuel hatch insert. tank.
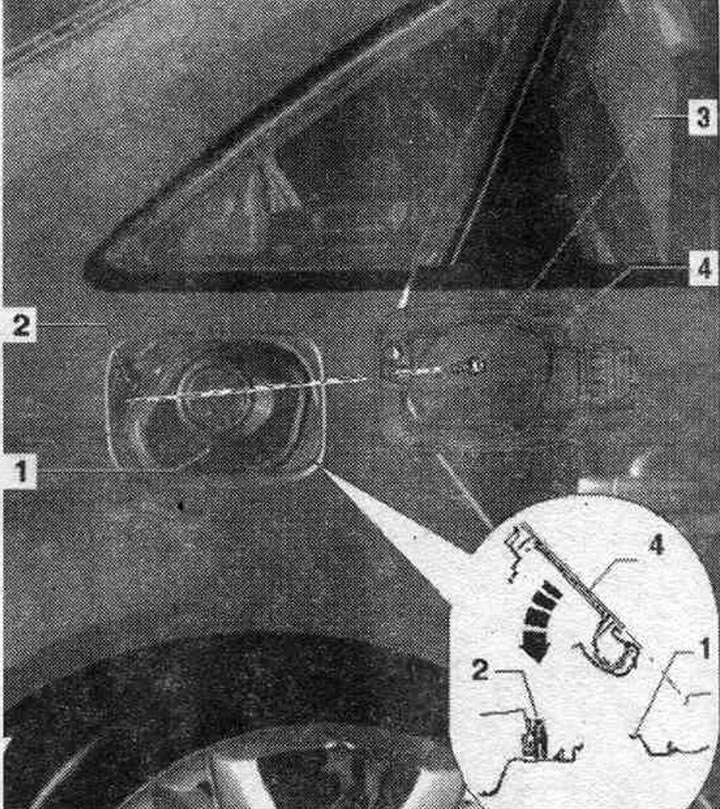
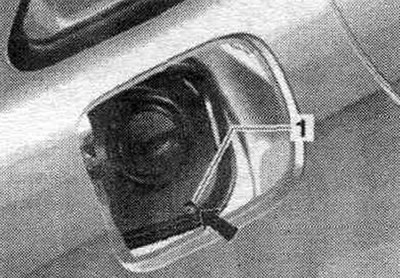
Remove the fuel filler cap
Insert a screwdriver as shown in the figure between hatch "2" and hatch mounting socket "1" and release the lock. Pull the hatch back slightly "arrow" from the lock. Remove the hatch.
Install
Install the hatch into the slots of the mounting socket. Move hatch "2" forward until it clicks into the "arrow" lock of fastening "1".
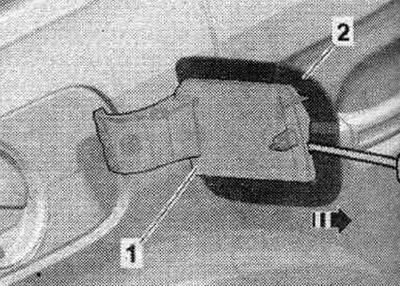
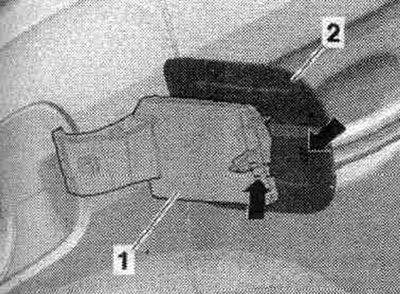
Removal the fuel filler flap liner. tank
Open the fuel tank hatch and unlock the fuel hatch trim according to the "arrow" marks. tank.
To do this, insert a small screwdriver in the direction of the arrow at an angle from below along the marks on the fuel hatch insert. tank above the retainer. Lift the screwdriver up slightly to release the clips underneath. Gradually pull the hatch insert out of the cutout.
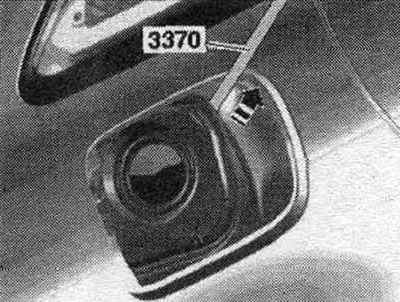
Removal the fuel filler door niche
The fuel filler cap has been removed. Using the "3370" master key, vertically remove the fuel hatch neck. tank from a niche in the body.
Installation
Installation in reverse order. To ensure that the hose is installed without bends, align the edge of the drain hole with the edge of the body hole "arrow".
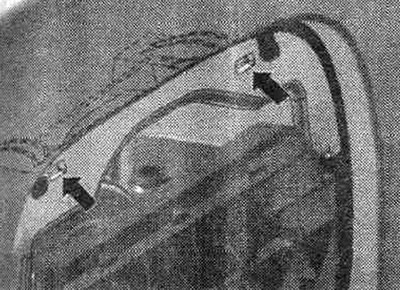
Emergency fuel filler flap release element

1. Electric motor for opening the fuel filler flap "V155".
2. Cable pull for emergency opening: install el. the "V155" fuel filler flap release motor with cable above the fuel filler flap recess, as shown in the picture; run the cable traction into the passenger compartment in the rear direction and install it on the protrusion on the flange of the central used Comfort system "J393".
3. Sidewall.
Fuel hatch installation position. tank
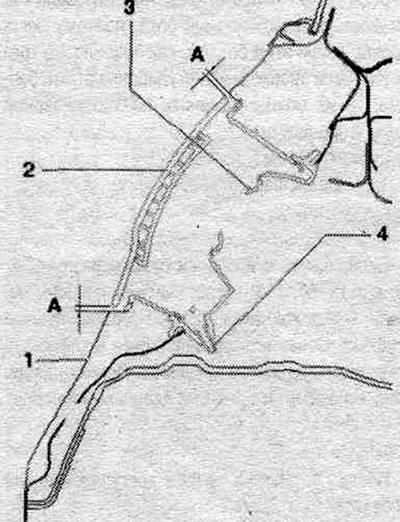
1. Sidewall.
2. Fuel hatch cover. tank: distance "A" = 2.2 mm, adjust evenly along the side.
3. Fuel filler neck hatch unit. tank: as shown in the picture, slide onto the body flange along the perimeter.
4. Drain hose: Install without bends.
Fuel hatch drain hose. tank
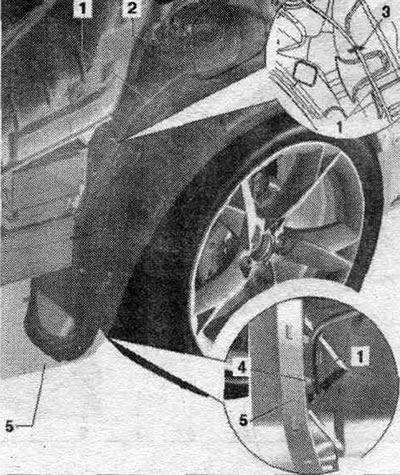
1. Drain hose: Place the drain hose under the fender liner as shown in the picture and insert it into the branch pipe.
2. Fuel tank hatch.
3. Mudguard liner: loosen in the area of the drain hose and move to the side.
4. Rear bumper.
5. Rear guide part: The drain hose is inserted into the lower branch as shown in the figure
(This article was copied from an online resource «AudiManual.ru»)