
Table of contents: Lift-and-slide sunroof - sedan ↓ Removal and installation the fairing ↓ Sliding and lifting sunroof cover ↓ Removal the side seal ↓ Removal and installation a sliding… ↓ Zero position adjustment (engine) ↓ Drainage hoses ↓
Lift-and-slide sunroof - sedan
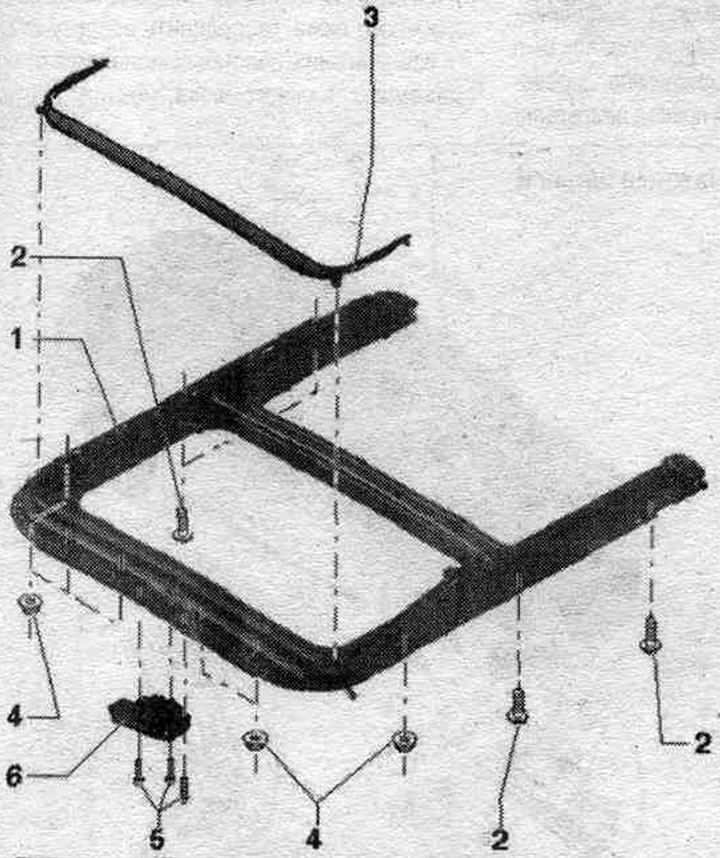
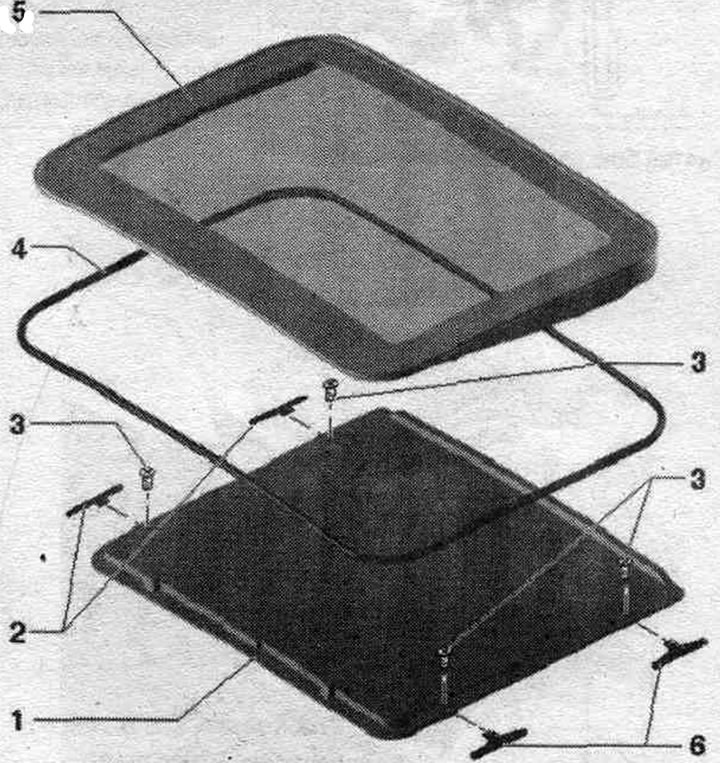
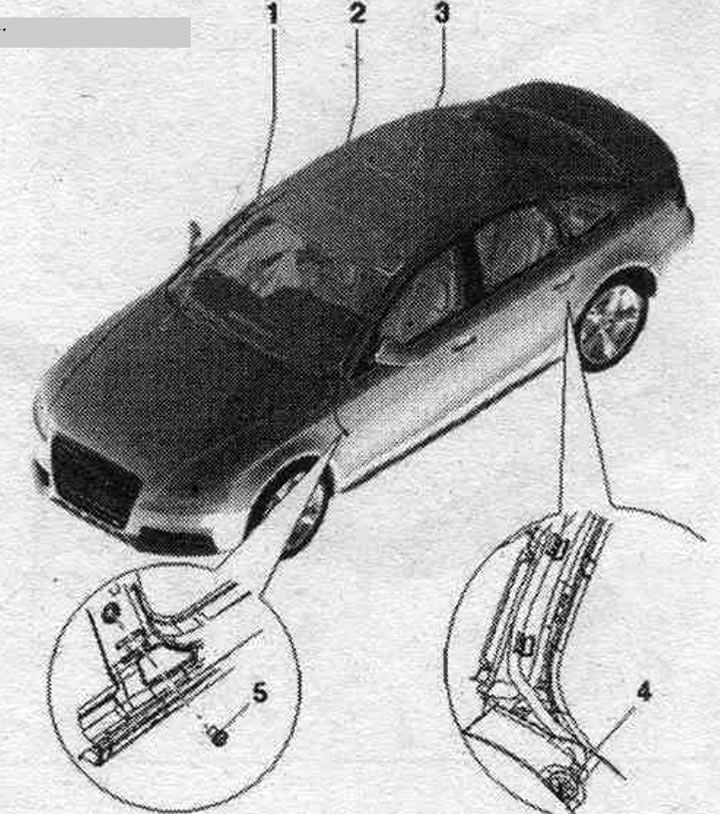
1. Frame: removal: fold the seat backs back as far as they will go, lower the ceiling panel, remove the hatch cover, remove the drainage hoses, unscrew the nuts "4" and bolts "2" of the frame, remove the frame through the rear door from the car; installation: Do not fully tighten the frame nuts and bolts on the roof, connect the drainage hoses, use a 12 mm drill bit at the front right and a 10 mm drill bit to secure the frame to the body and tighten the front nuts on the left and right to the specified torque. puffs, starting from the center; tighten in the same sequence. bolts with a specified torque. puffs.
2. Bolt: 8 Nm.
3. Fairing.
4. Nut: 8 Nm.
5. Bolt: 4 Nm.
6. Engine: removal: remove the interior light, disconnect the electric motor connector, unscrew the bolts "5" and remove the el. engine from the ceiling opening; after removing and installing the engine, it is necessary to carry out an adjustment pass. Remove the electric motor only when the cover is closed.
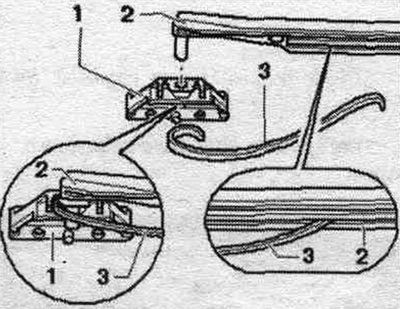
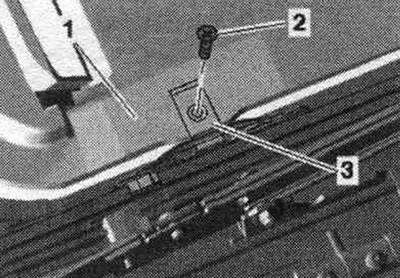
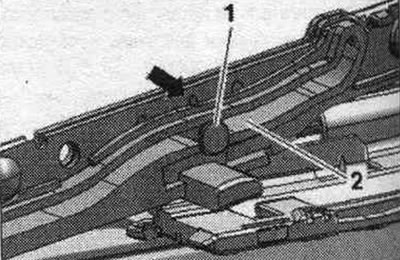
Frame attachment points
When installing a lift and slide sunroof, the frame at the front right "arrow" must be secured after the first nut "1" with a 12 mm diameter drill and...
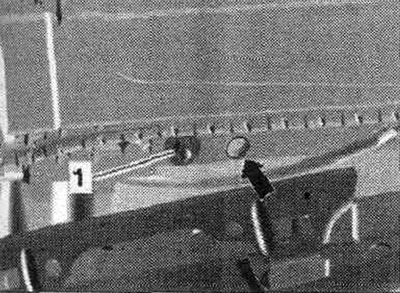
...back left (elongated hole) "arrow" in front of the last bolt "1" with a 10 mm diameter drill.
Tighten the nuts and bolts to the specified torque from the front, starting from the center back.
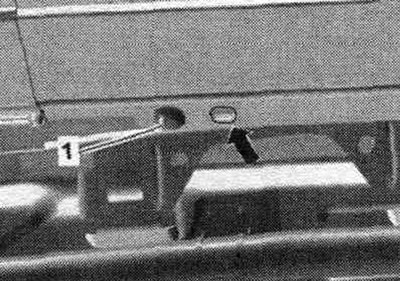
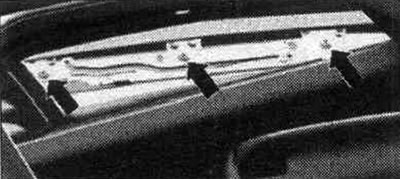
Removal and installation the fairing
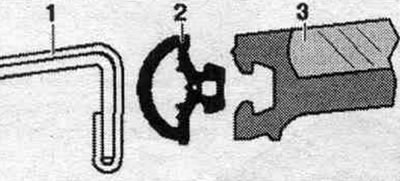
Open the hatch completely. Press the front wind deflector down and remove the wind deflector arms towards the center of the vehicle from the support. Remove wind deflector "1" at an angle to the rear from the opening of the sliding and lifting sunroof. Installation in reverse order.
Install the fairing spring: Insert spring "3" into bracket "1" of the wind deflector. Insert the spring into the outer groove of the windshield "2".
Sliding and lifting sunroof cover
1. Sliding sunroof: Only for vehicles with glass roof, remove sunroof cover before removing.
2. Sliding ceiling panel spring, right: Before removing, remove the ceiling panel frame; to remove, unscrew the bolt "7" at the front and rear; move the front springs "2" forward and the rear ones back from the sliding curtain and remove them; remove the sliding curtain from the guides on the sides and pull it upwards.
3. Bolt; 1.5 Nm.
4. Gasket.
5. Hatch cover: to remove, lift the hatch, remove the side seal, unscrew the bolts on the left and right of the sliding hatch cover and lift the cover.
6. Spring for sliding ceiling panel, left.
Removal the side seal
1. Bolt: 4 Nm.
2. Hatch cover.
3. Corrugated cover (dust cover): remove from the side of the cover and from the frame.
Removal the sunroof cover
Remove the side seal from the side of the cover and from the frame. Unscrew the "arrow" bolts on both sides and lift the cover.
Adjusting the lift-and-slide sunroof cover
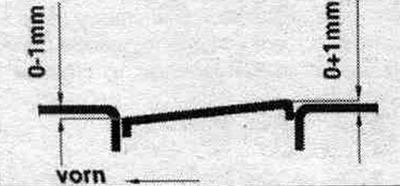
The height adjustment at the front and back is carried out to prevent wind noise as per the picture. Check the height adjustment at each roof opening radius relative to the vehicle's centerline. The glass panel should not be higher than the roof at any point in the front or lower than the roof at any point in the rear. For height adjustment, turn on the lid for closing only from the open position (not raised) provisions.
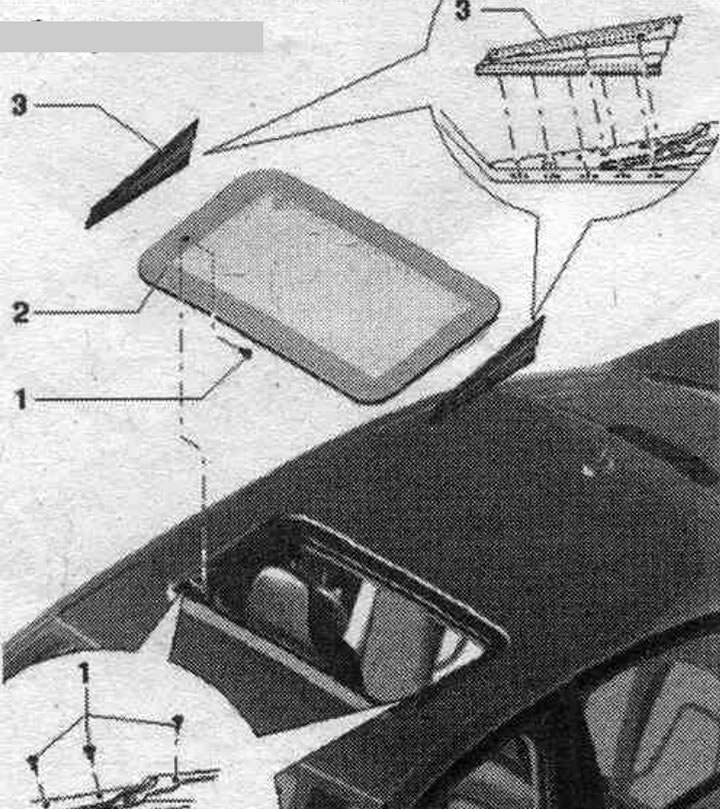
Replacing the hatch panel seal
Hatch cover "3" is removed. Remove hatch panel seal "2" from hatch cover "3". Insert a new seal at the rear. center the edge of the cover, starting from hatch cover "3". To facilitate installation of the seal, lubricate the edges of the panel with a soap solution.
Removal and installation a sliding curtain
The hatch cover has been removed. Unscrew bolt "2" of spring "3".
Move the ceiling panel "1" back a little and remove the front springs forward. Move the rear springs back. Pull the curtain up.
Zero position adjustment (engine)
The engine is removed, electrical connections are connected. Using the rotary switch. select "Sunroof Closed." The engine automatically returns to its original position and turns off. In this position, install the engine with the hatch closed.
Engine Adjustment Pass: To ensure proper operation of the hatch, it is necessary to perform a so-called engine adjustment pass after the engine has been removed, installed or replaced.
Electric sunroof motor: Turn on the ignition and close the doors, close the sunroof if necessary. Pull out the sunroof control key and hold it in this position for 10 seconds. The hatch extends, moves back to the end position, then forward again and closes. During the entire adjustment process, the hatch control key must remain in the extended position. This completes the adjustment pass. On new replaced engines, the adjustment run begins immediately after switching on, without a 10-second wait.
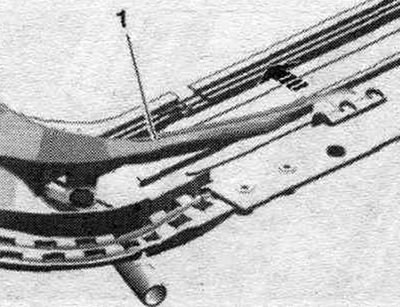
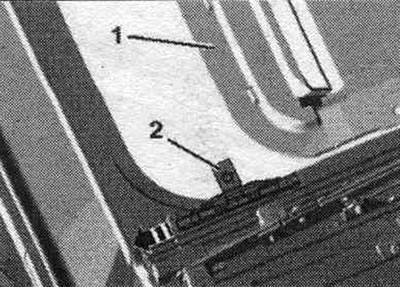
Checking and adjusting the zero position (rocker arm guide): The zero position can be checked with the hatch cover installed. The side seal has been removed. Move the hatch cover back and close it again. In a vehicle with a glass sunroof panel, push the sliding shade all the way back. Close the hatch. When the zero position is correctly set, the guide pin "1" should be aligned in the center with the "arrow" mark on the guide of the rocker arm "2".
Adjustment: The electric motor for the sliding and tilting sunroof has been removed. The sunroof cover has been removed. Move the slide guide manually from both sides, as shown in the figure, to the zero position. Adjust the engine to zero position and install.
Drainage hoses
1. Front water drain hose: drainage hoses, the front ones pass through the A-pillars and end between the door and the A-pillar, to remove it is necessary to remove the trim of the A-pillar at the top and the A-pillar at the bottom; remove the drainage hose from the sliding sunroof, disconnect the nozzle from the A-pillar and remove it downwards, cleaning is performed from the opening of the sliding sunroof; installation: Fully insert the drain hose from below onto the A-pillar with an upward movement, press the nozzle against the A-pillar and insert the drain hose near the sliding hatch, fix the drain hose in the brackets at the A-pillar; cleaning is carried out from the opening of the lift-and-slide hatch.
2. Lift-and-slide hatch.
3. Rear water drain hose: removal: the rear drain hoses pass through the C-pillars and end at the side under the fender liner, the C-pillar and D-pillar trim has been removed and the ceiling panel in the rear. area is lowered, removing the drainage hose from the rear. sliding sunroof, in the front area, detach the fender liner and push it to the side so that access to the drain hose nozzle is provided, detach the nozzle from the bottom of the fender liner and remove it with a downward movement; installation: installation in reverse order, they are cleaned from the lower end of the drain hose, for this you should disconnect the fender liner in this place or press it to the side; they are cleaned from the lower end of the drainage hose.
4. C-pillar attachment.
5. A-pillar bushing.
[The original version of the article is posted on the website: AudiManual.ru]