
Table of contents: Outside door handle and door lock ↓ Removal and installation the housing ↓ Removal and installation the… ↓ Lock bracket, door lock and door… ↓ Door lock ↓
Outside door handle and door lock
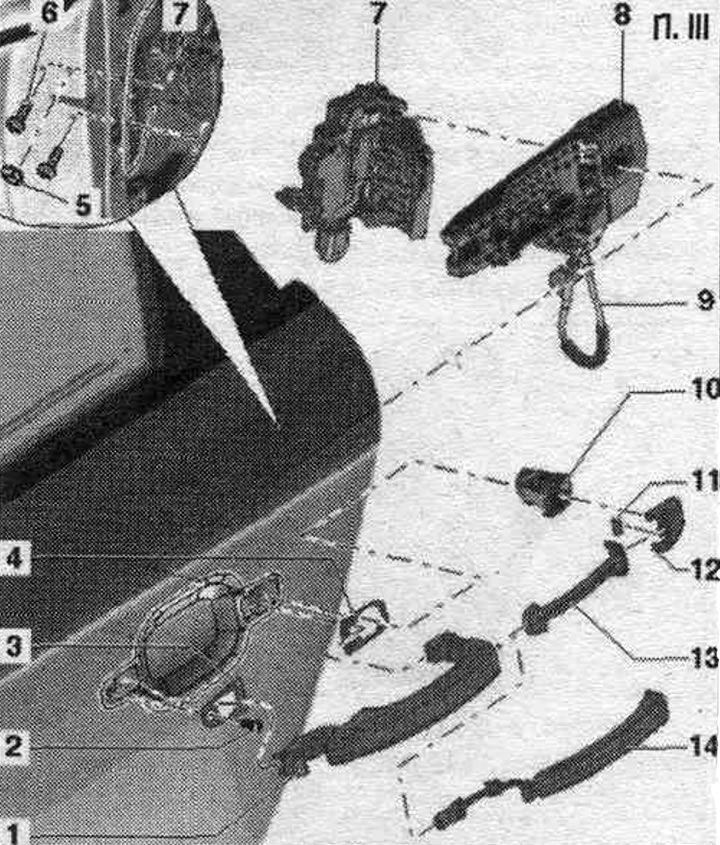
1. Outside door handle: Before installation, install spacers at the front and back of the outside door panel. On vehicles with keyless entry, the rear door handle touch sensors -G 417/418- are located in the outer door handles.
2. Bolt: 2.5 Nm.
3. Front lining.
4. Bottom lining.
5. Cover: Unlock before removing the door handle.
6. Bolt: 19 Nm.
7. Door lock.
8. Handle body: Insert the back lining "5" into the outer door panel; to install, attach the mount with the "10" screw slightly screwed in to the door, push it forward and tighten the screw to a torque of 2.5 Nm.
9. Control rod: hang in the door lock.
10. Body: Before installation, put on cap "7".
11. Magnet: Only for vehicles with keyless entry system.
12. Lid.
13. Outside door handle strip: for vehicles without system. access without a key.
14. Door handle touch sensor: for vehicles with keyless entry system.
Removal and installation the housing
1. Cover: remove from the body.
2. Magnet: only for vehicles with "Keyless entry system".
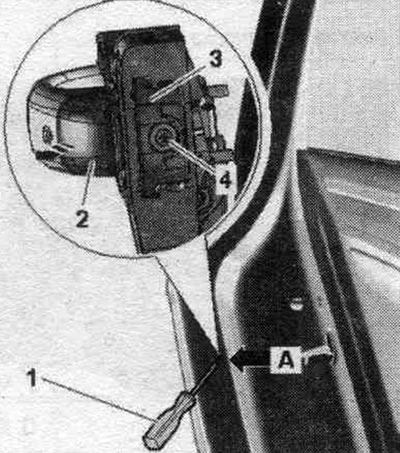
3. Housing: Use a screwdriver to completely unscrew the clamp bolt, press the mounting bracket with a screwdriver and remove the housing with the cap on the side.
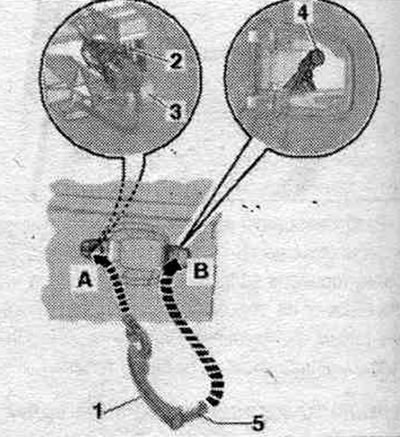
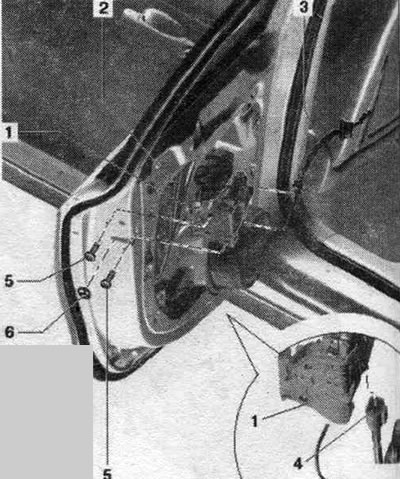
Move the door seal to the side and remove the protective film over the hole marked "arrow A." Fully unscrew the clamp bolt "4" using screwdriver "1." Press the housing mounting bracket "3" inward. Remove housing "2" from the support bracket "arrow B".
Installation in reverse order.
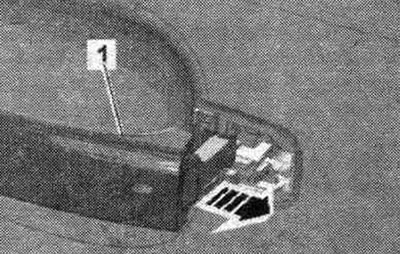
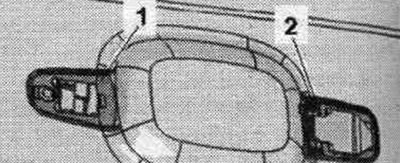
Removal the housing cap
Removing the housing. Loosen the fastening clamps "arrows" and remove cap "1" from body "2", use an awl if necessary.
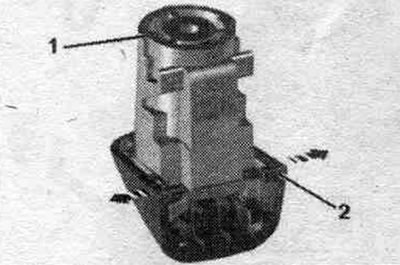
Installation in reverse order. Place the housing cap on until it clicks into place.
Removal and installation the exterior door handle
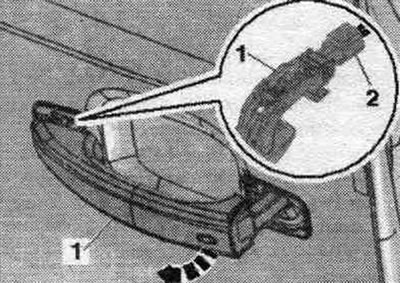
Move the door seal aside and remove the protective film over the opening marked "arrow A." Fully unscrew the clamping bolt "4" using screwdriver "1." Pull the outer door handle and hold it in the "Open" position. Press the housing mounting brackets "3" inward; the outer door handle will lock in the "Open" position. Remove the housing "2" from the support bracket marked "arrow B." Pull the outer door handle "1" in the direction of the arrow; this will remove the outer door handle from the drive lever in the support bracket.
Tilt the outer door handle "1" outward "arrow" and remove it from the mount on the support bracket. On vehicles with "Keyless Entry System", disconnect plug "2" from the outside door handle.
Installation
Installation in reverse order. Replace damaged or brittle outer door handle washers "1" and "2".
Insert the outer door handle "1" "arrow A" so that the outer door handle enters the fastening "2" on the support bracket "3". Tilt the outer door handle "1" "in the direction of arrow B" and insert the "leash" "5" in front of the drive lever "4" in the support bracket. Press the housing mounting bracket against the outer door handle. Installing the case.
Lock bracket, door lock and door release handle drive cable
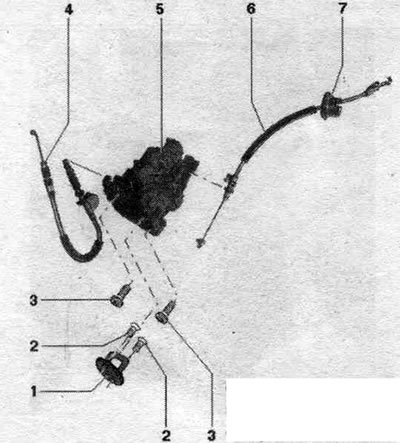
1. A bracket with a finger under the latch of the lock.
2. Bolt: 25 Nm.
3. Bolt: 19 Nm.
4. Door lock drive cable. To prevent the drive cable from bending or breaking too much during removal and installation, the door lock must be removed and installed together with the support clamp. The drive cable outside the door must be removed and installed on the control lever on the door lock.
5. Door lock.
6. Door handle drive cable.
7. Nozzle: cannot be replaced separately.
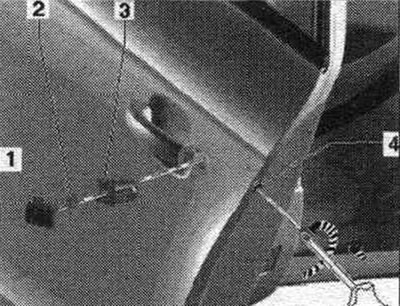
Door lock
1. Door lock.
2. Door.
3. Door handle drive cable.
4. Electrical connector.
5. Bolt.
6. Lid.