

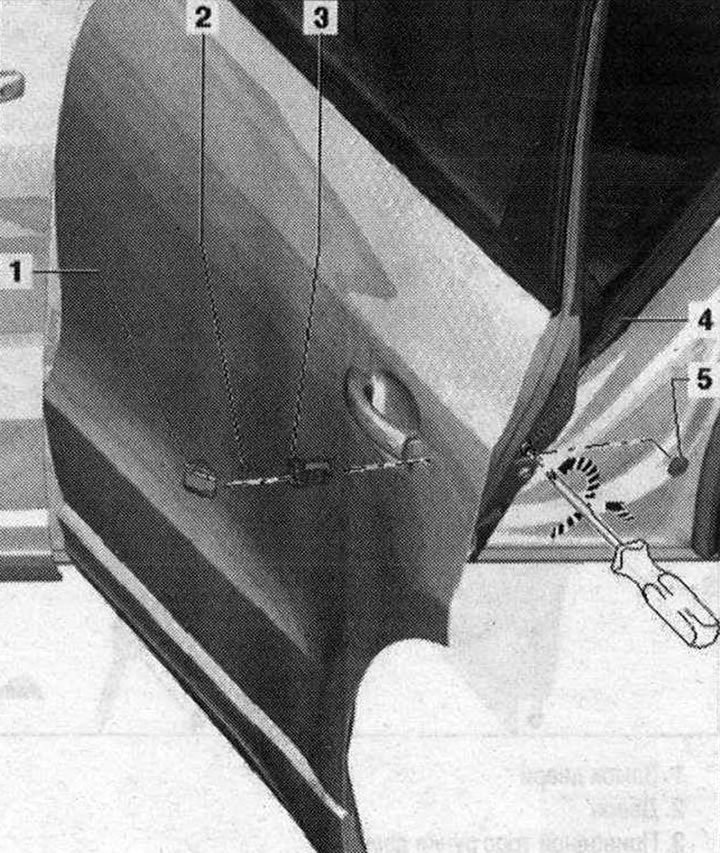
Installation diagram of the external handle and door lock 1. External door handle. Before installation, install pads on the front and back of the outer door panel; 2. Bolt. 2.5 Nm; 3. Front lining; 4. Bottom lining; 5. Cover. Disconnect from the outside door handle; 6. Bolt. 19 Nm; 7. Door lock; 8. Pen body. Insert the rear support -5- into the outer door panel. To install, connect the fastener with a slightly screwed screw -10- to the door, push it forward and tighten the screw to a torque of 2.5 N'M; 9. Control rod. Hang in the door lock; 10. Before installing the body, install the cap -7-; 11. Cover; 12. Magnet (only for vehicles with "keyless entry system"); 13. External door handle strip (for vehicles without "keyless entry systems"); 14. Removing the rear door outside handle sensor -G417-/-G418- for vehicles with "keyless entry system"
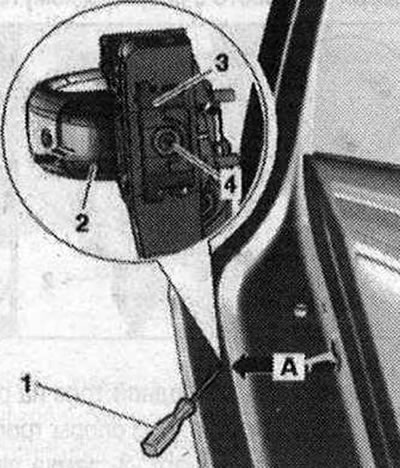
Removing the housing 1. Cover. Remove from the body; 2. Magnet (only for vehicles with "keyless entry system"); 3. Body. Using a screwdriver, completely unscrew the clamp bolt. Press the mounting bracket with a screwdriver and remove the housing with the cap on the side; 4. Mounting bracket. Spare parts are not included in the scope of supply of the bearing race; 5. Overlay
Move the door seal to one side and remove the protective film over the opening -arrow A-. Unscrew the clamping bolt -4- completely using a screwdriver -1-. Press the mounting bracket -3- of the housing inwards. Remove housing -2- from support bracket -arrow B-.
Install in reverse order.
Removing the body cap
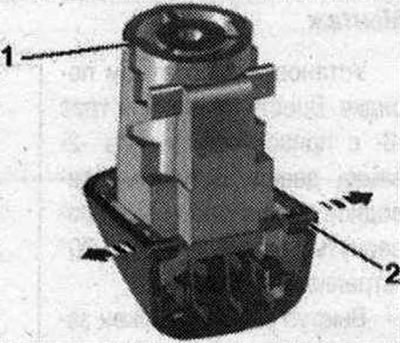
Removing the housing. Release the fastening brackets -arrows- and remove the cap -1- from the housing -2-, using an awl if necessary.
Installation
Press the housing cap until it clicks.
Visitor comments