
Table of contents: Removal the door lock ↓ Installation ↓ Removal the support bracket ↓ Installation ↓ Removal the door lock drive cable ↓ Installation ↓ Removal the inner door handle drive… ↓ Installation ↓
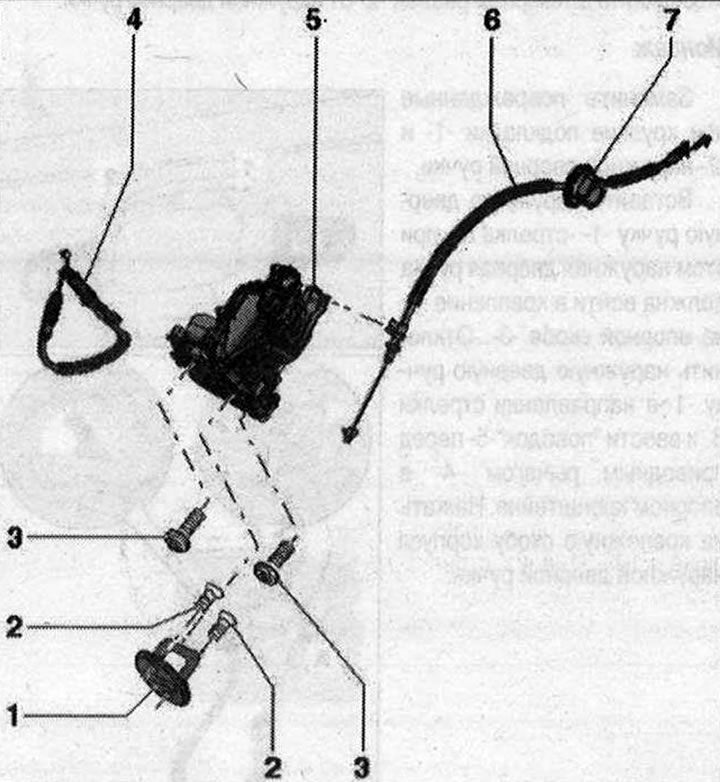
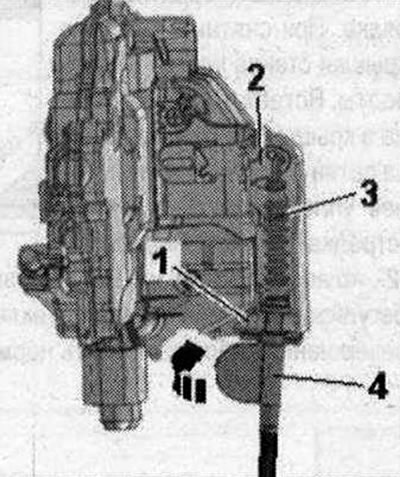
Door lock and lock bracket 1. A bracket with a finger under the latch of the lock; 2. Bolt 25 Nm; 3. Bolt 19 Nm; 4. Door lock drive cable; 5. Door lock. Risk of functional damage. To prevent the drive cable from bending or breaking excessively during removal and installation, the door lock must be removed and installed together with the support clamp. The drive cable outside the door must be removed and installed on the control lever on the door lock; 6. Inner door handle drive cable; 7. Nozzle. Cannot be replaced separately
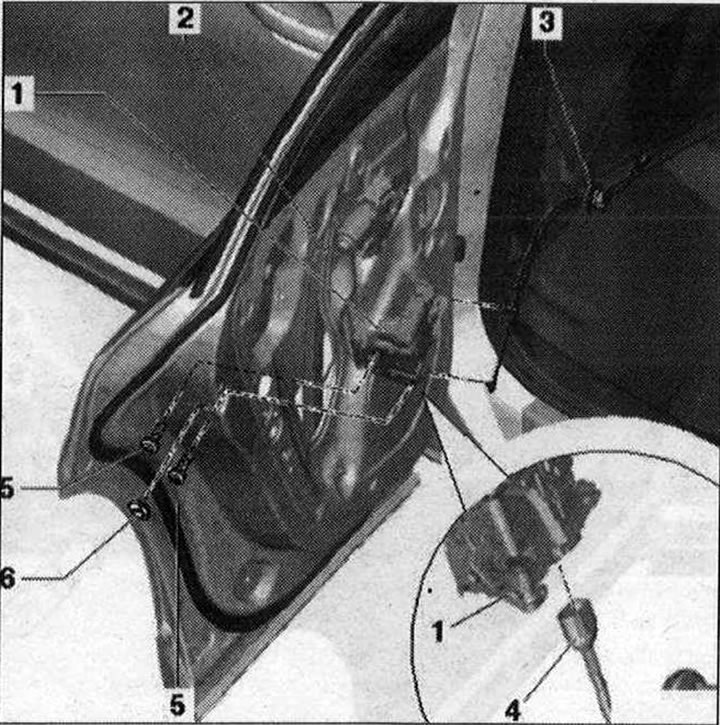
Door lock installation diagram 1. Door lock; 2. Door; 3. Door handle drive cable; 4. Electrical connector; 5. Bolt; 6. Lid
Removal the door lock
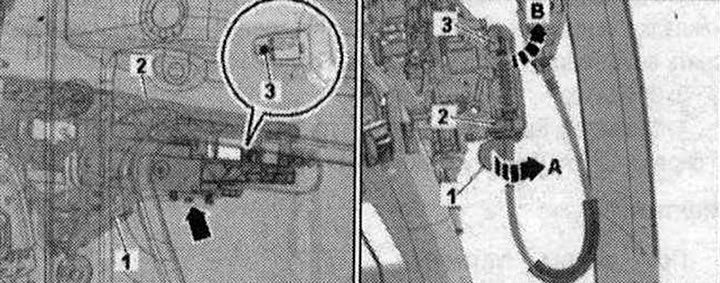
Removing the housing. Remove the door trim. Remove the inner door panel trim. Unscrew the "arrow" bolts on the door lock. Remove the fastener. Disconnect the electrical connection "2" and remove the door lock "1" together with the support clamp.
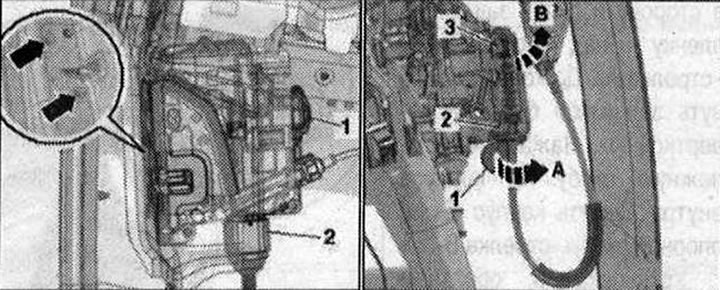
Turn the drive cable on the lever "1" by 90° in the direction of arrow A- and remove it from the cable support "2". Turn the drive cable on the drive lever "3" of the door lock "in the direction of arrow B". The drive cable must be in line with the hole in the drive lever. Remove the drive cable from the drive lever.
Installation
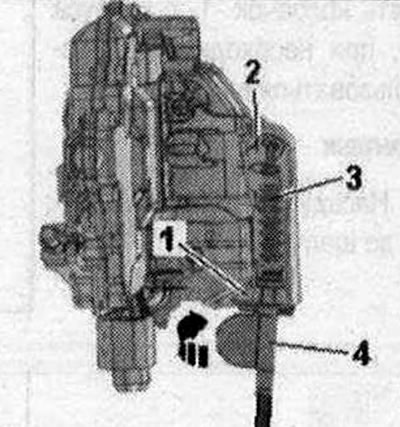
Installation in reverse order. Insert the drive cable "3" from the drive lever "2" of the door lock. Insert the drive cable into the support "1" and turn the lever "4" 90° "arrow".
The lever protrusion should snap into the cable support.
Removal the support bracket
Remove the door trim. Remove the inner door panel trim. Remove the outer door handle. Disconnect (if available) electric wire from the support bracket "arrow".
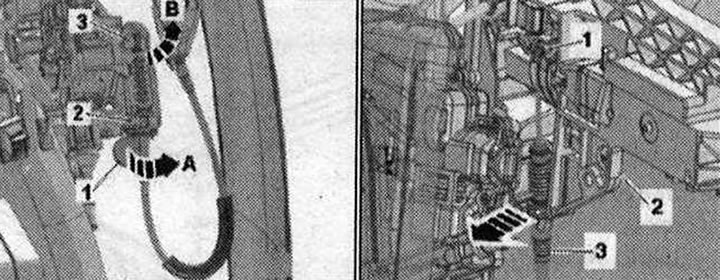
Release the cable tie "1" using the lever "80-200". Use a soap solution to facilitate removal. Unscrew the bolt "3" and remove the support clamp "2" together with the door lock from the door. Turn the drive cable on the lever "1" by 90° in the direction of arrow A- and remove it from the cable support "2". Turn the drive cable on the drive lever "3" of the door lock "in the direction of arrow B".
The drive cable should be in line with the hole on the drive lever. Remove the drive cable from the drive lever.
Installation
Insert the drive cable "3" from the drive lever "2" of the door lock. Insert the drive cable into the support "1" and turn the lever "4" 90° "arrow". The lever projection should click into the cable support.
Removal the door lock drive cable
Remove the door trim. Remove the inner door panel trim. The support clamp and door lock have been removed. Turn the drive cable on the lever "1" by 90° in the -direction of arrow A- and remove it from the cable support "2". Turn the drive cable on the drive lever "3" of the door lock "in the direction of arrow B". The drive cable must be in line with the hole in the drive lever.
Remove the drive cable "1" from the drive lever, to do this, press the support "3" out of the mount on the support bracket -2 "arrow". Remove the drive shaft.
Installation
Installation in reverse order. Insert the drive cable "3" from the drive lever "2" of the door lock. Insert the drive cable into the support "1" and turn the lever "4" 90° "arrow".
The lever protrusion should snap into the cable support.
Removal the inner door handle drive cable
Removing the housing. Remove the door trim. Remove the inner door panel trim. Unscrew the "arrow" bolts. Press the door lock "1" to the side and, if necessary, disconnect the plug connector "2".
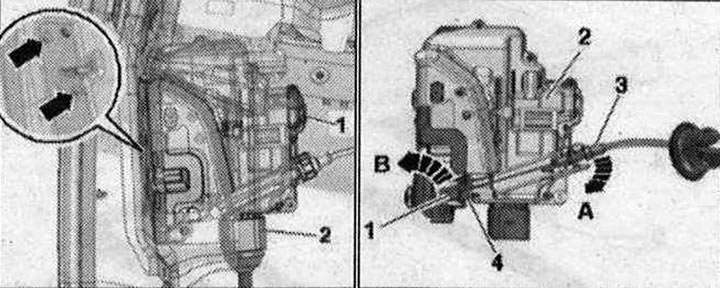
Disconnect the drive cable "3" on the door lock cable support -2 "arrow A". Turn the nipple "1" by 90° "in the direction of arrow B" and remove it from the door handle release lever "4".
Installation

Insert nipple "2" into the release lever "3" of the door handle "lower arrow". Turn the nipple 90° -upper arrow- and press the drive cable into the door lock cable support "1" until it locks audibly.